

Edit your photos online with Koofr's image editor
Koofr's built-in image editor lets you make simple edits to images hosted in your cloud storage account. Find out how you can resize, crop, or apply effects using just your browser.
Sometimes, you need a quick and easy way to edit your photos online. You might want to resize them to a smaller size or crop them to a certain aspect ratio. Maybe you just want to give your photo album a uniform feel by applying the same visual effect to all your photos.
Well, Koofr's got you covered!
Koofr's image editor is a premium feature included in our web application, which means you don't need to install any extra software to use it! All you need is a Koofr account on an active paid plan and an internet connection.
Read on to find out how to get started with Koofr's image editor.
Accessing the image editor in Koofr
Note: The image editor is only available for Koofr users on a paid plan.
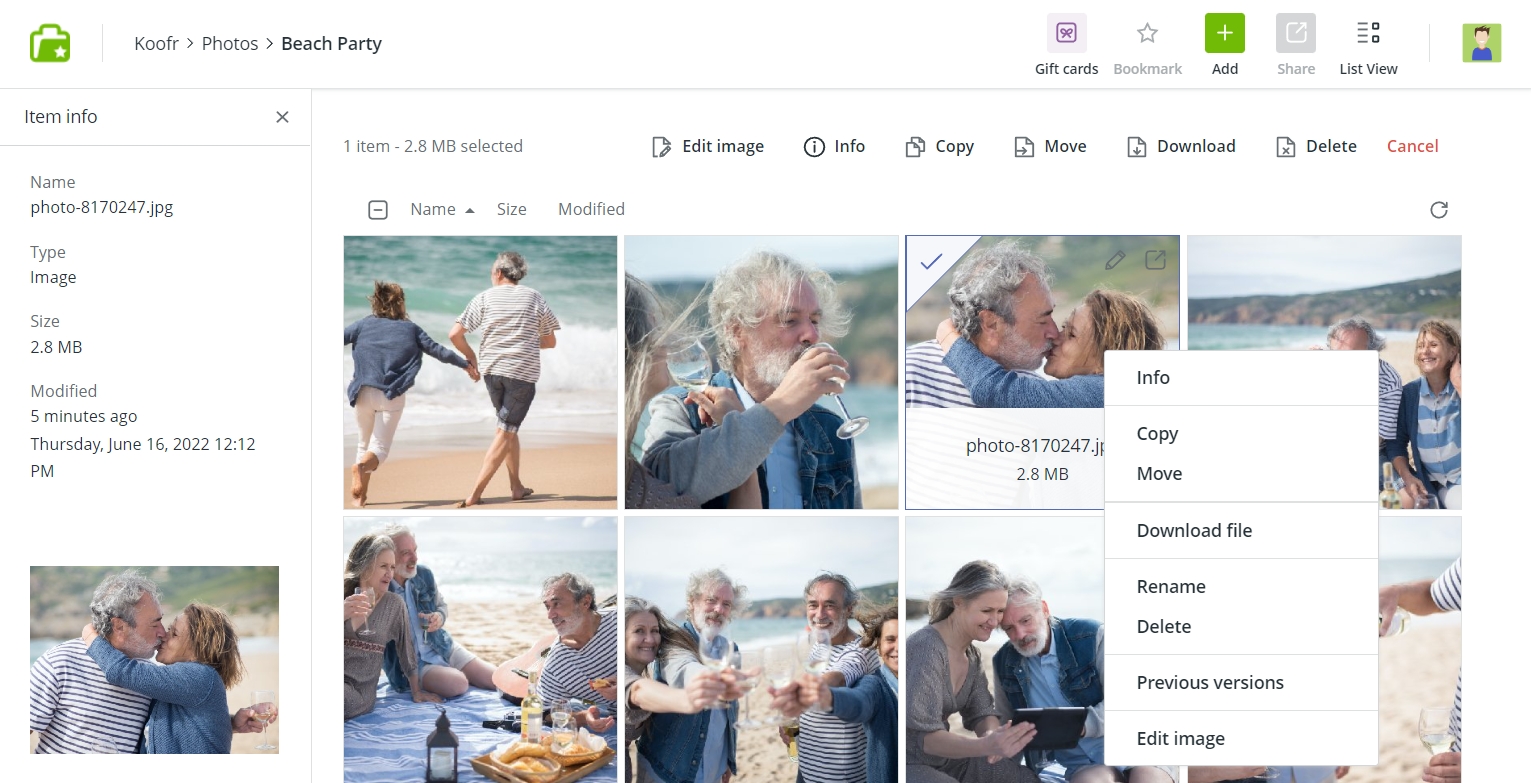
There are two ways of accessing the Koofr image editor. Start by opening the folder which contains the images you'd like to edit.
- Select the image you want to edit to display the options menu. Click on Edit image to open the image editor.
OR
- Right-click on the image you want to edit and click on Edit image in the right-click context menu.
Interface overview
Before we dive deep into how to edit images in Koofr's image editor, let's take a look at the interface.
In the top bar, you can see the filename of the image you're currently editing and its save status, or when it was last saved. The green indicator will turn orange when there are unsaved changes. You can use the X button in the right-hand corner to exit the editor without saving.
In the right-hand side panel, there is a tools menu with expandable sections: Properties, Crop, Effects, and Save options. This is where you'll find all the editing tools and settings.
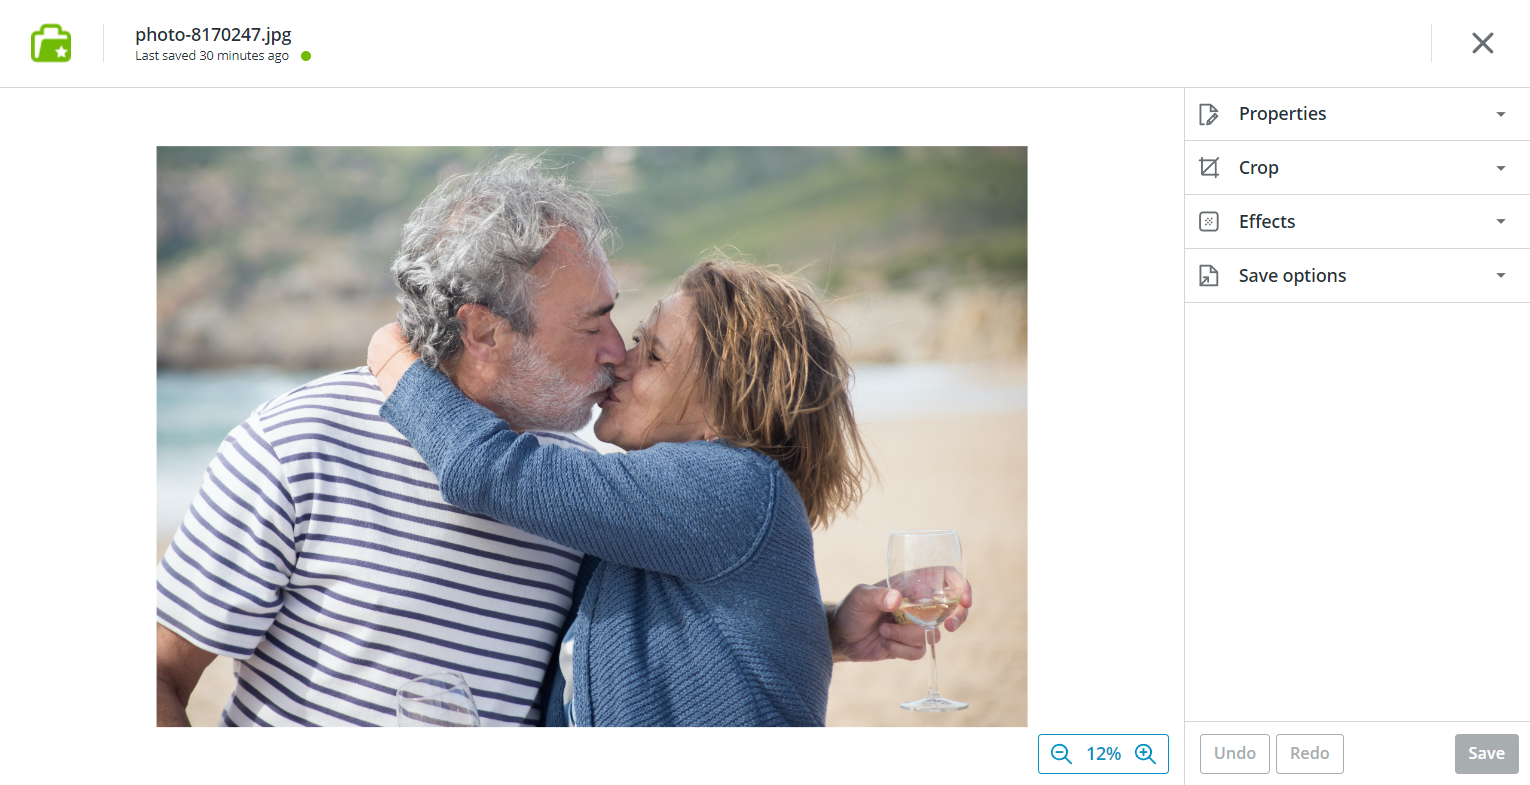
In the center-left panel, there is the main viewport where you can see and preview the changes you're making to your image in real-time. Large images will be zoomed out to fit the window by default, so you can see the whole image in the viewport. You can zoom in or out of the image by using the + and - buttons in the bottom right corner of the viewport.
Finally, in the bottom-right corner, you can find the Undo and Redo buttons, useful for reverting unsaved changes.
Now that we've familiarized ourselves with the editor, let's get started!
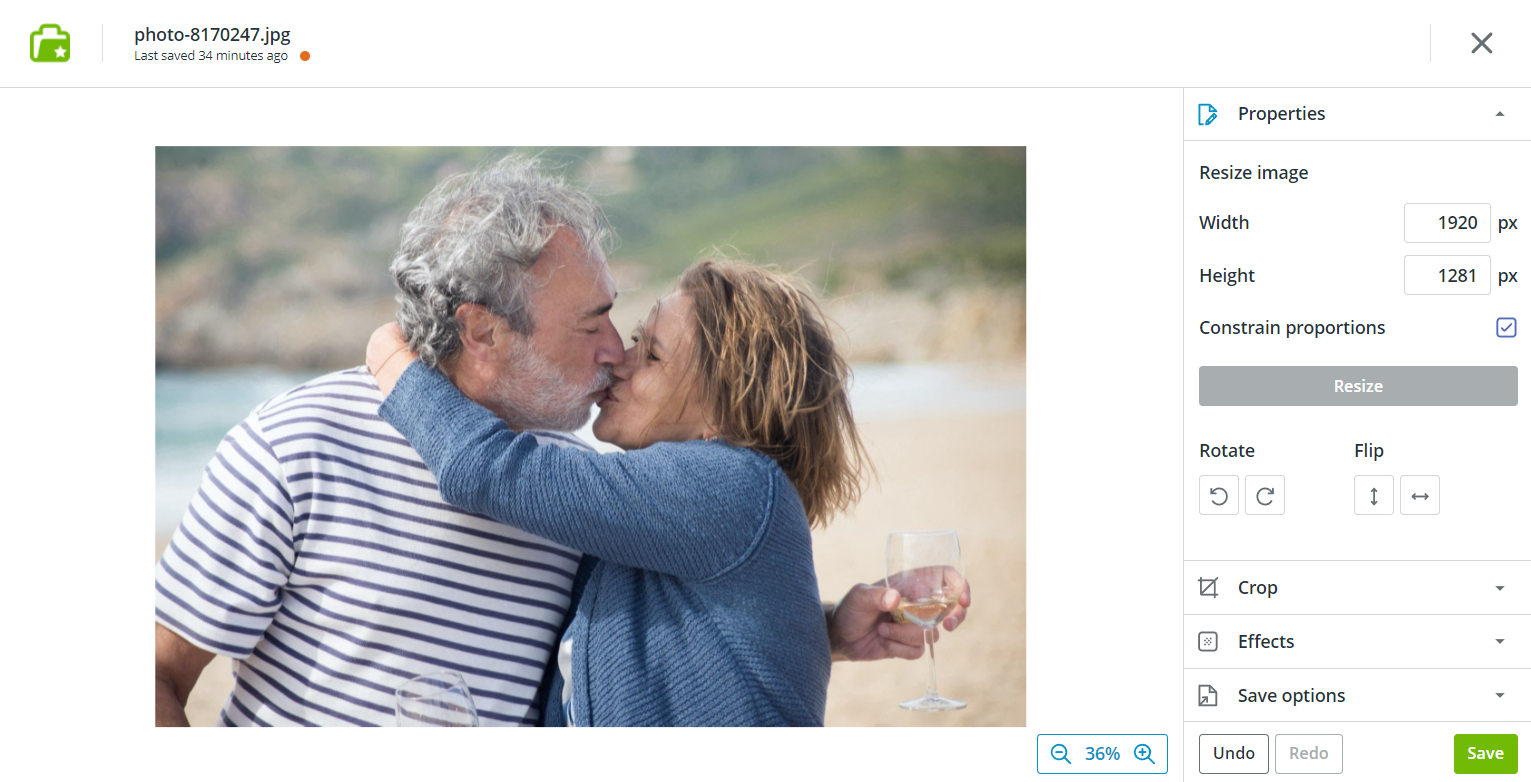
Resizing an image
To resize an image, expand the Properties menu in the right-hand tool panel.
You can set a custom image width and height by typing in the size for each dimension in pixels. Click Resize to confirm the change.
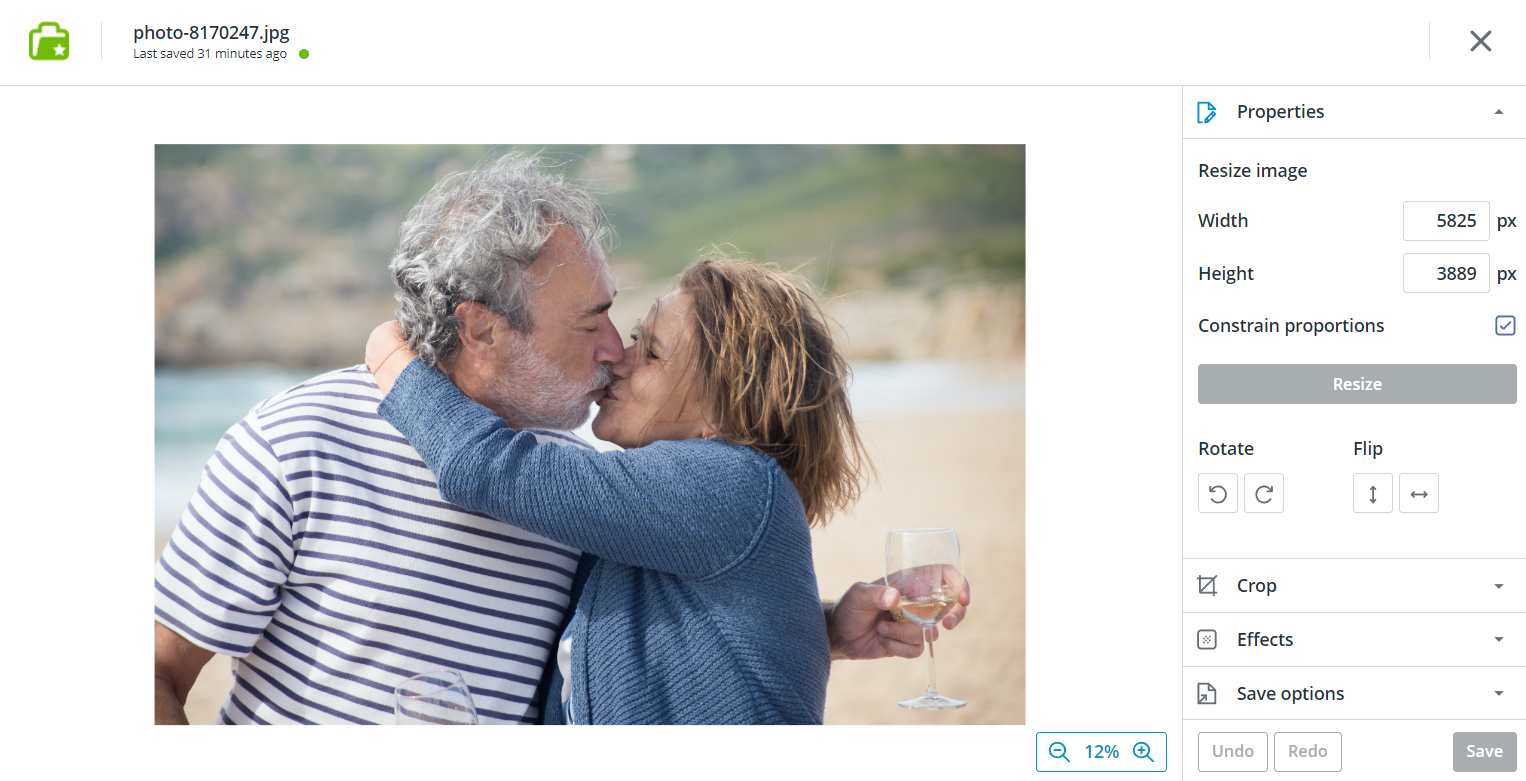
To avoid the image becoming squished or stretched, use the Constrain proportions option. By checking off this box, the image editor will automatically calculate the size of the opposite dimension: if you set a custom width, then the editor will set a corresponding height.
You can also use the Rotate buttons to rotate the image clockwise or counter-clockwise in 90° steps. The Flip buttons allow you to flip the image horizontally or vertically.
Cropping an image
If you want to crop an image to a different size or just to place more focus on the subject, you can use the Crop tool found in the right-hand panel.
Click on Crop to open the tool settings.
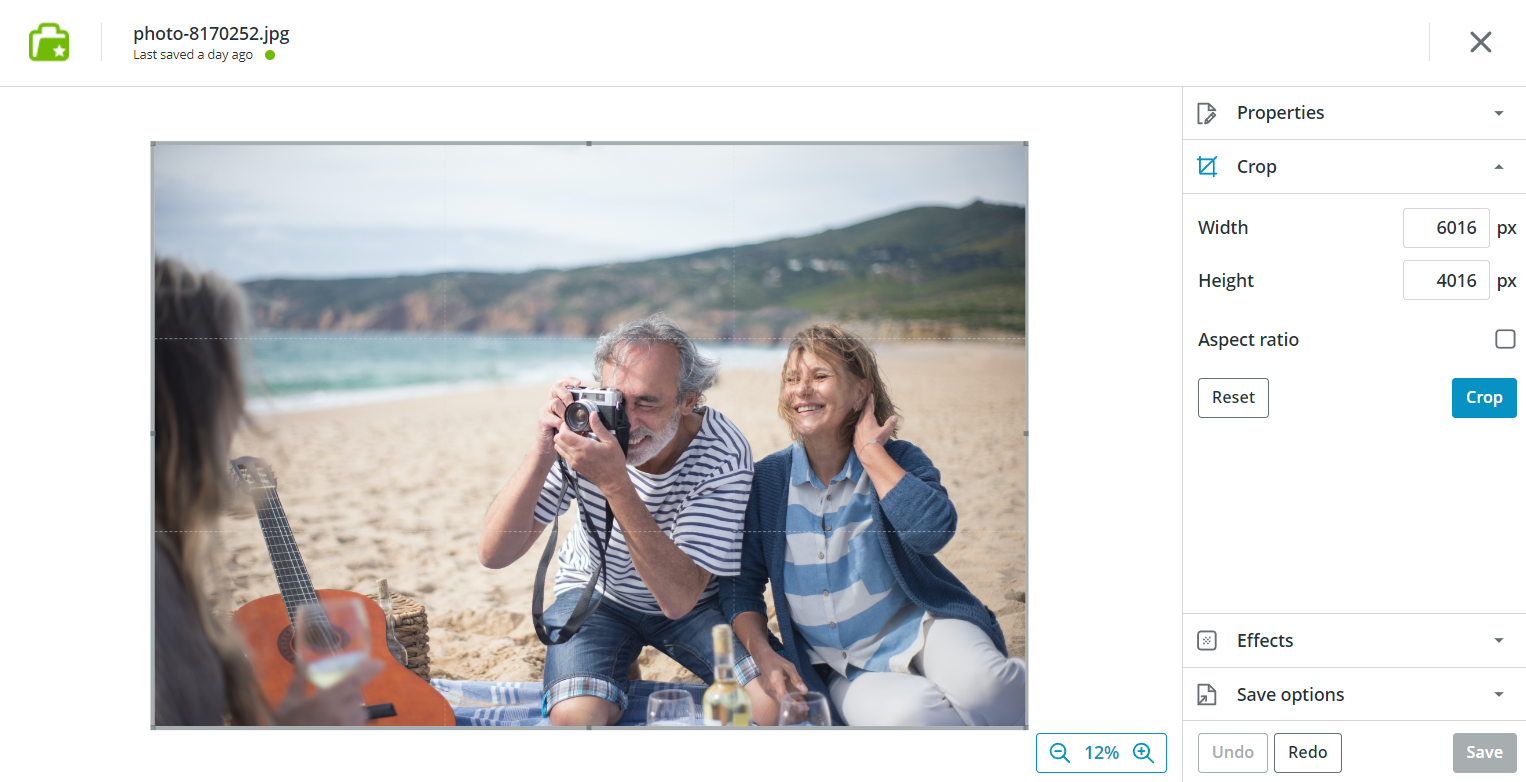
Like with Properties, you can set your crop size by typing in custom size in pixels.
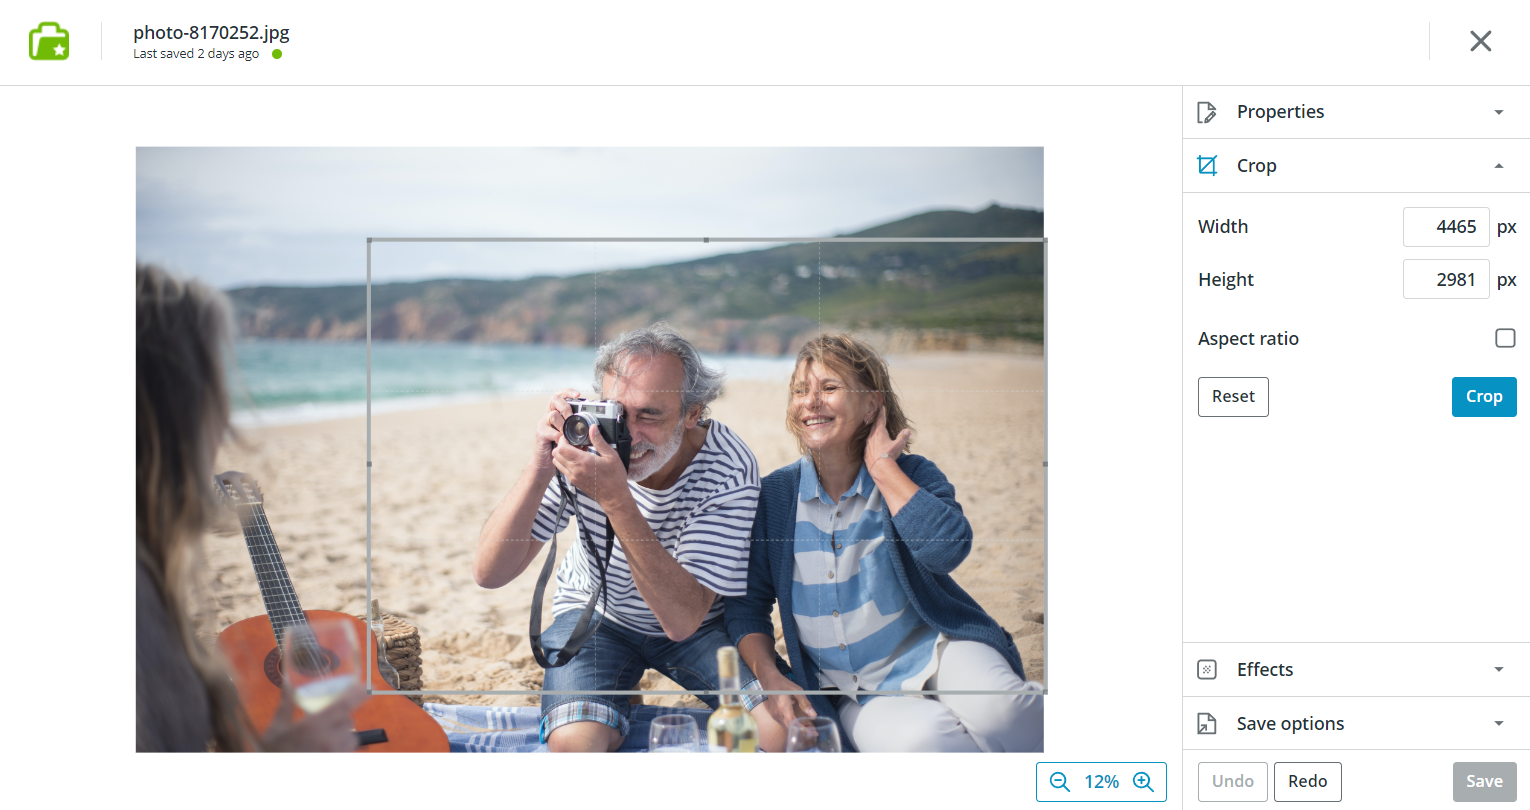
Alternatively, you can use your mouse to move the crop frame in the image viewport: Click on a corner to resize diagonally or click on one of the sides to move just one of them at a time. You can also drag the frame with the mouse to adjust its position.
Tip: Press Shift to constrain the proportions of the crop frame when resizing.
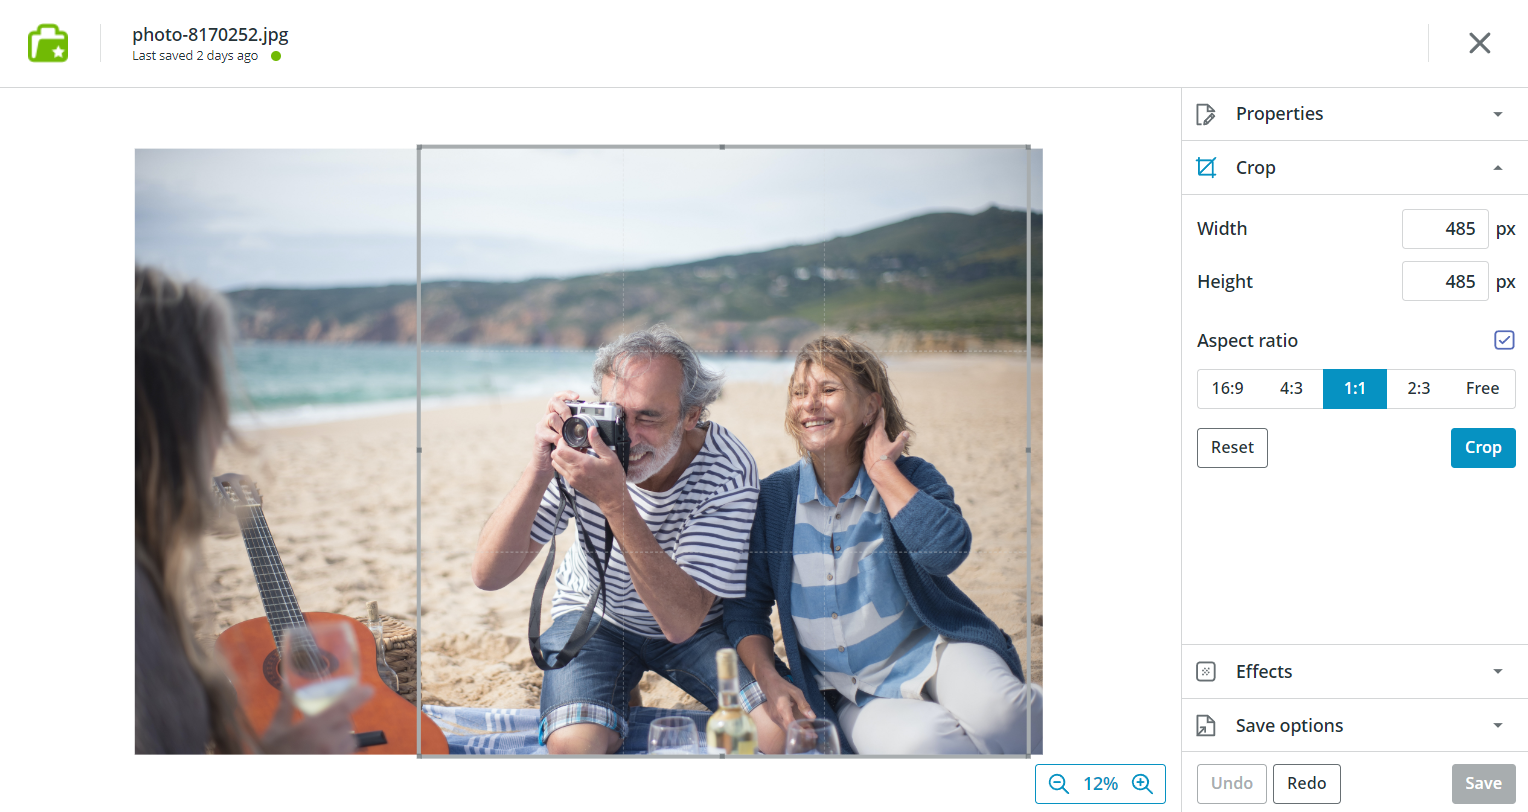
If you want to crop your image to a specific aspect ratio, you can do that, too! Tick the Aspect ratio check box to display the available options: 16:9, 4:3, 1:1, or 2:3. Once you've selected the aspect ratio, resize the crop frame manually until you're happy with it. The frame will be constrained to the chosen aspect ratio.
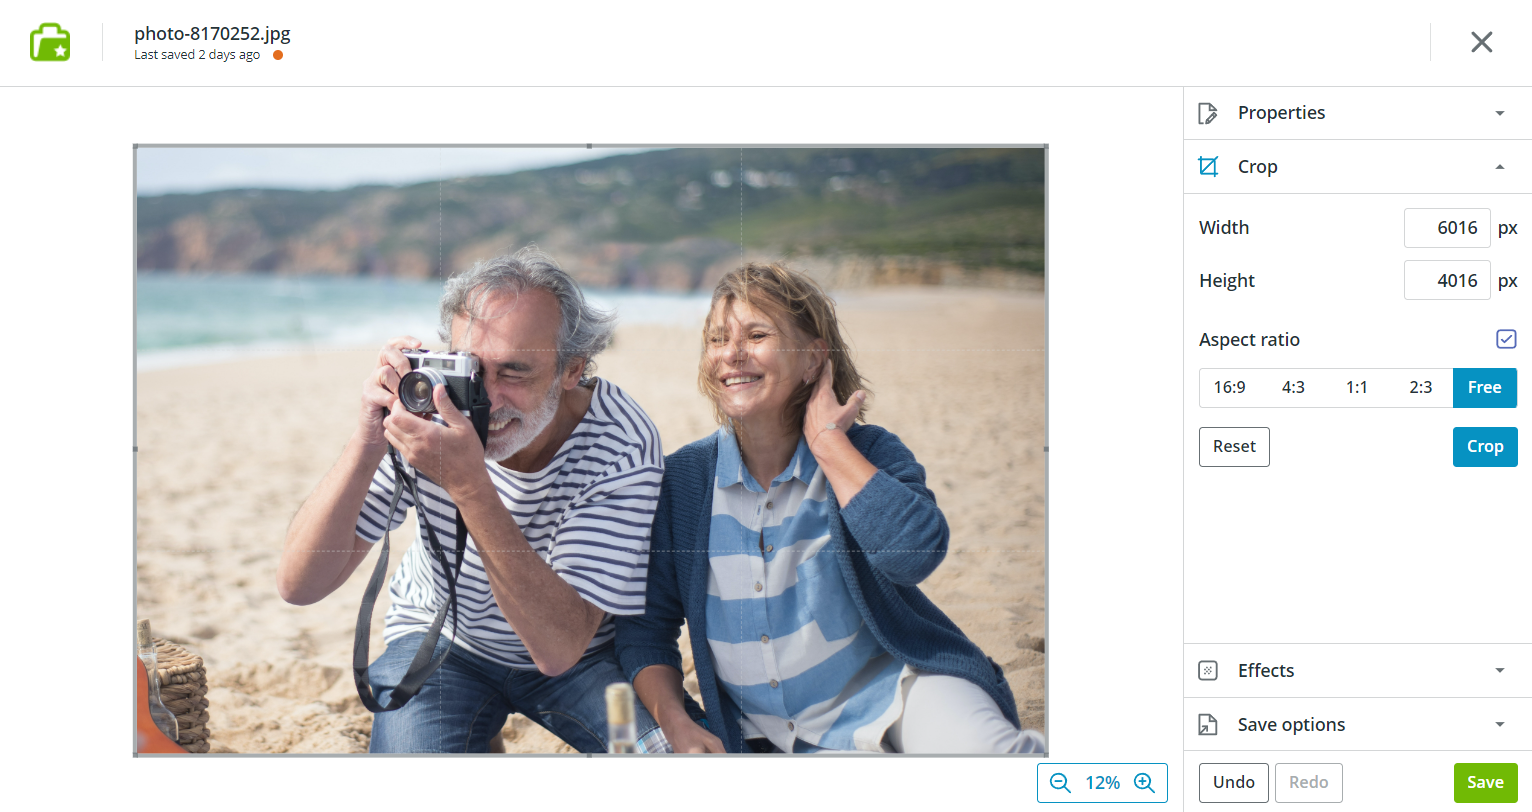
When you're happy with the crop frame position, click on the Crop button to perform the crop.
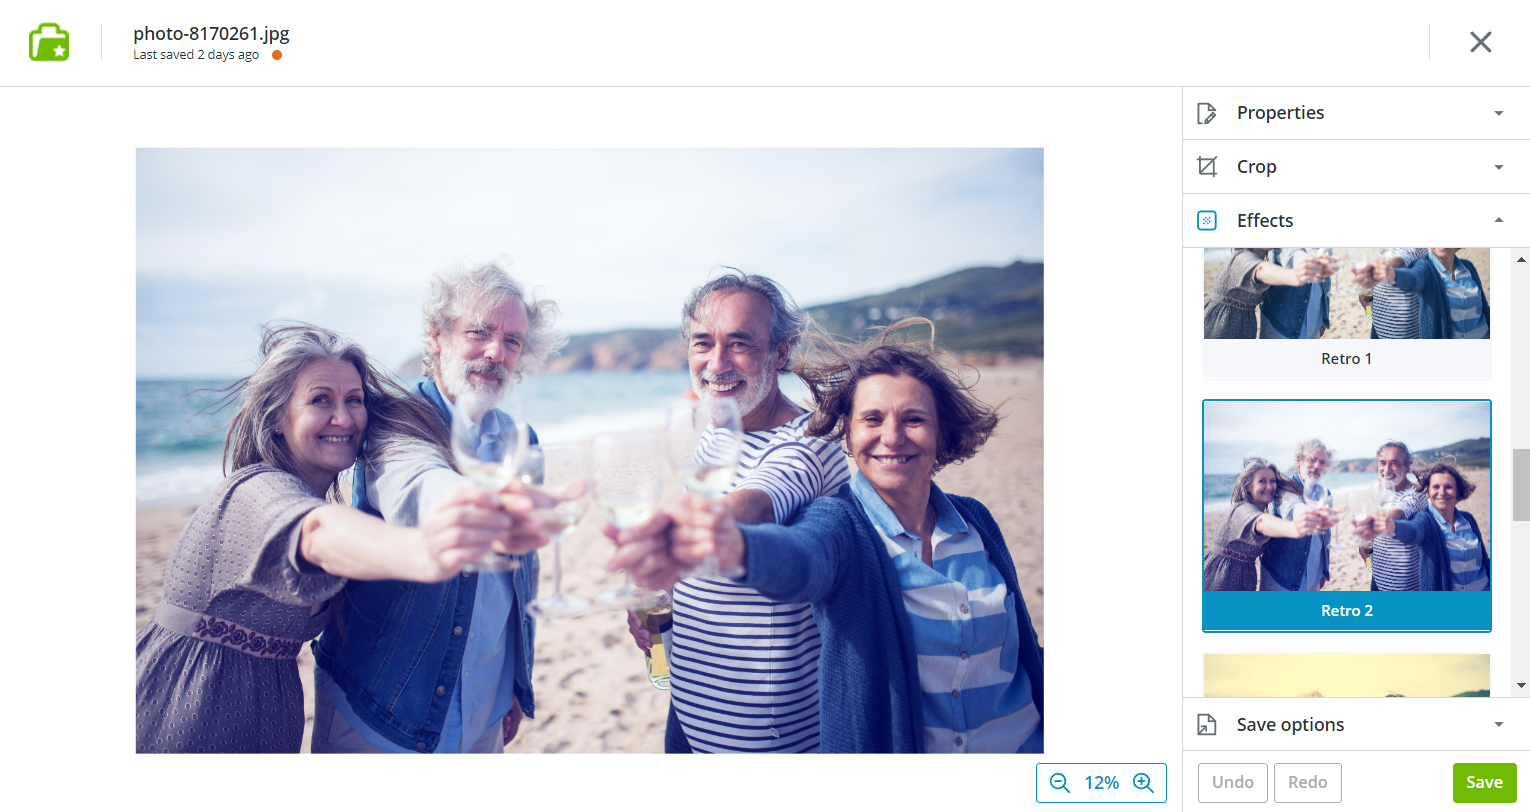
Adding effects
You can use Koofr's online image editor to give your images some simple visual effects. These work as filters on top of your existing image. As of writing this post, the currently available effects are:
- Sepia
- Grayscale
- Vignette
- Retro 1, 2, and 3
- Greenish
- Reddish
- Vintage
To apply an effect, click on Effects in the right-hand panel to display the effects. Scroll down to see all the available effects. Click on an effect to apply it to your image.
Saving changes
Finally, you'll need to save any changes you made while editing. Don't worry about accidentally closing the editor and forgetting to save - you'll be prompted to save your work if you click on the close button without saving.
You can choose to save your image as a JPEG or a PNG. Select your preferred image format in the Save options menu in the right-hand panel. The format of the original image is selected by default.
Tip: You can use the image editor as a format conversion tool! Read more on how to do this in our previous blog post.
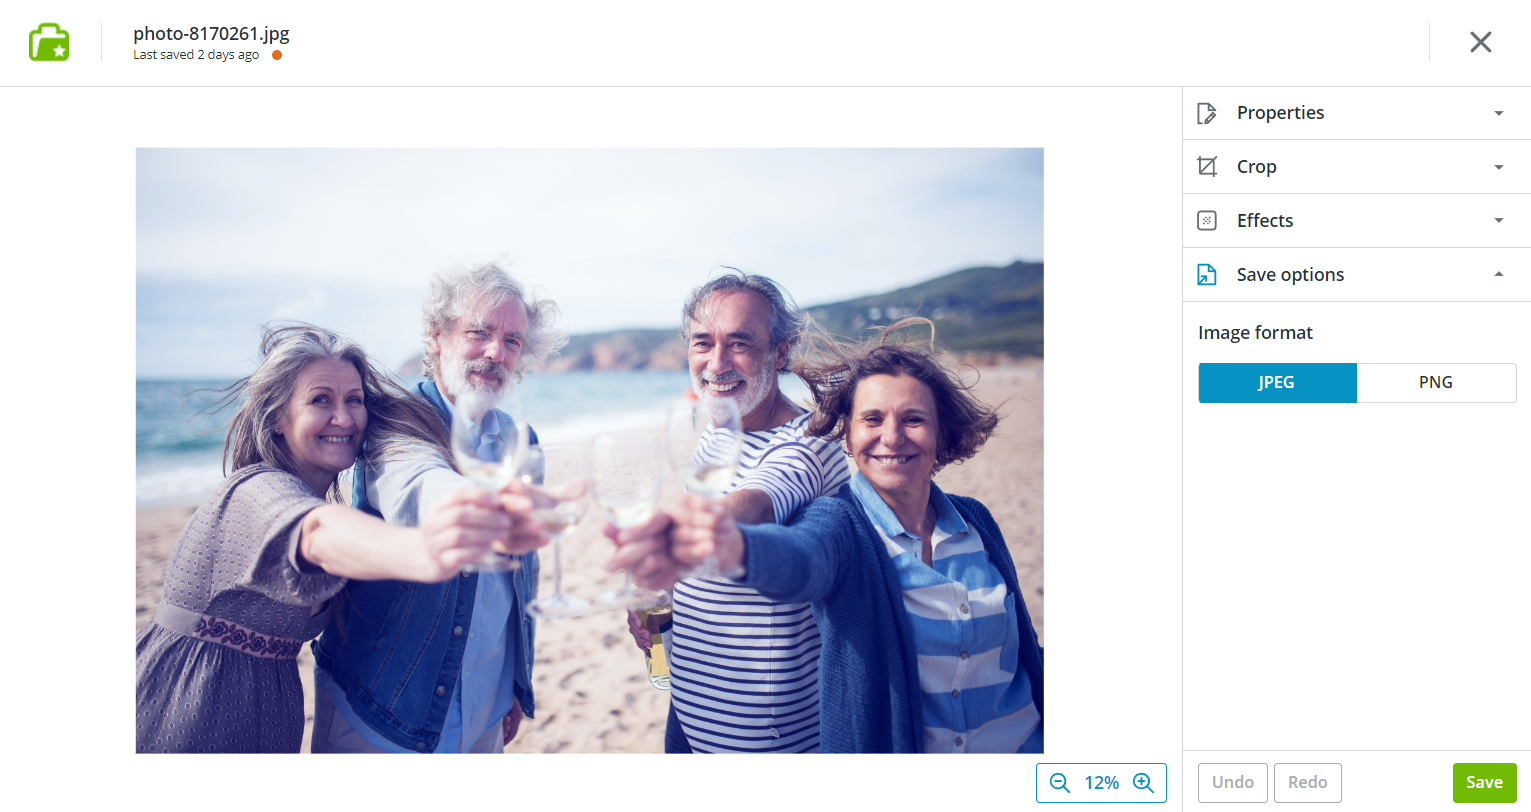
When you're happy with your edits and format settings, click on the Save button in the bottom-right corner of the screen.
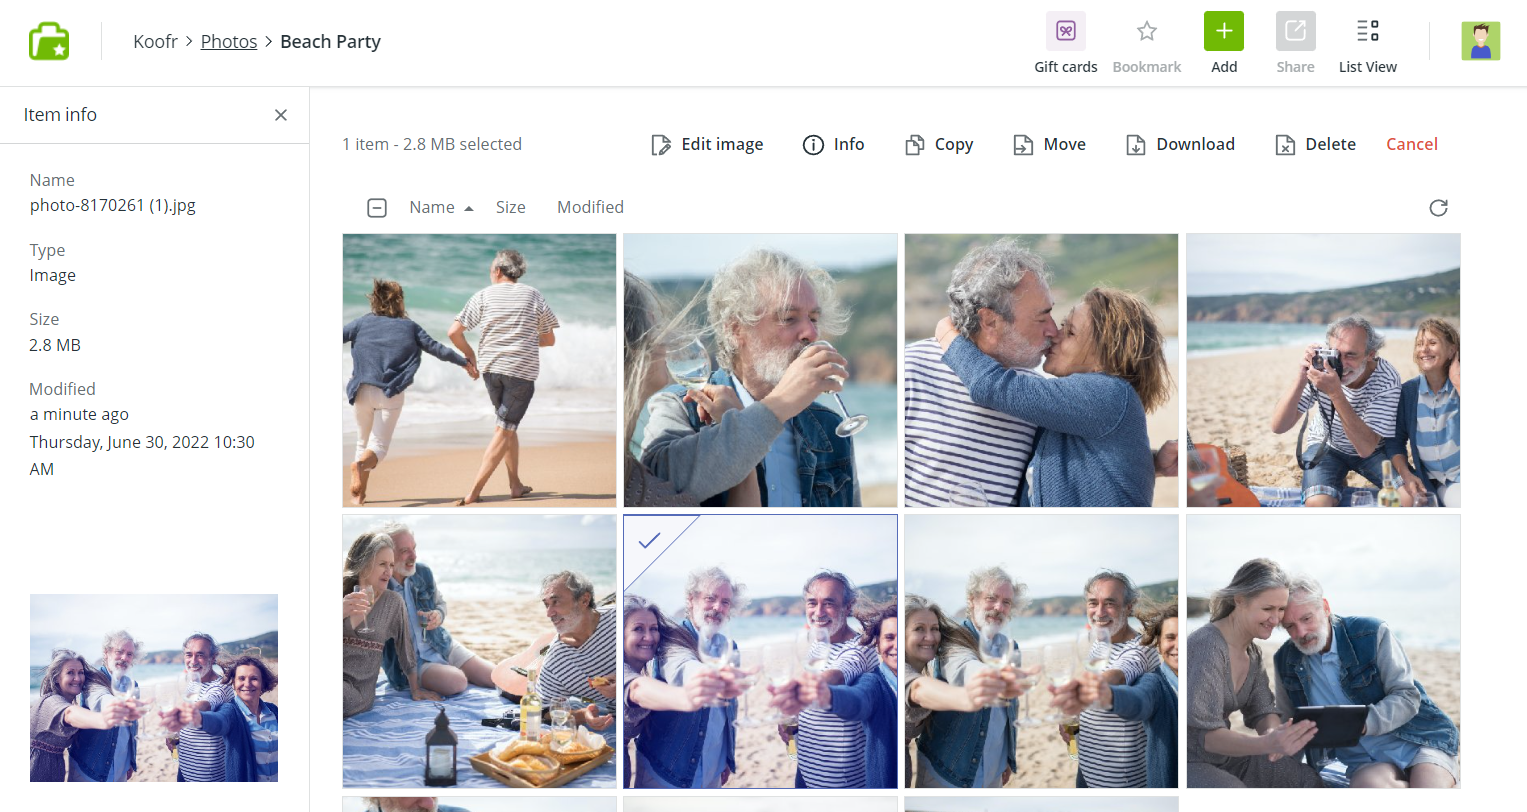
Your image will be saved as a copy rather than overwriting the original file. The new image will have a (1) appended to its filename, as seen in the screenshot below:
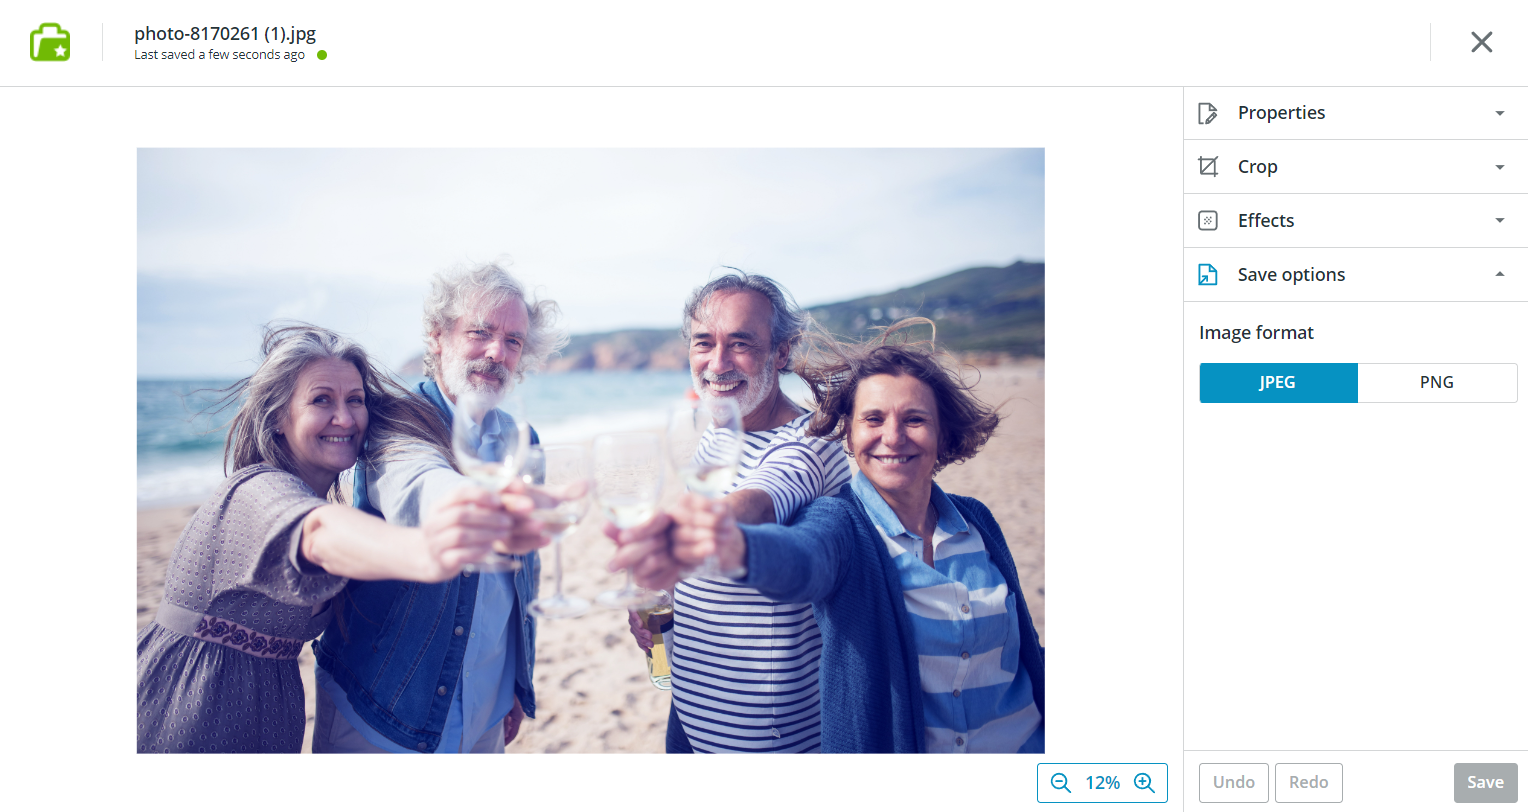
You can find your edited image in the same folder as the original image.
Want to talk to us about Koofr or the built-in image editor? Join our growing Reddit community!