

#degoogle: How to Switch from Google Photos to Koofr for Automatic Photo Backup
Quickly and easily make the switch from Google Photos and start backing up your photos to Koofr cloud storage. Learn how to transfer your photos and set up automatic media backup on your Android smartphone.
Written by human for humans
If you're an Android user, chances are that you've automatically been backing up your photo albums to Google Photos. You might have never even given it a second thought - it's just a photo backup service, right?
For a company that thrives on monetizing user data, Google sure loves to stress that they don't "sell" your personal data to third parties. While that might be true in a very literal sense, Google does use your personal data to sell its own products to advertisers, with more data facilitating more and more targeted advertising.
To be sure, Google Photos is a minor fragment in the Google mosaic. As far as the public can tell, they don't use your personal photos for advertising or anything like that. They may, however, use your photos to help train their object recognition algorithms with training data provided by the users themselves, for example. Not to mention that uploading your photos also means you send all of your pictures' metadata, like device, timestamp, location, etc., to Google as well.
If you've tried to disentangle your online presence from Google, then you know that this Big Tech titan is basically everywhere. To effectively degoogle and remove yourself from the system, you'll need to find an alternative for every Google tool or service you might have been using until now. For photos (and other file storage purposes), Koofr is a great choice. So let's take a look at how you can make the switch: start backing up your Android photos to Koofr, and haul your backlog from the past years over from Google Photos while you're at it, too.
Enable automatic media backup in the Koofr app
To start backing up your media to Koofr, you'll first need to download the Koofr mobile app from the Google Play Store. If you need help getting started with the app, we recommend going through our beginner's guide to make things a bit easier.
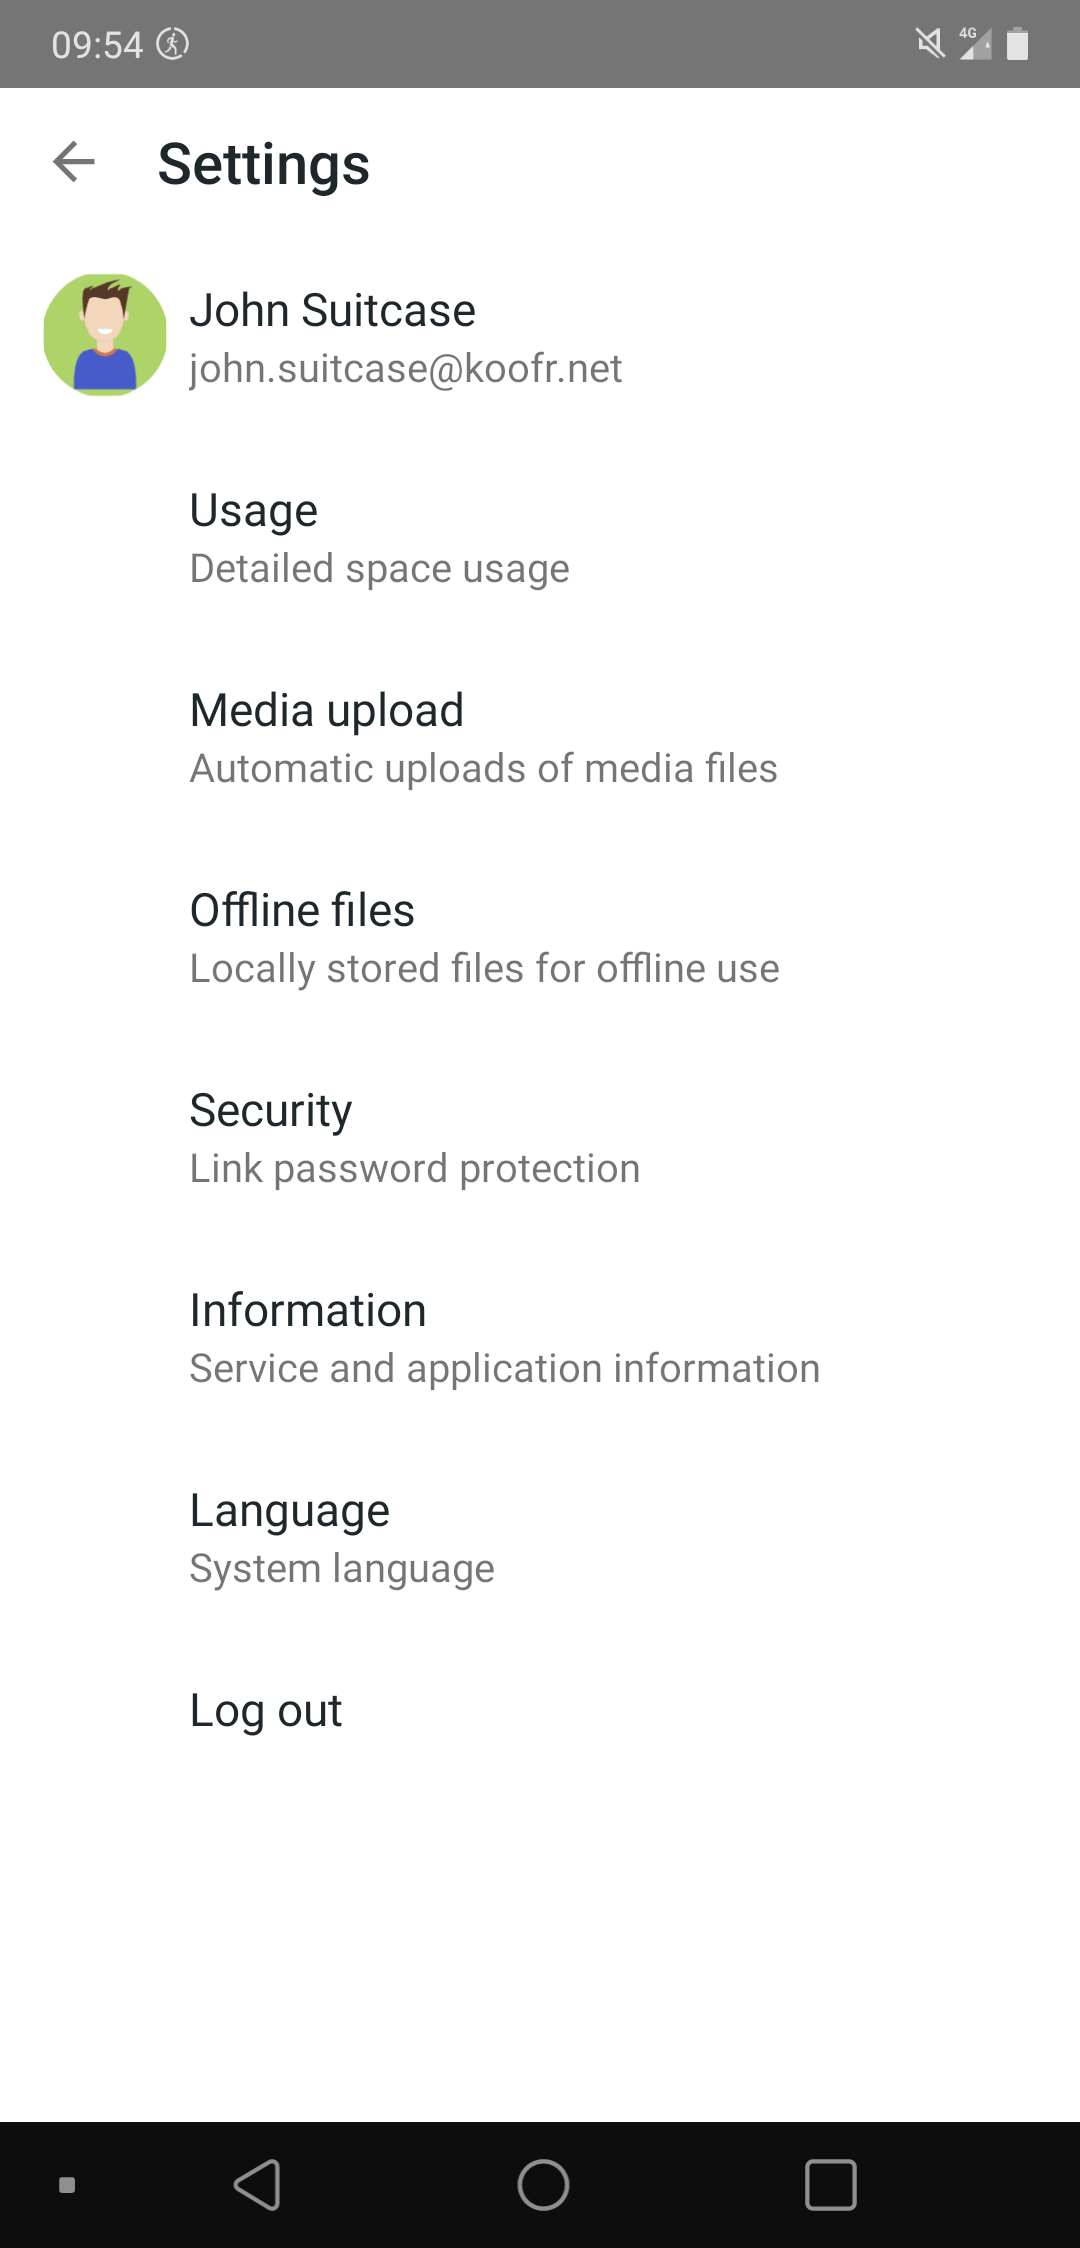
You can easily enable automatic media backup in the Koofr mobile app by opening Settings (the cogwheel icon in the top-right corner of the screen), then tapping on Media upload.
In the Media upload menu, there are several options you can choose depending on what you need. Turn on automatic media upload by toggling the Upload new media files option. You can tell Koofr to only upload when there's a WiFi connection and choose whether you want to upload images, videos, or both. You can also select a custom Autoupload folder, set which folders you want to exclude from auto upload, and choose if you want the uploaded media to be sorted into subfolders by year or by application.
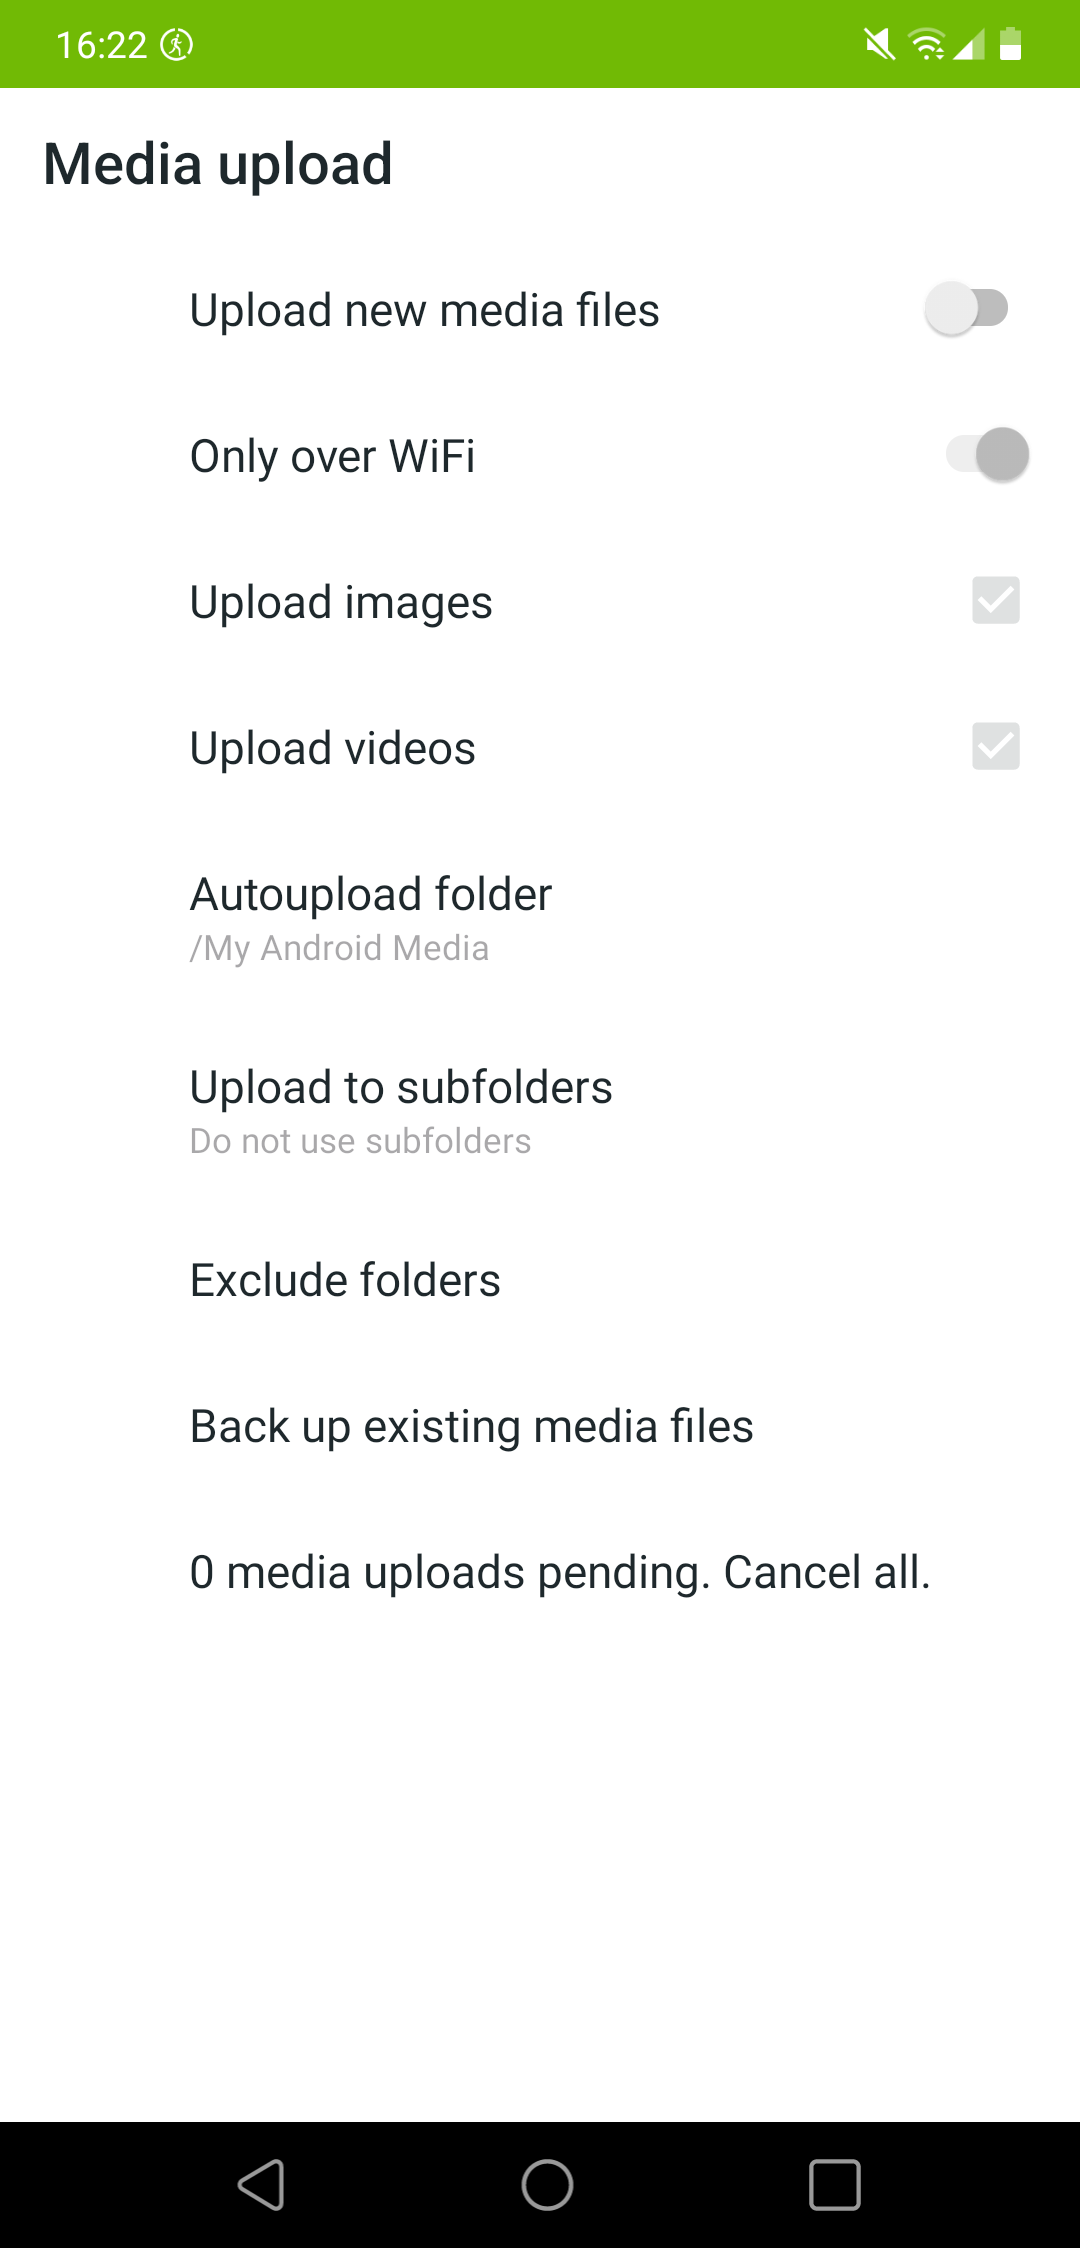
Finally, you can back up all existing media files from your device to Koofr in one swift stroke. Keep in mind that this could take a long time depending on your connection. Make sure you've got enough space in your Koofr to do this!
Download your photos and videos from Google Photos
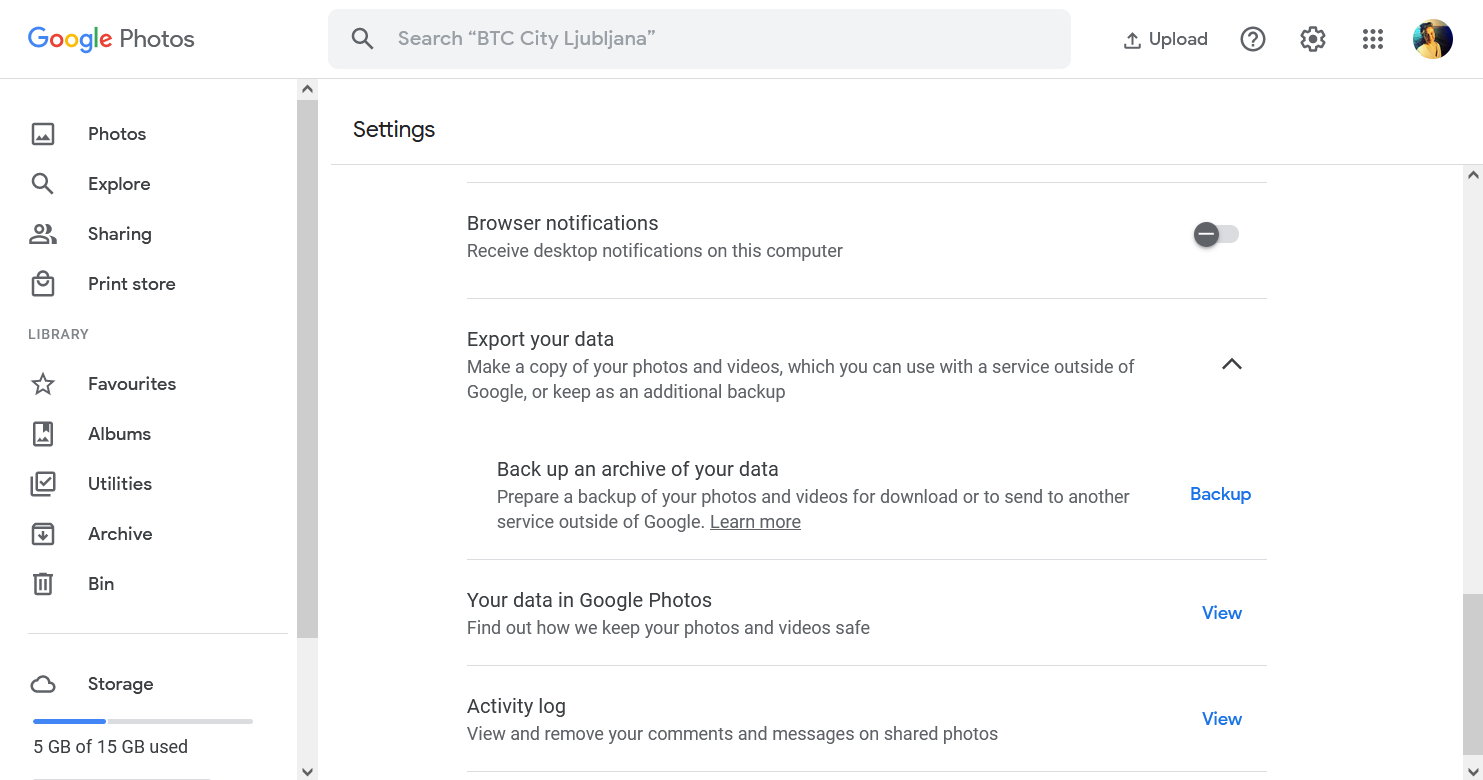
To download a copy of your media from Google Photos, first log in to your Google account and open Google Photos in a browser. Then, go to Settings in the top-right section of the screen and scroll down to Export your data. Clicking on this will reveal the Back up an archive of your data option. Click on the Backup button, and the Google Takeout dialog will open up in a new browser tab.
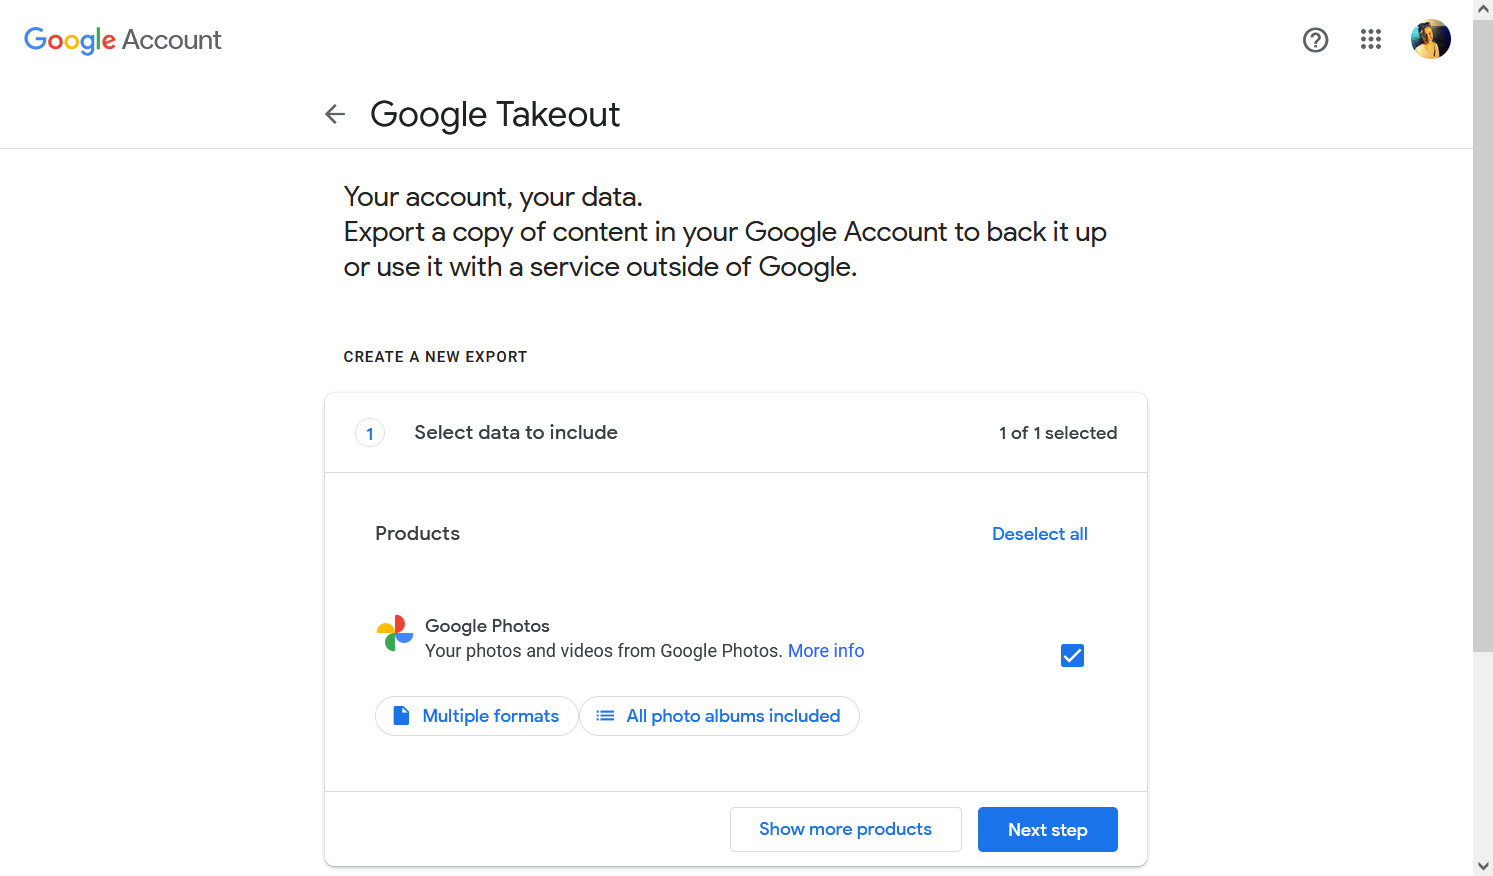
First, you'll choose which data you want to include in your download. You can narrow your selection by file format and by photo album. When you're ready, click on Next step.
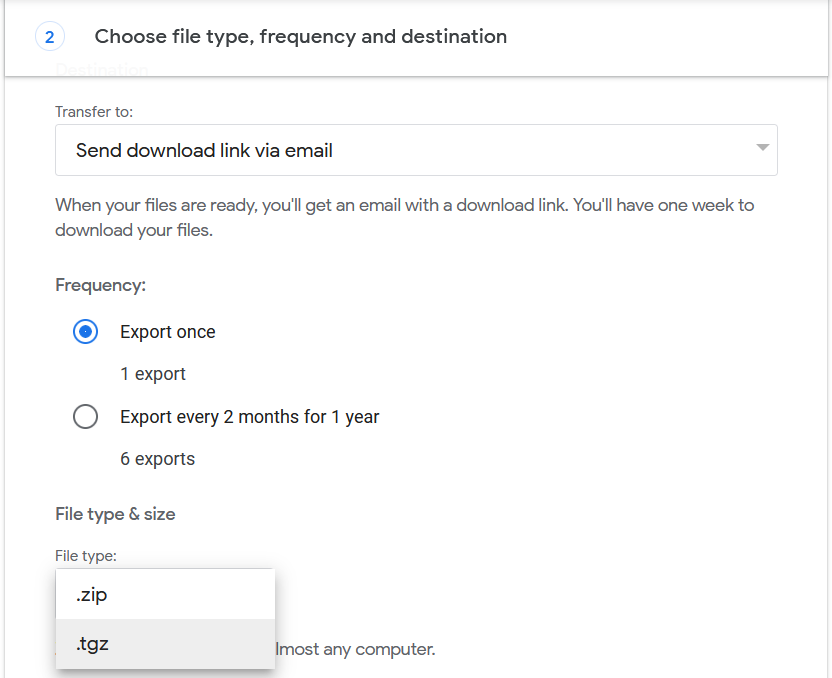
Here, you'll set a transfer destination, frequency, and what file type and size you want the export to be prepared in. You can choose between .zip and .tgz compressions for the export. You can also break up the export into multiple compressed files (sized 1 GB, 2 GB, 4 GB, 10 GB or 20 GB) to make the downloads more manageable. Once you've set everything up, click on Create export.
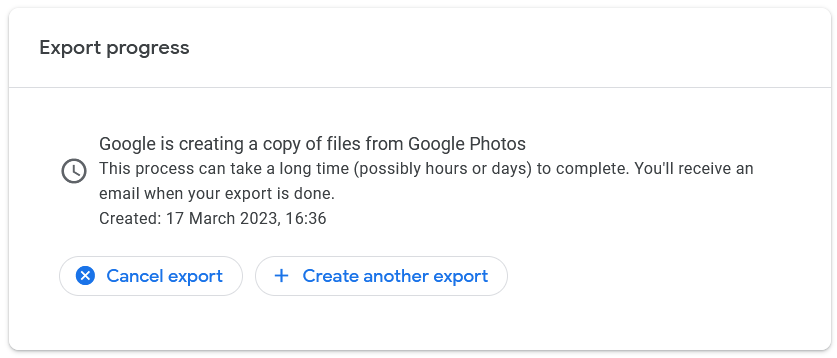
Google will now start creating a copy of your files. Depending on the quantity and size of your data, this could take a long time, so feel free to close this tab and get on with your day - you will receive an email notification when the export is ready.
Disable backup on Google Photos
There's one last thing you'll need to do to finalize your separation from Google Photos: disable backup to the service.
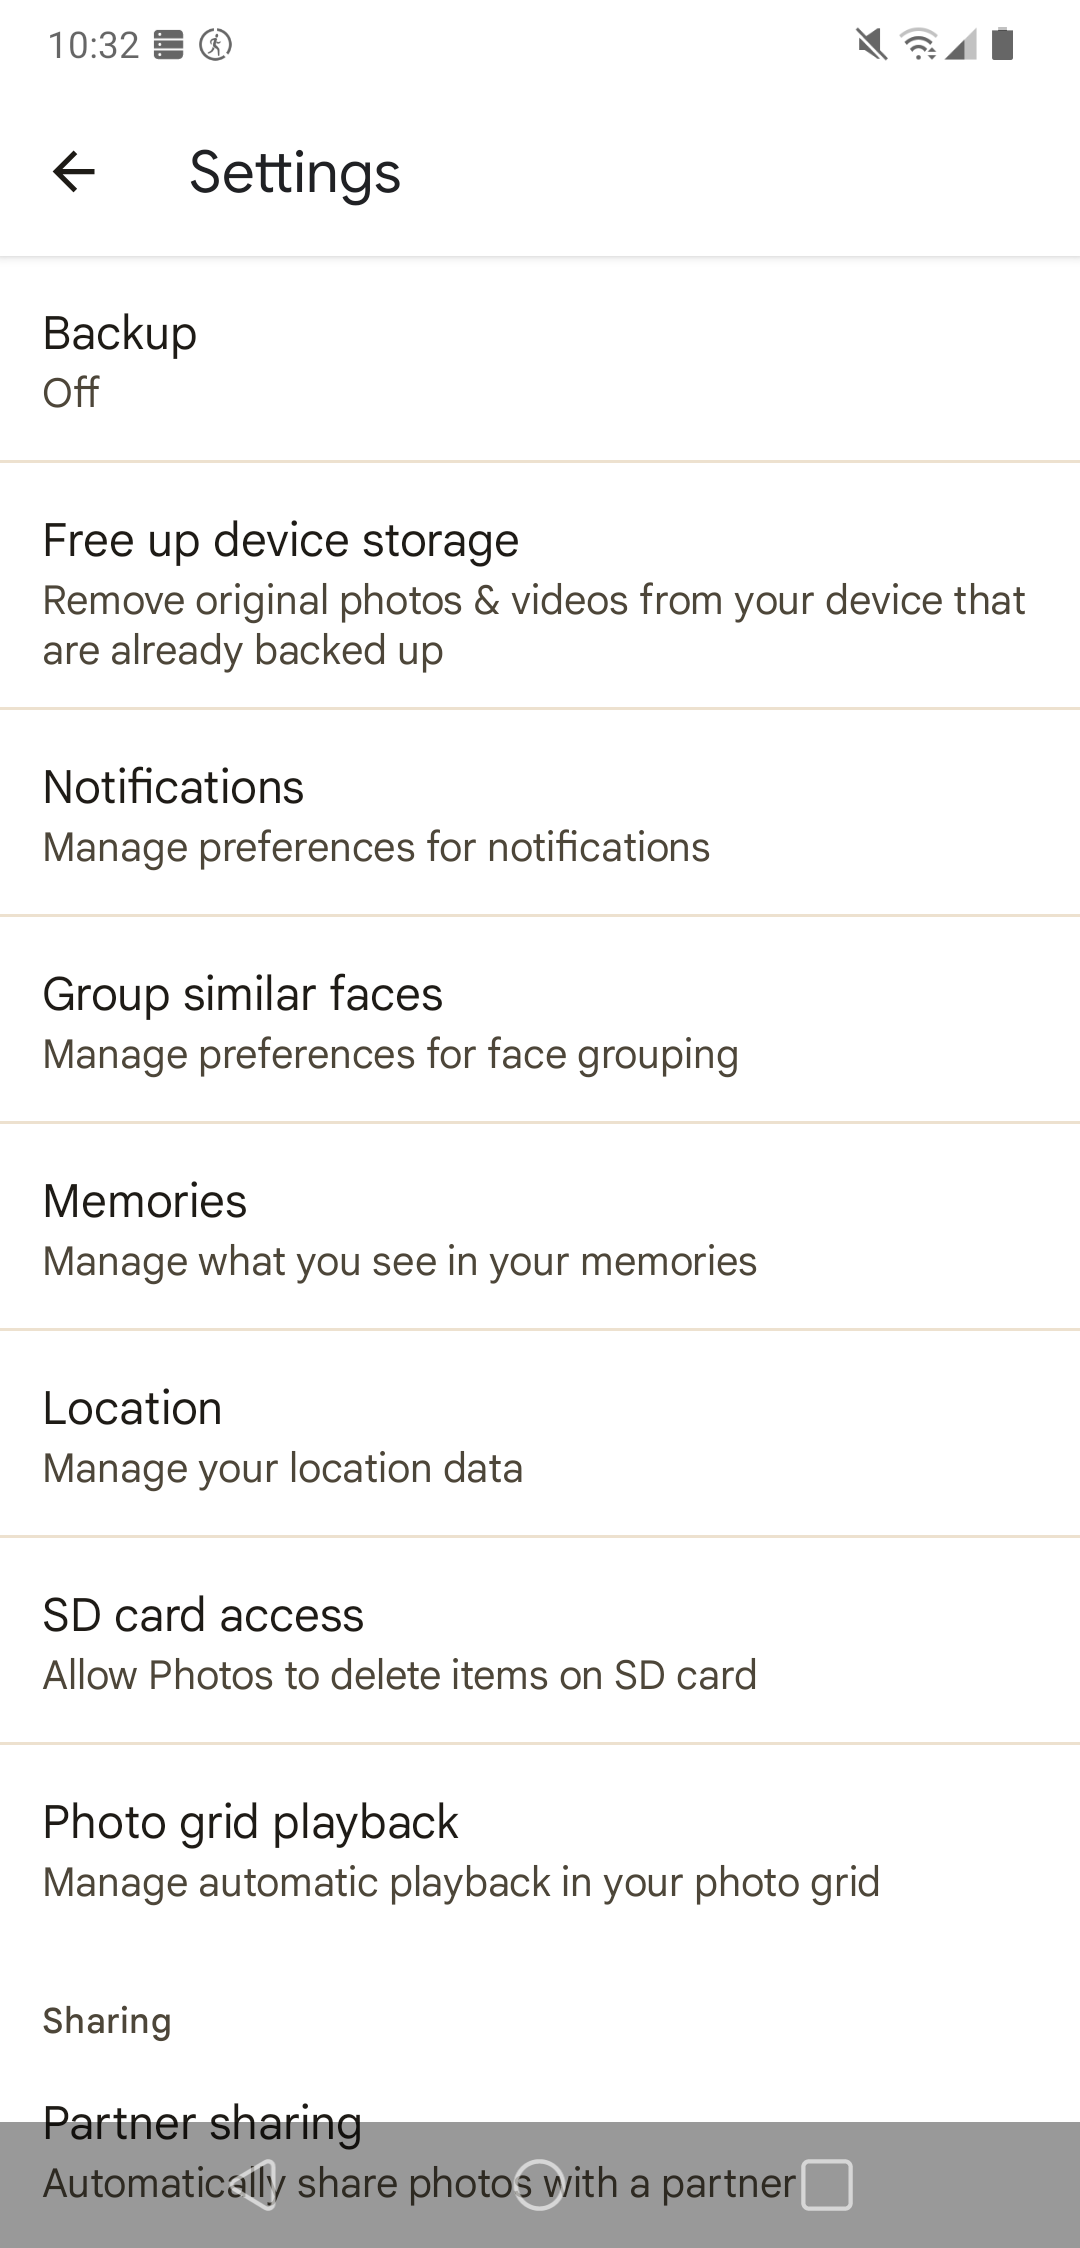
First, make sure you turn off automatic backup in the Google Photos app. You can do this by tapping your profile picture in the top-right corner to display the main menu, then going to Photos settings. The very first option on the list is the Backup option, where you can toggle auto backup on or off.
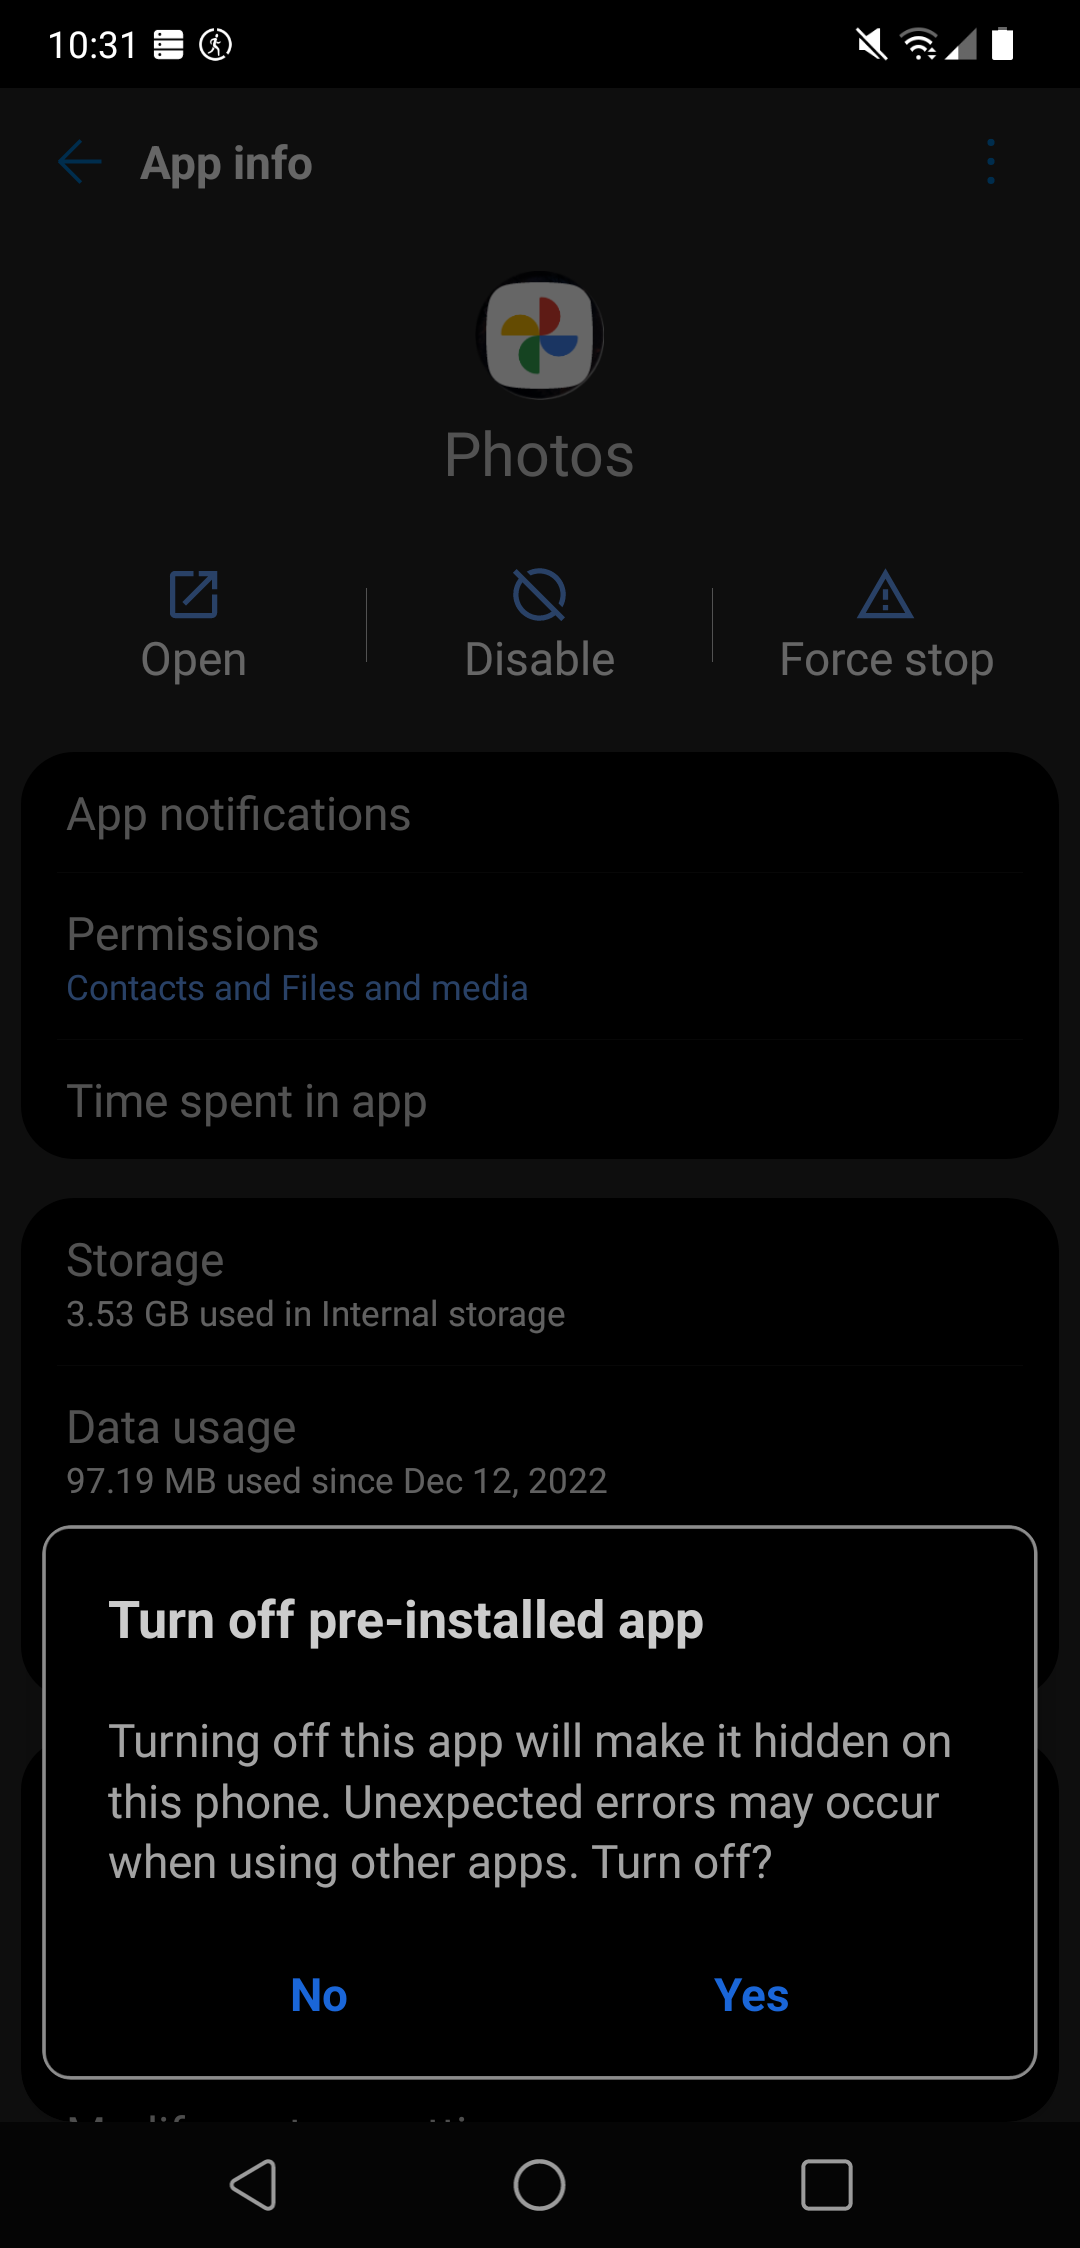
Depending on your Android phone, you might not be able to actually remove the Google Photos app, so the best you can do is disable it on your device. The exact way to do this might vary depending on your phone's manufacturer, but in general, you can access each application's settings by tapping and holding the app icon, then clicking on App info.
Upload your existing photos to Koofr
After downloading your exported files to your computer, you can upload any older photos from your previous Android devices to Koofr, to keep everything in one spot. You can let Koofr automatically backup media from your current device to figure out where the cut-off point is. Again, you'll want to make sure that you have enough space in your Koofr account to hold your entire collection!
Remember, if you want to be able to navigate and preview your photos in the Koofr apps, you'll need to extract the files from the compressed .zip or .tgz file before uploading to Koofr.
You can upload your photos either by dragging and dropping the files or folders into the Koofr browser application, or by using the upload wizard in the app itself. For more information, visit the Koofr help center.
Want to talk to us? Join us on the Koofr subreddit!