Backup your WordPress website to Koofr with UpdraftPlus Plugin via WebDAV
Regular backups are essential to ensure your WordPress website stays safe and intact. Find out how you can use the WebDAV protocol to create a backup of your website and send it to your Koofr account using the UpdraftPlus plugin.
Written by human for humans
As an owner of a WordPress site, you know that backups are key to keeping your content and website intact. You have probably already asked yourself what is the best way to backup your website, especially if you are new to WordPress. We will explain how you can simply create automatic backups of your website to Koofr, with the help of WebDAV protocol and an add-on of the UpdraftPlus Plugin for WordPress.
What is Updraft? UpdraftPlus is a simple, efficient and easy-to-use backup and restore plugin for WordPress. It comes both in a free and premium version, but you'll need to buy a WebDAV add-on if you want to use it with WebDAV protocol. With UpdraftPlus you can create manual or automatic backups of your website and restore backups easily.
(1) What do you need before we start backing up your WordPress site to Koofr?
-
You need to be the owner/administrator of a WordPress website.
- You'll need the UpdraftPlus plugin and its paid add-on for WebDAV.
(2) How to set up backups to Koofr with UpdraftPlus plugin?
- Follow the instructions you received when you purchased the WebDAV Plugin from UpdraftPlus to set the plugin up in your WordPress dashboard. Once it is installed you'll be able to see it in the WordPress dashboard.

- Open the UpdraftPlus plugin Settings and choose the schedule of your files and database backups at the top of the page.

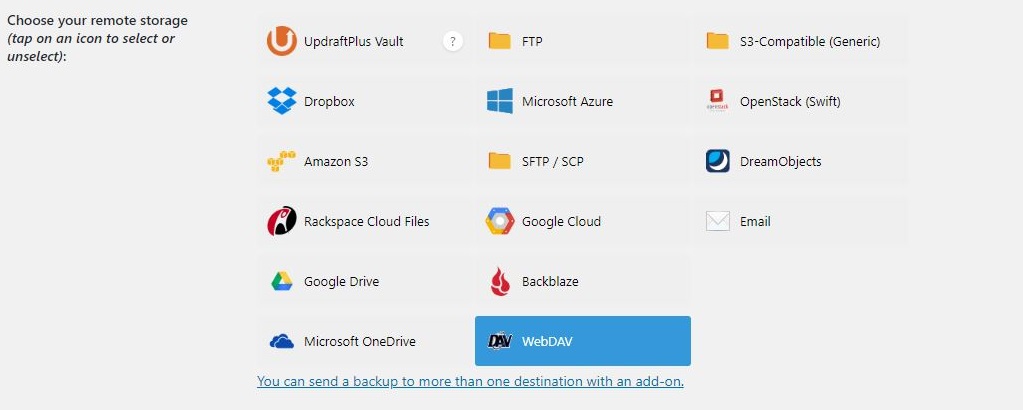
- Choose WebDAV as a remote storage location.
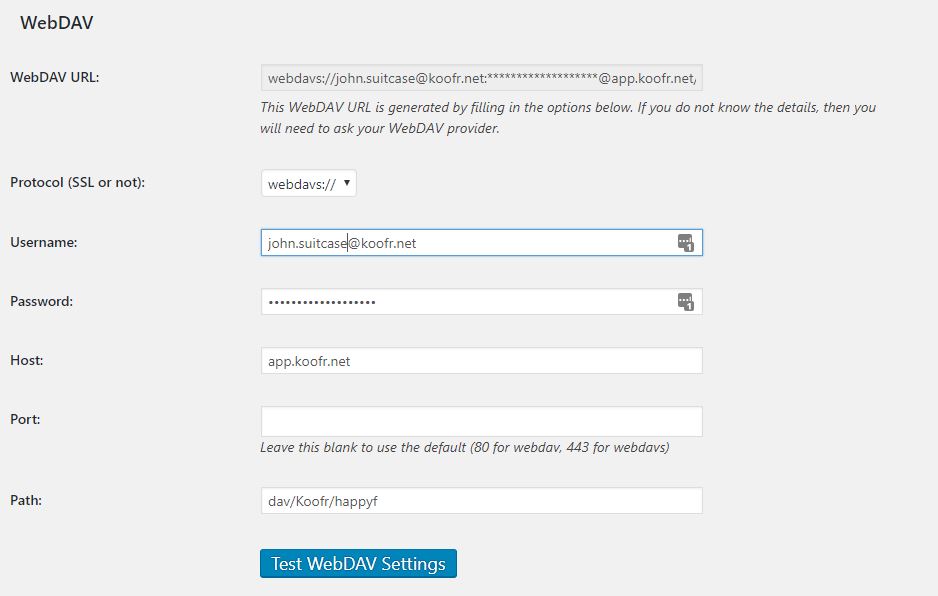
- Fill out the WebDAV settings according to the picture below to connect your UpdraftPlus plugin to Koofr.
-
Move to your Koofr account for a moment and generate an application-specific password to use with the UpdraftPlus plugin. Check out our video to see the process of creating an application-specific password.
- If you used a folder name in the Path of the WebDAV Settings following dav/Koofr, you need to create that folder in your Koofr account manually. Your WebDAV connection will not work without it. We created the happyf folder in Koofr manually. If you want your backups to be saved to the root Koofr folder, you do not need to create an additional folder in your Koofr account.
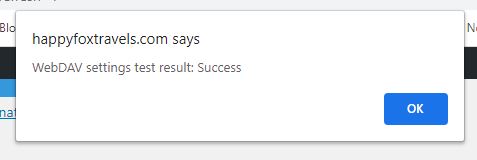
- Return to the UpdraftPlus plugin settings in your WordPress dashboard and click on Test WebDAV Settings. You will see a pop-up appear if your WebDAV settings are correct. Click on OK.
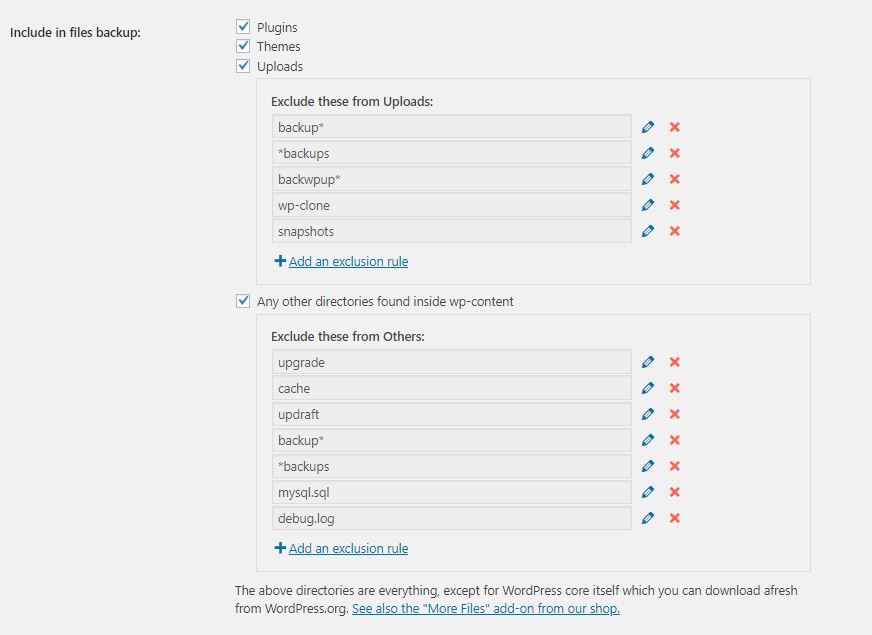
- Choose which files you wish to include into your backup.
Note: Please note that backing up is IO intensive. Check with your hosting provider regarding your IO and bandwidth limitations.
-
Scroll down to the bottom of the Settings tab and click on Save Changes.
- Go to the Backup/Restore tab and click the Backup Now button.

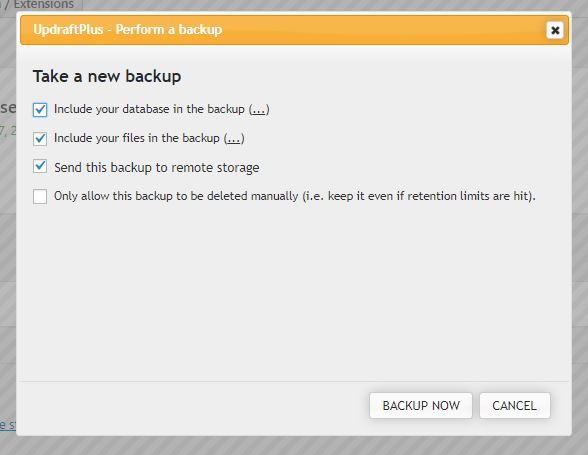
- Select Send this backup to remote storage and confirm the creation of a new backup by clicking Backup Now. The backup process will start running.
-
You will be able to see the status of your backup in the Backup/Restore tab of the UpdraftPlus Plugin.
- When your backup is finished you will be able to see it under Existing backups in the Backup/Restore tab of the UpdraftPlus Plugin, where you can also choose to Restore it or Delete it.

Note: If you are having issues uploading files larger than 1 MB try adding the following to your ‘wp-config.php’ file, just under the database settings:
define('UPDRAFTPLUS_WEBDAV_NEVER_CHUNK', true);More on How to restore with UpdraftPlus plugin.
Happy backing up.
Want to talk to us? Join us on the Koofr subreddit!


