

Restore your WordPress backup from Koofr with UpdraftPlus Plugin
Website owners know that it is important to do regular backups of websites. It is also important that you can simply and effectively restore them. You don’t want to end up without your website if disaster hits. Easily restore your WordPress website backup from your Koofr account with UpdraftPlus plugin and WebDAV protocol.
Written by human for humans
As an owner of a WordPress site, you know that backups are key to keeping your content and website intact. In one of our previous blog posts, we explained how you can simply create automatic backups of your website to Koofr, with the help of WebDAV protocol and an add-on of the UpdraftPlus Plugin for WebDAV. But, backing up is only the first part. What is equally as important is, that you can simply restore your backups in case disaster recovery is needed.
What is Updraft? UpdraftPlus is a simple, efficient and easy to use backup and restore plugin for WordPress. It comes both in a free and premium version, but you'll need to buy a WebDAV add-on if you want to use it with WebDAV protocol. With UpdraftPlus you can create manual or automatic backups of your website and restore the backups easily.
Why should you have backups anyway?
If you don't know yet, let us explain. Many things can go wrong. And things do go wrong all the time. You can lose a part of your website database; you can delete part of your website by accident. In the worst-case scenario, the server where you are hosting your website stops working or your database is modified by a hacker. These are only a few examples. In all of these and other cases, you’re going to need a backup of your precious site, that you probably spent a while building. But every backup also needs to be tested. Always. If we are to rely on it we need to be sure it works.
How to test the restore function of Updraft?
We wanted to restore our WordPress webpage to the same location and URL as it was before. We assumed we were going to do a full restore of our WordPress website from our Updraft backup files, into an empty WordPress. We also assumed we lost everything, aside from our Updraft backup and we have to start anew with only our backup and build our webpage back up from that. The last assumption we made was that we have the Updraft backup saved in our Koofr account, so we will need to establish WebDAV access between Koofr and Updraft.
(1) What do you need before we start restoring your WordPress site from Koofr?
- A backup of your WordPress site saved in your Koofr account
-
A fresh and empty copy of WordPress
- The UpdraftPlus plugin and its paid add-on for WebDAV.
(2) How to do a restore from Koofr with UpdraftPlus plugin?
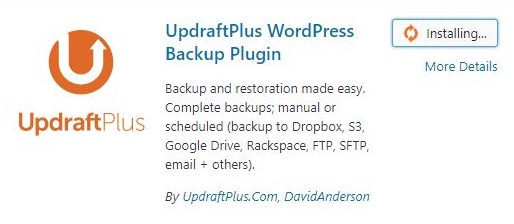
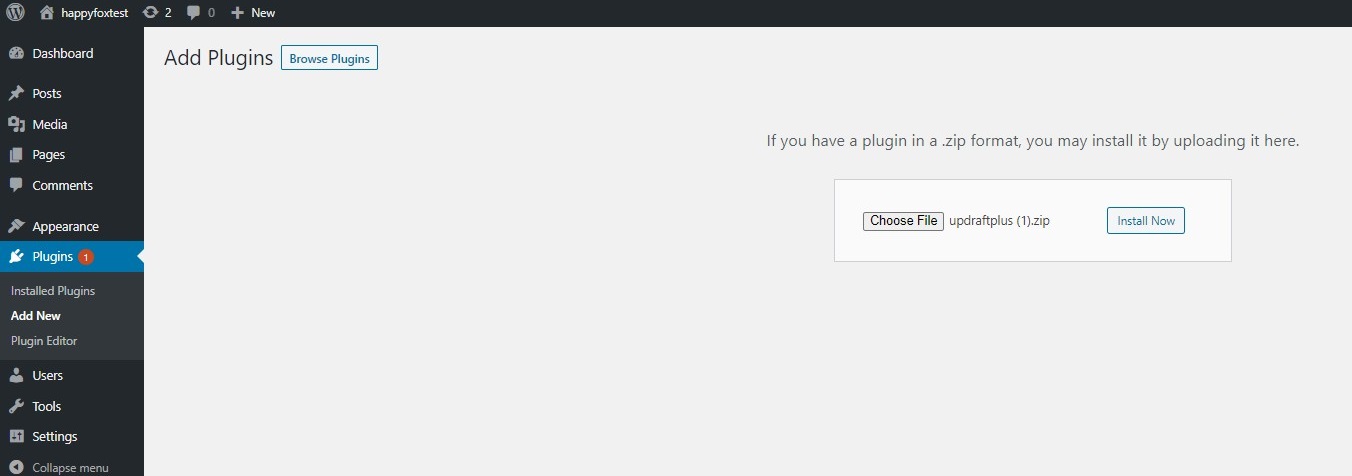
(1) First, log into your empty WordPress. Go to the plugins installer, and upload the UpdraftPlus plugin file. Install it by clicking Install now and activate it.
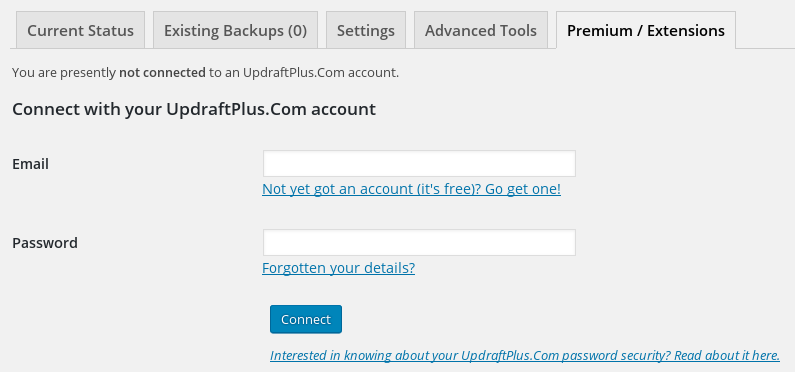
(2) Once you installed the plugin, you'll need to enter your UpdraftPlus details and connect your UpdraftPlus plugin with your UpdraftPlus account. You can do that in the plugin Settings. Open the Premium/Extensions tab, input your details and click on Connect.
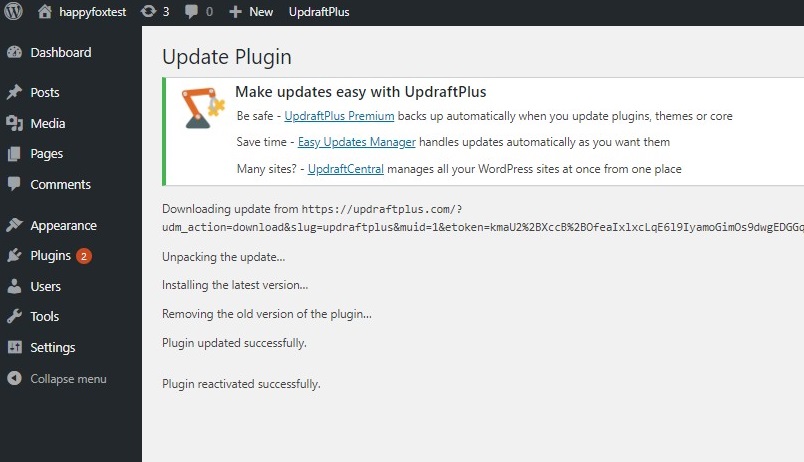
(3) After connecting the accounts, you should be able to scroll down to your WebDAV add-on and follow the link to activate it. When you click on it, you will see it being unpacked, installed and activated automatically.
(4) Activating the WebDAV add-on is not enough though. Until you input the correct WebDAV details to establish the WebDAV connection to Koofr, your backups will not be visible in the Backup/Restore tab of the UpdraftPlus plugin settings. See the picture below.

(5) Open the UpdraftPlus plugin Settings tab and choose WebDAV as a remote storage location. Fill out the WebDAV settings according to the picture below to establish the WebDAV connection to Koofr.
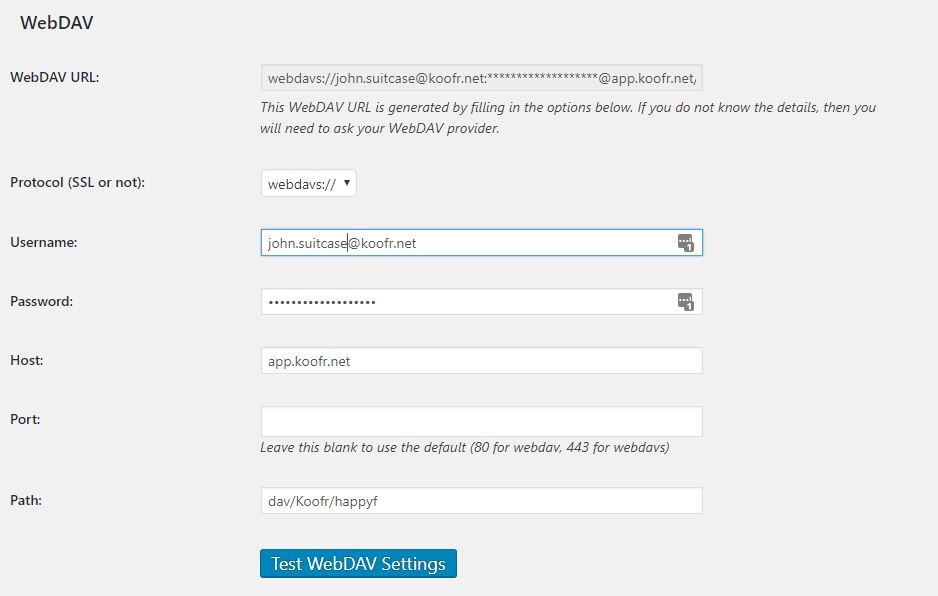
Be sure to use the same WebDAV settings you used when creating your backup. You can create a new application-specific password inside your Koofr account to use with UpdraftPlus plugin. Check out our video How to generate application-specific passwords for WebDAV connections to see the process of creating an application-specific password inside your Koofr account.
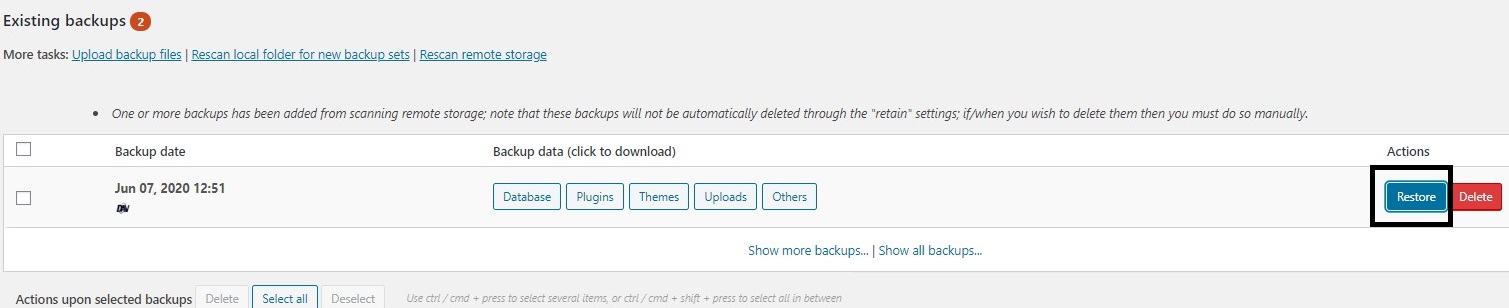
(6) Click on Test WebDAV Settings. You will see a pop-up appear if your WebDAV settings are correct. Click on OK. Go to the Backup/Restore tab of the UpdraftPlus plugin and you should see all of the existing backups that are saved in your Koofr account. Click on the Restore button next to the backup you want to restore.
(7) The restoration wizard will start. A window will appear with a list of files available to restore.
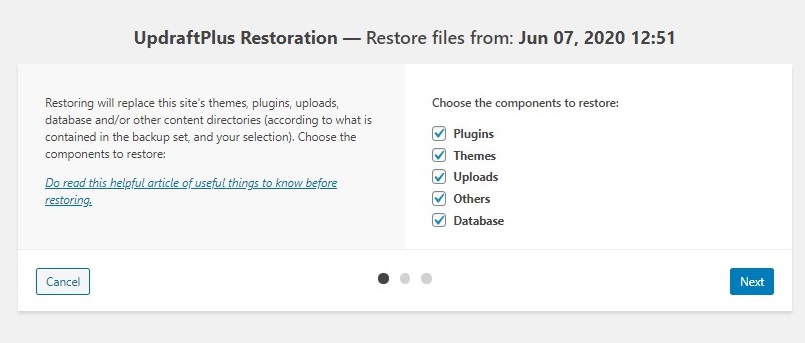
We selected everything that was available. After you select the wanted files, click on Next.
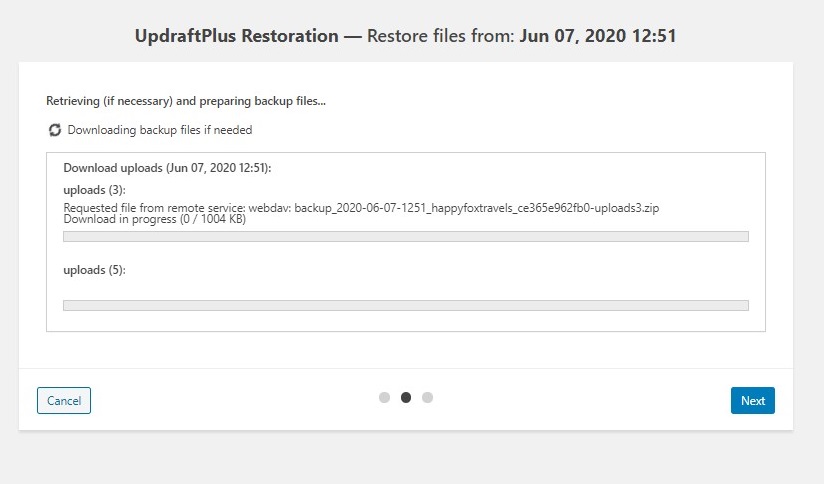
(8) You'll see the UpdraftPlus plugin retrieving your files. When the process is done click on Next.
(9) The UpdraftPlus plugin will then run the restoration process. You can watch the progress on your screen. When restoration is done, you'll receive a message like the one in the picture below.
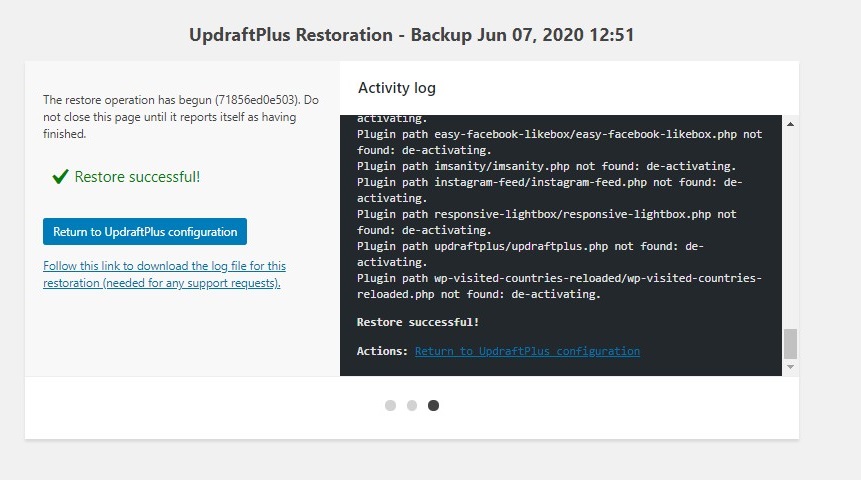
(10) If you return to the WordPress dashboard at this point, you may have to log in again. At this point, your webpage should be available again and back to the state at which the backup was created. Check if everything was restored correctly to its previous form.
We hope you managed to restore your website successfully. Check out the official UpdraftPlus plugin restore instructions.
Want to talk to us? Join us on the Koofr Subreddit!