

Backup Your Files to Koofr Using Restic
Use this open-source command-line backup tool to easily and quickly backup your files to Koofr.
Written by human for humans
Once you go cmd, you never go back. Sure, graphic user interfaces make software more accessible and easier to use, but there are benefits to using the good old command-line, too.
If you're mostly using the keyboard as an input, then learning a few commands could actually save you a lot of time and streamline your work. Many free open source command-line programs offer advanced features that are otherwise often locked into expensive software plans or add-ons.
We've written a lot about setting up rclone to access your Koofr cloud storage via command-line. We love it because it allows you to set up client-side encryption.
Today, we're covering how to combine rclone with restic: a command-line program that allows you to back up your files to Koofr and other local or remote file storage media.
Install and configure rclone
Before you get started with restic, you'll need to install rclone. Rclone is a powerful open source command-line tool which can sync, move, copy, and do other file operations on your Koofr files. If you've already done this, you can skip to the next step.
For a beginner's guide to setting up rclone, we recommend our previous blog post Learning the basics of Koofr with rclone. While there have been some minor changes in what information the computer prints since the guide was published, our step-by-step instructions are still correct.
For even more detailed information, please see rclone's official documentation.
For this example, we configured a remote called koofr-backup using rclone.
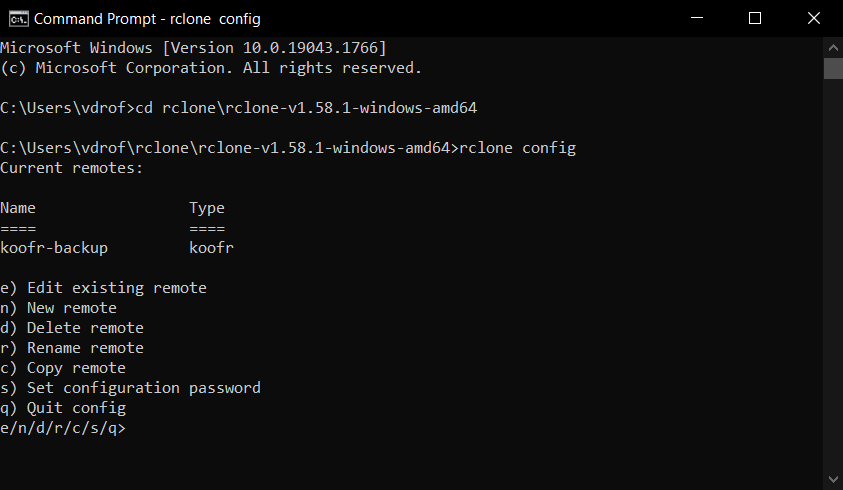
Once you've installed rclone and configured your Koofr remote, you can move on to the next step.
Install restic
This guide describes the installation process on a Windows machine. If you're using a different operating system, please see the relevant chapters in the restic documentation.
1) To install restic on Windows, you'll need to install Scoop first. Scoop is a command-line installer for Windows.
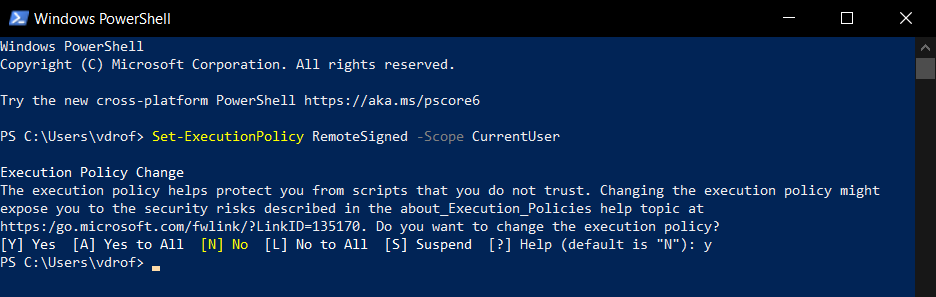
Start by opening a PowerShell terminal. PowerShell is a command-line shell and scripting language designed for system administration. If you're using Windows 7, you may need to install PowerShell 5.1 or later manually.
First, change the execution policy to allow running remote scripts by entering the following command:
> Set-ExecutionPolicy RemoteSigned -Scope CurrentUser
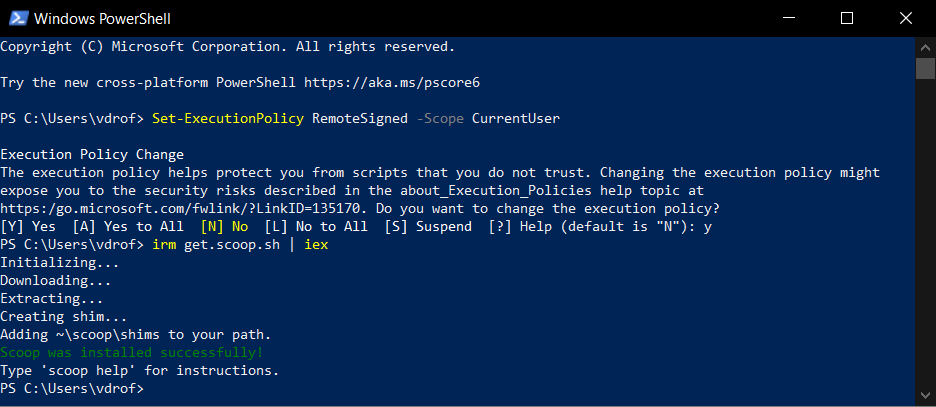
Next, run this command from a non-admin PowerShell. By default, scoop will install to ´C:\Users\username\scoop´.
> irm get.scoop.sh | iex
After installing scoop, you can change the execution policy back to the default or other setting by running the following:
> Set-ExecutionPolicy Default -Scope CurrentUser
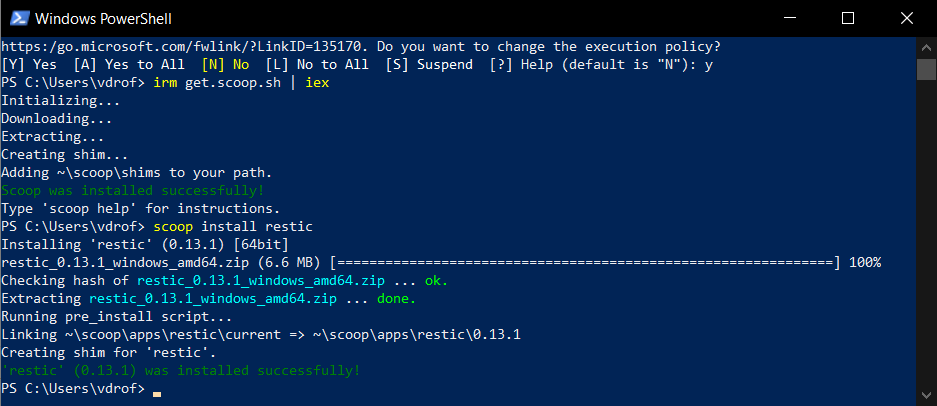
2) Install restic with scoop. We continued from the previous step in PowerShell, but you can switch back to Command Prompt from here on if you prefer.
Run the following command to install restic:
> scoop install restic
You've now installed everything you'll need to set up your restic backup.
Prepare a new repository
Before we delve in, some basic restic terminology:
repository : a space to store digital data, either remote or local; the space where your backups will be saved
snapshot : the contents of a directory at a specific point in time
backup : a collection of snapshots stored in a repository
To keep your Koofr nice and tidy, we recommend creating a dedicated folder for your restic repository. We can use rclone to do this in cmd or PowerShell.
To create a new directory, use the mkdir command:
> rclone mkdir remote:path/to/newfolder
Note: If using PowerShell, you'll need to add ´.\´ at the beginning of every rclone command you enter for the program to run it.
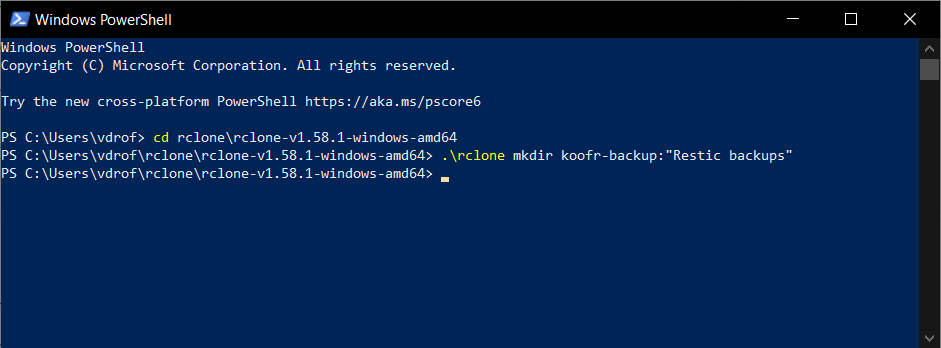
In our example, we're creating a folder called "Restic backups" in Koofr's root folder, on rclone remote "koofr-backup" which we previously configured.
> rclone mkdir koofr-backup:"Restic backups"
Next, let's initiate a new repository with restic in this location.
> restic -r rclone:remote:path init
For our example, the command looks like this:
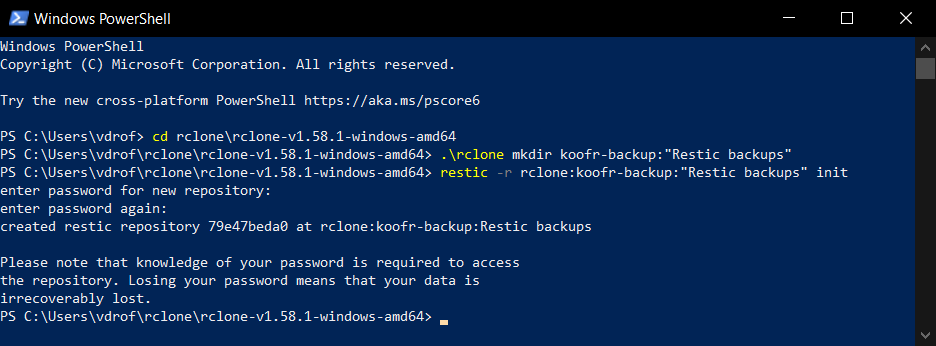
> restic -r rclone:koofr-backup:"Restic backups" init
You will be asked to select and repeat a password for your new repository.
To check whether your repository was set up correctly, you can tell rclone to list the contents of the "Restic backups" directory:
> rclone ls remote:path
Following our example, the command is:
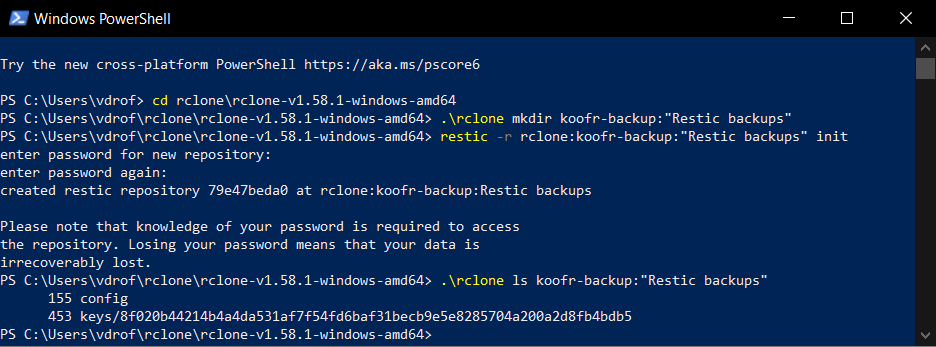
> rclone ls koofr-backup:"Restic backups"
It should look a bit like this:
For additional and advanced configurations as well as help on debugging, please see the restic documentation.
General note for using rclone with Koofr: Do not use --copy-links option with rclone when copying or syncing files to Koofr, since you might end up infinitely uploading your files over and over again if a cycle in the filesystem is induced by your symlinks or junction points.
Create a new backup
We've now prepared everything we need to create a new backup with restic! Because restic relies on rclone, you need to be in the directory where rclone is installed, so use the ´cd´ command to move there if needed.
Use the following command to backup the "path" directory:
> restic -r rclone:remote:path --verbose backup ~\pathIn our example, we're backing up the Pictures folder.
> restic -r rclone:koofr-backup:"Restic backups" --verbose backup C:\Users\username\Pictures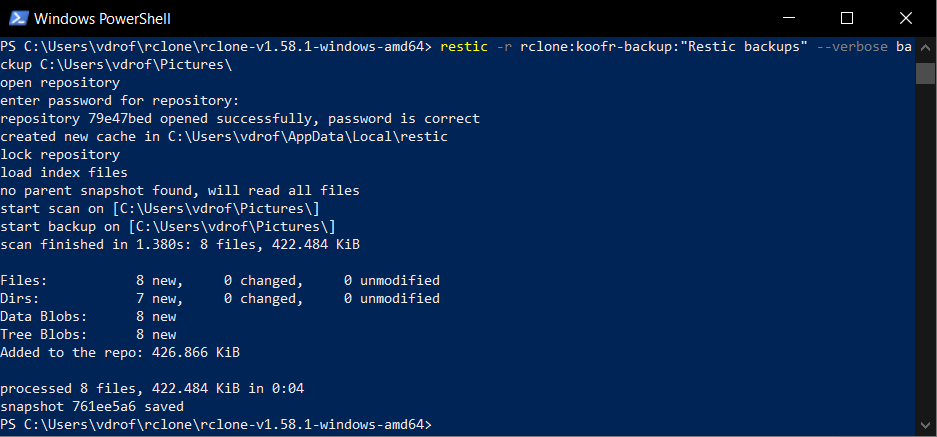
The result should look something like this. The backup has now been created and the first snapshot has been saved!
Tip: The ´--verbose´ option ensures that the computer prints more information, allowing for easier troubleshooting. Once you're comfortable with restic, it's okay to skip it.
Each time you backup, restic will create a new snapshot of your directory. It will only record changes from the previous snapshot to avoid duplication and save time. Here's what making a later snapshot in Command Prompt looks like:

As you can see, restic compares the number of files and directories, and only adds what's been newly added or modified to the repository. Even though the folder we backed up is larger than before, the snapshot took less time to create and consumed less additional storage space.
Restoring a backup
Restoring backups with restic is very simple. First, you'll need the ID of the snapshot you'd like to restore. You can use the snapshots command to see a list of all snapshots in your repository:
> restic -r rclone:remote:path snapshots
Here's the command we used in our example:
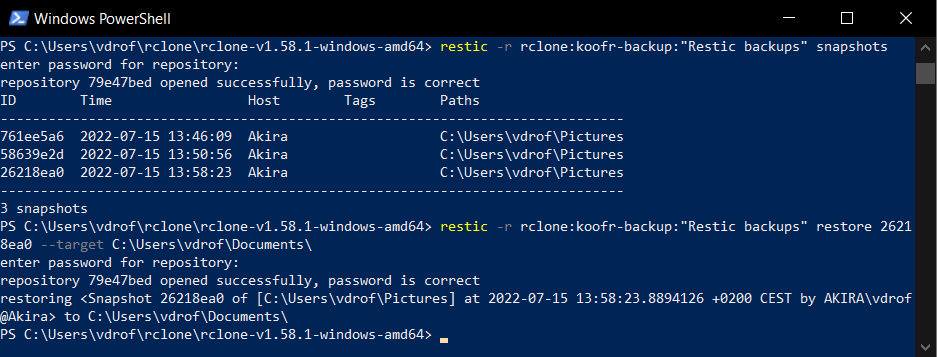
> restic -r rclone:koofr-backup:"Restic backups" snapshots
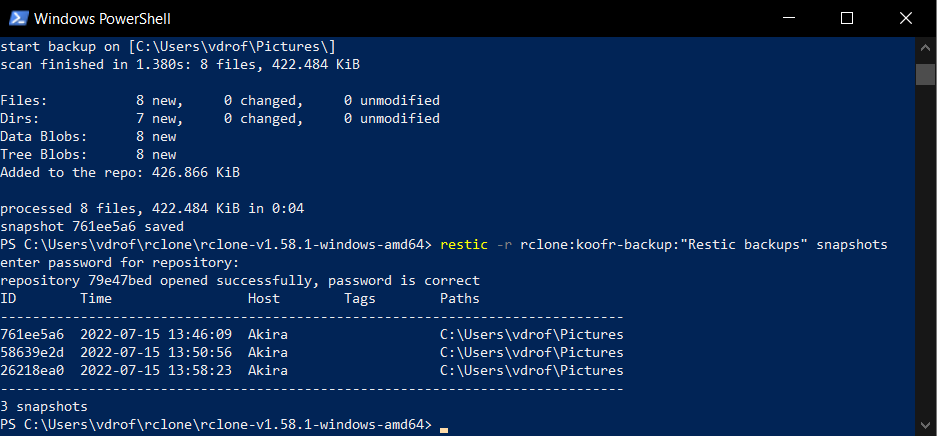
Since our repository only contains 3 snapshots, it's easy to identify which one we want to restore. However, you may have backups of different paths in the same repository, or you might be using the same repo for different machines (hosts). You can use filters to help you isolate snapshots. Please see the restic documentation to learn more.
Now that you know which snapshot you want to restore, use the following command:
> restic -r rclone:remote:path restore snapshotID --target ~\destination
We used the following command to restore our backup to the Documents folder:
> restic -r rclone:koofr-backup:"Restic backups" restore 12345678 --target C:\Users\username\Documents
You can also mount snapshots as a file system via FUSE (MacOS, Linux, and FreeBSD only) or print them to standard output. More on this in restic's documentation.
Additional operations
Restic supports a number of other command-line operations and advanced backup options. For example, you can include or exclude certain files or folders when creating or restoring backups. You can also remove snapshots either individually or according to a ruleset. Restic also supports "dry runs", which means it can simulate a backup or removal operation to show an expected result without actually performing it.
Are you using restic to backup your files? Join our growing community on Reddit and tell us all about it!