

Learning the basics of Koofr with rclone
How to use rclone with Koofr as an alternative to the old and slow Webdav? This open-source tool lets you manage and sync files to and from Koofr, and much more. Follow this easy setup guide to get started.
Written by human for humans
What is rclone?
It is an open source command-line tool that can sync, move, copy, and perform other file operations on your Koofr files. You can use it to create backups of your data or to simply store files in your Koofr account, optionally adding encryption.
2023 update: rclone is compatible with Koofr Vault, your client-side encrypted folder in your Koofr cloud storage. You can use rclone to encrypt or decrypt files just like you would using Koofr Vault - all you need is your Safe Box configuration, including your Safe Key and Salt.
(1) Getting started with rclone - Installation
First, you need to download rclone. See different versions of rclone for different operating systems. All of the steps in this blog post were written for rclone for Windows, but the steps are similar in other operating systems.
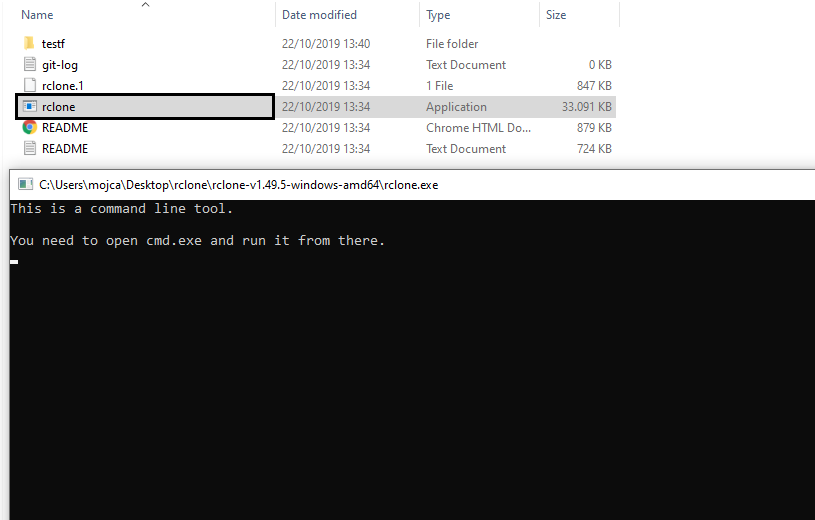
Download the Windows version of rclone and unpack it. There is no installer. You need to select all of the rclone files and click on Extract all to extract rclone to a chosen location on your computer. Once the files are extracted, find the rclone application and start it. As soon as you do that, you will receive a notification like the one in the picture below, telling you to open cmd.exe and run rclone from there.
(2) Basic rclone terminology
These are the basic terms you need to know before you start using rclone:
- a remote (a remote in our case is Koofr service, which you will configure through rclone)
- commands (there are commands you will execute when using rclone, for example, copy, sync, crypt etc. Find a list of all rclone commands with detailed explanations)
- a source and a destination (commands usually have a source and a destination)
(3) How to create a connection to Koofr in rclone?
Cmd, also known as Command Prompt, is the command-line interpreter available in most Windows operating systems. It is used to execute entered commands. Find cmd on your computer and open it.
Do not use --copy-links option with rclone when copying or syncing files to Koofr, since you might end up infinitely uploading your files over and over again if a cycle in the filesystem is induced by your symlinks or junction points.
Type c:\path\to\rclone.exe +Enter into the cmd window to start rclone.
Note: All of the commands you will input into rclone need to be followed by pressing Enter. All of the text boxes in this blog post represent the text that you need to type into rclone or what you would see as a result of a command in rclone.
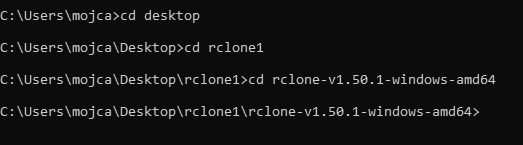
You need to "be" in the folder where you extracted rclone before you can start creating your first remote.
Type rclone config into the command window to start configuring rclone.
rclone config
This command allows you to add/remove or edit a remote. All of your remotes are stored in a config file and you can also decide to encrypt the config file.
Note: We didn't encrypt our config file for the purposes of this blog post.
Let's configure our first remote, named koofr.
After you input the rclone config command, rclone will return this:

Type n + Enter into the command window and name the new remote koofr when prompted.
Note: You can name your remote whatever you want, just make sure the name doesn’t have any spaces. Be sure to use that same name later on when inputting commands into rclone.
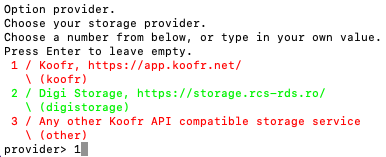
In the next step, rclone will return a list of storage services. Be sure to find Koofr on the list. Type in the correct number for Koofr-compatible storage providers and press Enter.
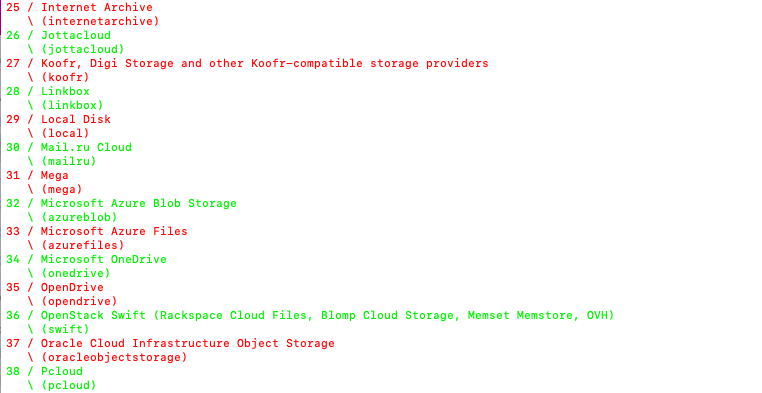
Next, you'll be asked to choose from a list of storage providers that are compatible with the Koofr API. Here, choose Koofr and type in the corresponding number 1, then press enter.
You will be prompted to enter your Koofr user name. Do that and then sign-in to your Koofr account, so you can generate an application-specific password to use with rclone. When prompted select the option y + Enter.

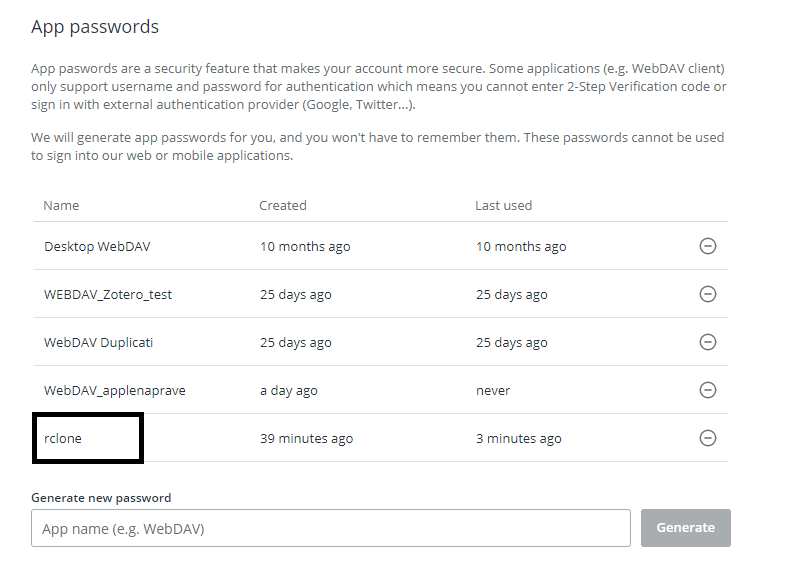
You can generate a password in the Account Settings, under Preferences. Click on the Password tab on the left, scroll down to App passwords and click into the Generate password field. Type-in a new password name (for example rclone) and click Generate.
Immediately use the newly-generated password in rclone command window. You will be prompted to confirm the password.
After you do that, you will see the summary of your newly-created remote. You will be able to confirm it, delete it or edit it further.
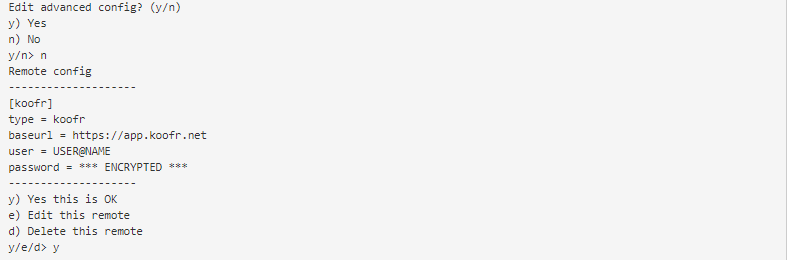
Type in y + Enter and voila - your first remote is created.
(4) How to test your rclone connection to Koofr
Once your remote is configured, you can test your rclone connection to Koofr by listing all the files or all the folders in your Koofr account.
This command will list all the files you have in your Koofr account.
rclone ls koofr:
This command will list all the folders you have in your Koofr account.
rclone lsd koofr:
(5) How to copy files to Koofr with rclone
We created a folder named testf inside the rclone folder on our computer. We wanted to copy the testf folder to our Koofr account. You can do this with the command below.
Note: The source folder does not have to be in the rclone folder. To use a different folder, use the full path to the folder in place of /home/source, eg. C:\Users\username\Pictures or similar.
rclone copy /home/source remote:backup
or in our case
rclone copy testf Koofr:/testfkoofr
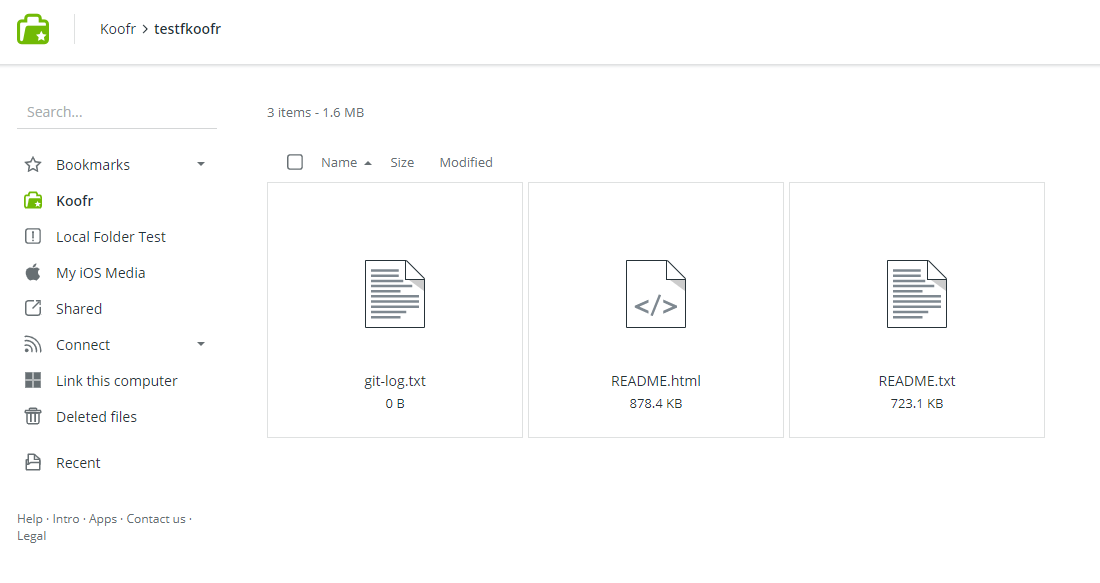
which copies the files from the testf folder on our computer to a testfkoofr folder in Koofr, as you can see in the picture below. Or, saying it differently - testf folder is the source and Koofr:/testfkoofr is the destination of this command.
Note: If you do not type-in a specific destination in Koofr to which you want to copy your files, they will be copied to the root folder of your Koofr storage account.
(6) How to mount Koofr as a network drive in rclone?
If you are a Windows user you'll need to first download WinFsp. For all other operating systems, you can skip this step. Find rclone mount command.
Note: When you mount a network drive, it will run only while cmd is open. As soon as you quit rclone, you will not be able to see the network drive on your computer anymore. You can close rclone by pressing ctrl + c.
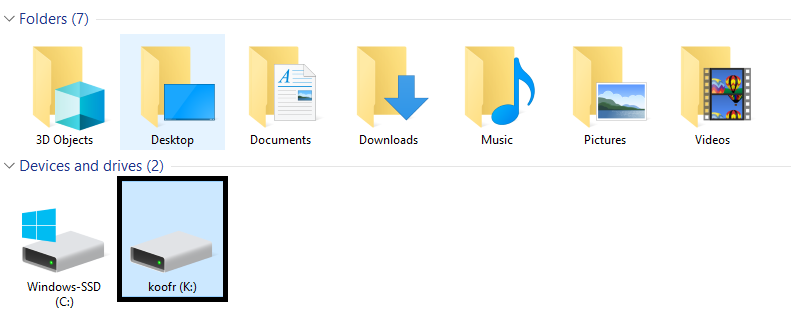
This command will mount Koofr as a network drive on your computer.
rclone mount “koofr:” K: --vfs-cache-mode full
Note: When mounting Koofr as a network drive be sure to use the same remote name you used when configuring your remote. The name does not need to be koofr. You can choose whichever name you want to, as long as you use it consistently through the whole process of configuration.
(7 Why use rclone?
Granted, you could use WebDAV protocol do to all this. But, WebDAV is an older protocol and it is slow for large amounts of files. You can of course still use WebDAV, but it is not optimal in those cases.
Note: For additional information, see a detailed guide on how to make a remote called koofr with rclone.
Read about client-side encryption of your Koofr files with rclone.
Want to talk to us? Join us on the Koofr subreddit!