

Set up Rclone and Restic for Koofr Using Scoop
Like the ease and breeze of the command line? Get started using Koofr with apps like rclone and restic in a snap with the command-line only method using Scoop.
Written by human for humans
Here at Koofr, we love the command line. We've long been raving about rclone, software that lets you swiftly manage, backup, and encrypt your remotely stored files - and more. Once you're accustomed to using the command-line interface to get things done, the mouse can start feeling like a drag (pun intended).
In this article, we've prepared a guide to get started working with Koofr by command line. You'll be using the Scoop command-line installer to set everything up, so a few commands is all you need to enter and you're good to go.
Using Scoop can really simplify your command-line processes and ease you into it if you're just getting started with using commands. One notable advantage is that you can use programs like rclone without having to specify the path where the program is installed first. It just makes for a smoother experience and saves you a lot of time, since you don't have to manually download any separate installers.
1 Install scoop with Windows PowerShell
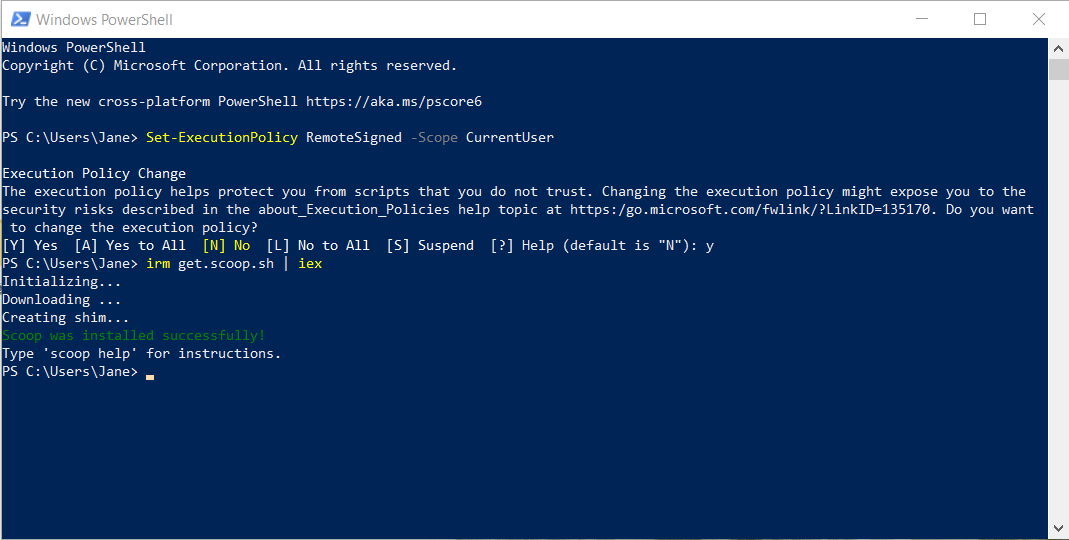
Start by opening Windows PowerShell. If you haven't run a remote script before, start with the following (or skip this step if you have):
Set-ExecutionPolicy RemoteSigned -Scope CurrentUser
To install Scoop, run:
irm get.scoop.sh | iex
Installing Scoop will automatically create a directory for programs you install with it. The path should be ~\Users\YourUsername\scoop\shims.
2 Install rclone
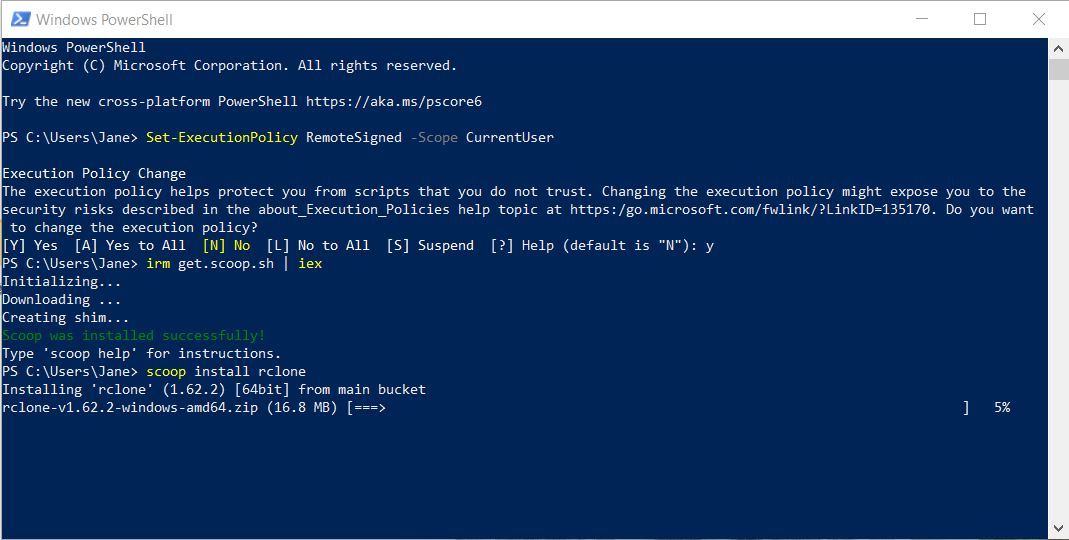
Once Scoop has been installed, you can move on to installing rclone. Run:
scoop install rclone
General note for using rclone with Koofr: Do not use --copy-links option with rclone when copying or syncing files to Koofr, since you might end up infinitely uploading your files over and over again if a cycle in the filesystem is induced by your symlinks or junction points.
2a Install WinFsp to enable mapping as a network drive
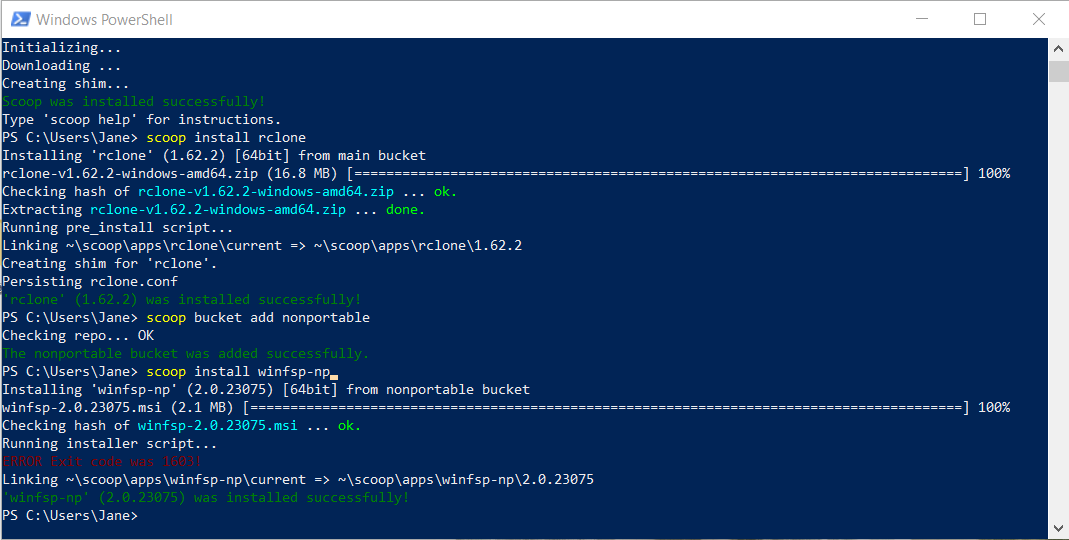
If you want to use rclone to map your Koofr account as a network drive, you'll also have to install WinFsp. You can use Scoop for this too. First, add the nonportable bucket to Scoop:
scoop bucket add nonportable
Next, run:
scoop install winfsp-np
You've now installed everything you need to configure a connection to Koofr in rclone. At this point, you can switch to your preferred command-line interface or just continue with Windows PowerShell.
3 Configure a remote for Koofr in rclone
Open the rclone configuration wizard by running the following command:
rclone config
NOTE: In some command-line interpreters like cmd, you need to specify the location of the program you're running. If you install your programs with Scoop, this isn't something you need to worry about. Yay!
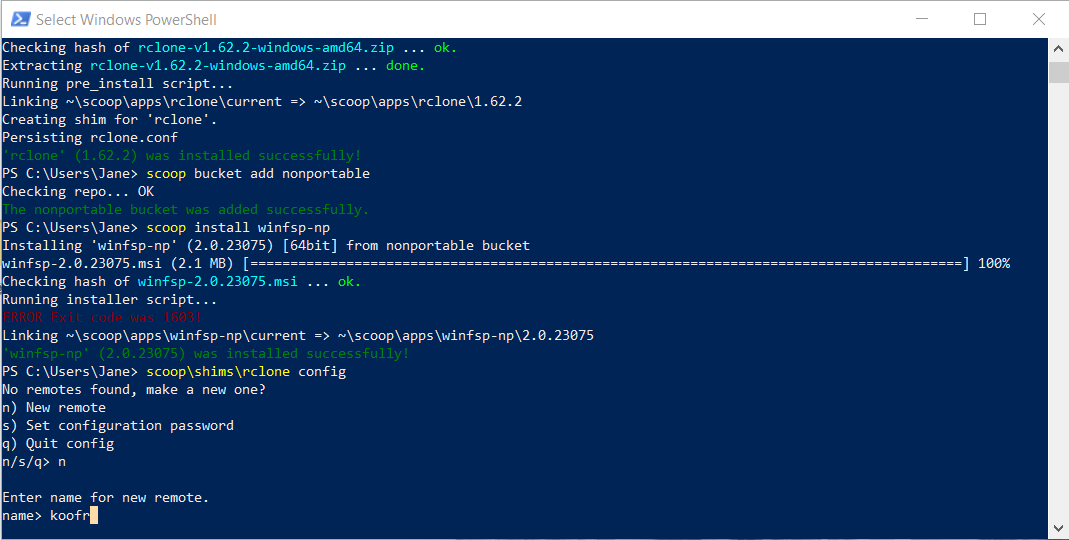
Follow the configuration wizard to set up a new remote. First, you'll give a name to your new remote - we recommend just 'koofr' for the sake of simplicity, but you can use whatever suits you.
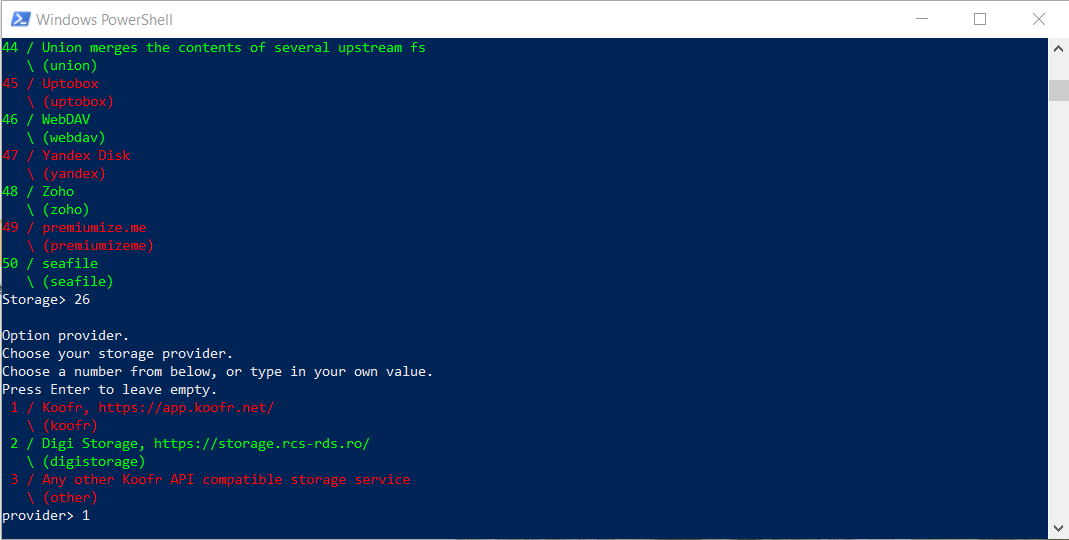
You'll need to choose Koofr from the list of offered services, then enter your credentials so rclone can access your account. Instead of your main password, make sure you use an application-specific password that you can generate in your Account Settings, under Preferences (open the Password tab on the left, then scroll down to App passwords). Watch video tutorial for creating app-specific passwords.

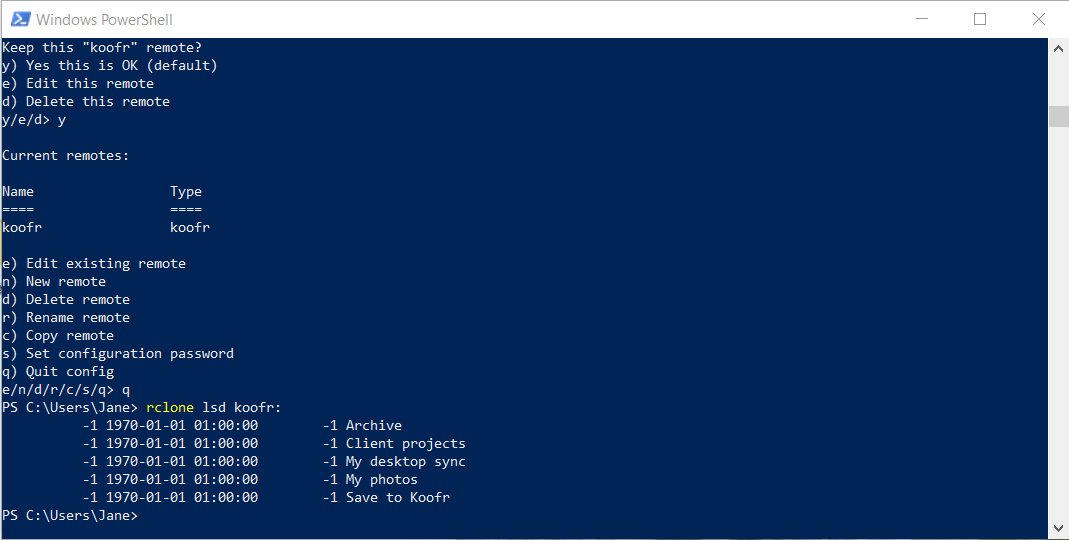
Once you've configured your Koofr remote, you can test the connection by using the ls or lsd commands to list all the files or folders in your Koofr account, respectively. Assuming you named your Koofr remote 'koofr', run either of the following:
rclone ls koofr:
rclone lsd koofr:
For a more in-depth walkthrough, you can read our guide to rclone basics or watch our video tutorial.
4 Map Koofr as a network drive with rclone
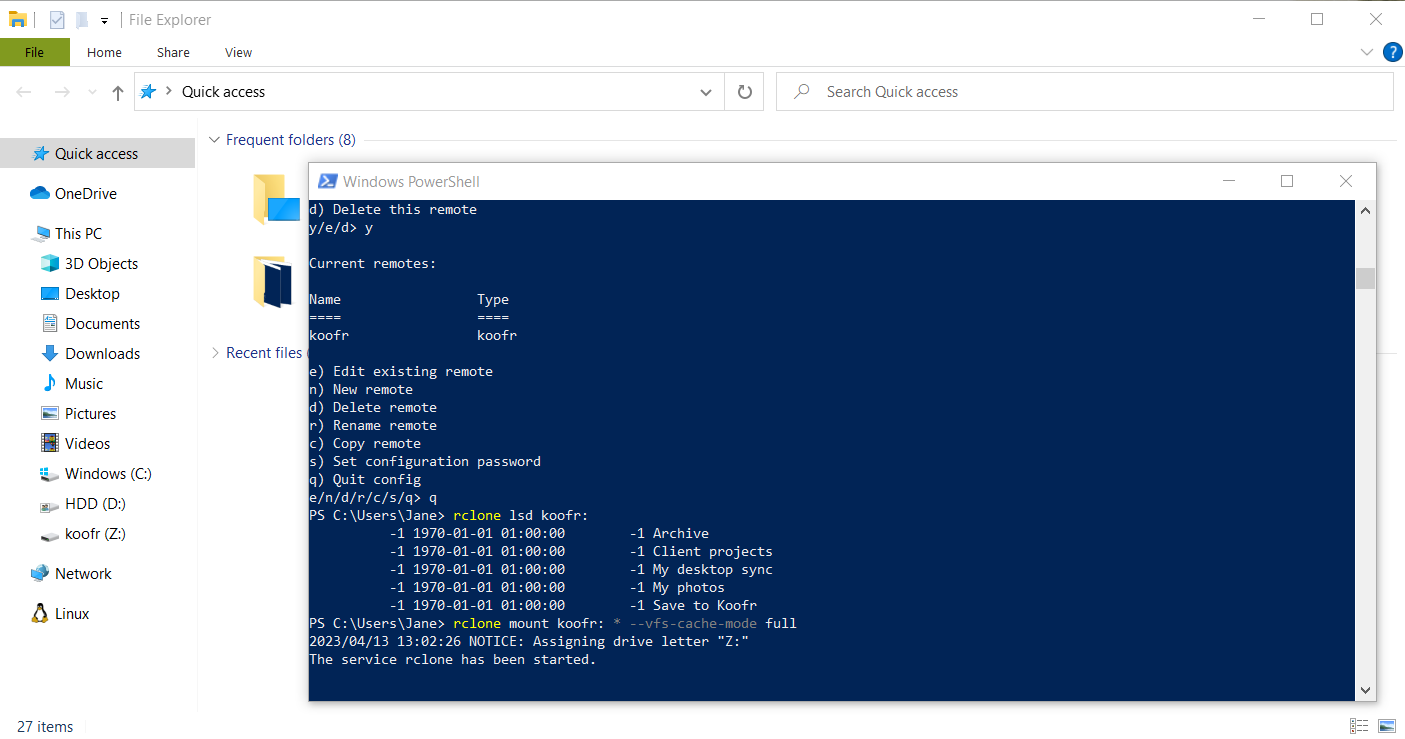
Once your Koofr remote has been configured successfully, you can now map Koofr as a network drive using rclone mount.
Run the following command to map Koofr to the next available drive letter:
rclone mount "koofr:" * --vfs-cache-mode full
You can specify a drive letter by substituting the asterisk, like this:
rclone mount "koofr:" K: --vfs-cache-mode full
You can also map subdirectories in your Koofr account to custom paths on your computer, like this:
rclone mount "koofr:/your/subdirectory/" "~\local\directory" --vfs-cache-mode full
For cases like this, keep in mind that you are mapping to a nonexistent subdirectory. So in this example, the '~\local\' parent directory exists, but its child 'directory' will be created by rclone.
More detailed instructions for mapping Koofr as a network drive with rclone are available in our previous post Learning the basics of Koofr with rclone and in our video tutorial Map Koofr as a network drive with rclone | Windows, Mac, Linux.
5 Create a client-side encrypted folder with rclone
While you're on a roll, why not create an encrypted folder as well? Any encrypted folders created in rclone can also be accessed in Koofr Vault, and vice versa!
First, set up a new, encrypted remote. Run rclone config, choose New remote, then choose the Encrypt/Decrypt option when creating a new remote.
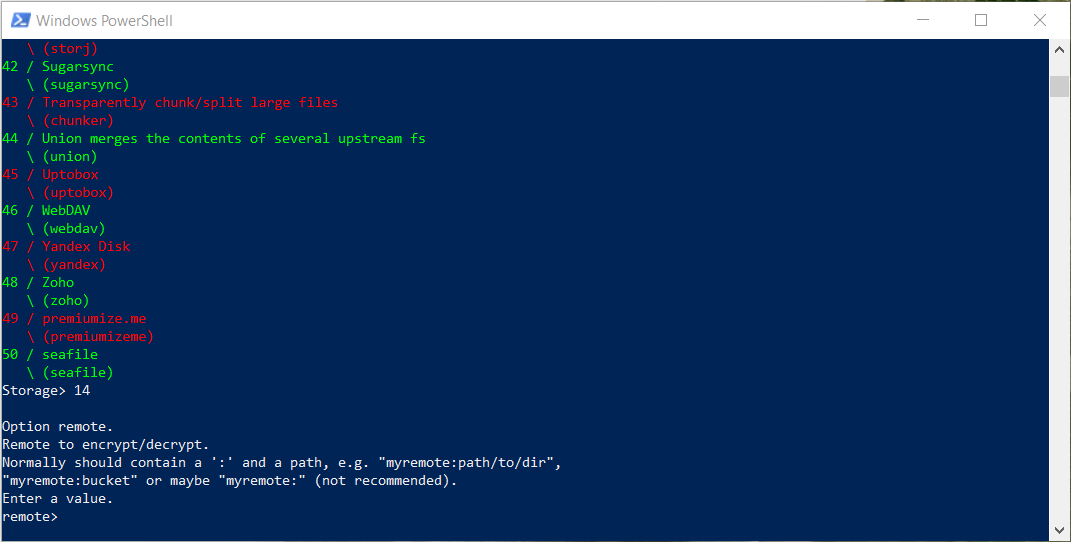
Using this option will create a new crypt remote, which works on top of your basic remote. The wizard will guide you through the process. To create an encrypted folder named "encrypted", enter the following when prompted:
koofr:/encrypted
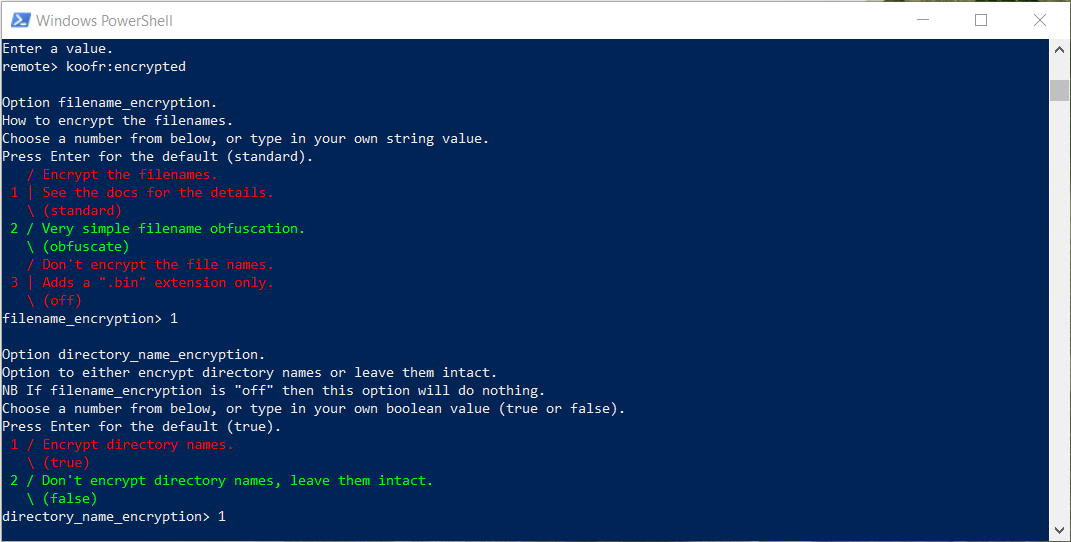
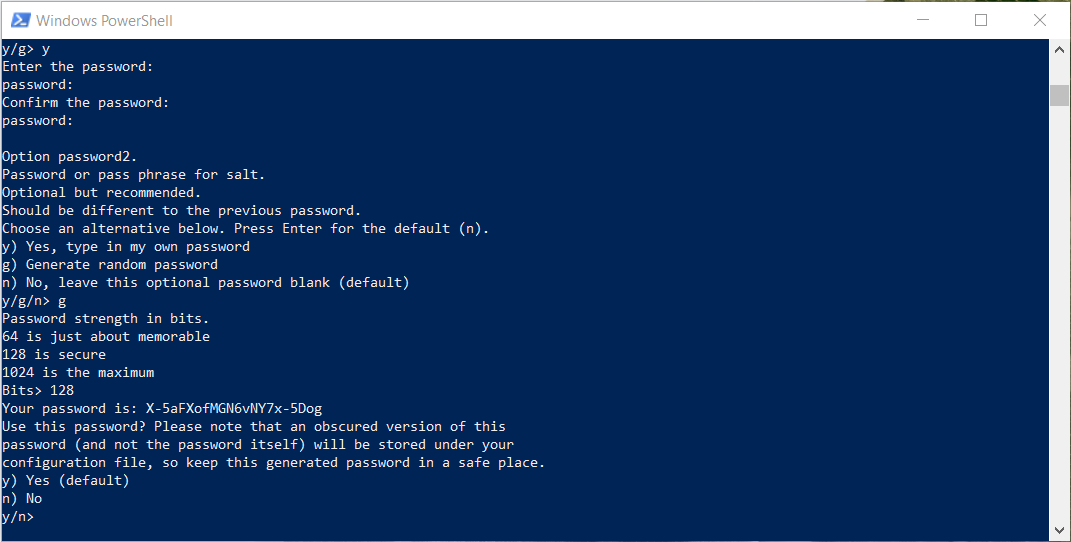
Next, you'll be asked whether to encrypt the filenames and directories contained in your new encrypted folder, and we recommend you set both to standard and true, respectively. You'll then set or generate a main encryption password (which is the same as your Safe Key in Koofr Vault) and a password for salt (called Salt in Koofr Vault). If generating, we recommend choosing at least 128-bit strength.
You can mount or map the encrypted folder as a network drive just like any other remote using the steps described earlier. The mapped folder on your computer will display the contents unencrypted.
See our in-depth guide for client-side encryption with rclone.
Note: rclone and Koofr Vault are interchangeable! You can access any Safe Boxes previously created in Koofr Vault.
Extra: Set up a backup with restic
Now that you've gotten used to Scoop and the command-line, you can go ahead and set up a backup to Koofr as well. To do this, we'll install restic, a program that allows you to back up your files to Koofr and other file storage media, local or remote.
scoop install restic
Once installed, you'll prepare a new repository for your backups. We recommend you create a dedicated folder for your backup repository. To create a folder called Restic backups in the root folder of your Koofr account, enter the following command:
rclone mkdir koofr:"Restic backups"
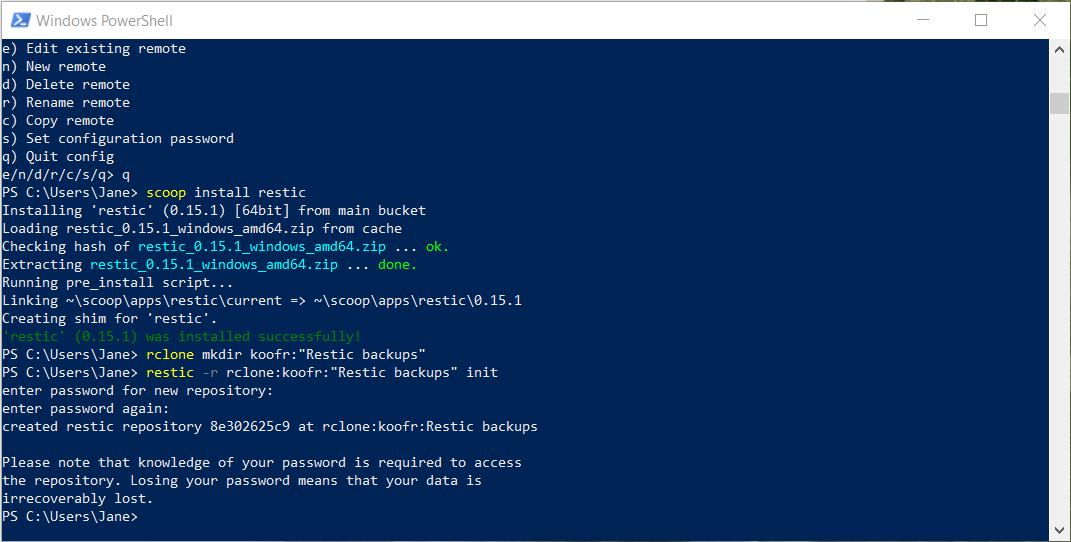
Restic uses rclone to perform operations in your Koofr storage account. To initiate a new repository, run:
restic -r rclone:koofr:"Restic backups" init
Next, you'll be asked to choose and confirm a password for your new repository.
After setting up a repository, you can now create a new backup. Let's say we want to backup the Pictures folder on our computer to Koofr using restic. Here's the command you would use:
restic -r rclone:koofr:"Restic backups" --verbose backup C:\Users\username\Pictures
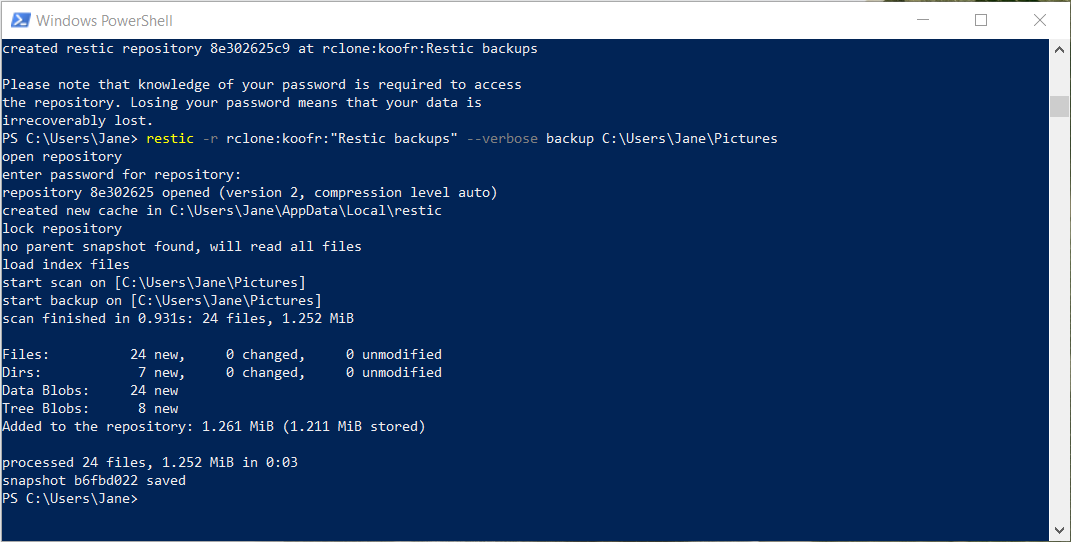
You've now successfully created a backup and saved the first snapshot. Use the same command whenever you want to create a new snapshot. Restic only records changes from the previous snapshot, which saves both time and storage space.
For instructions on how to restore a backup with restic and more fleshed out instructions, see our previous blog post about restic.
Curious to know what else you can do with rclone? It is wonderfully documented, so head over Rclone and read up.
Are you using the command line to access your files on Koofr? Join our growing community on Reddit and tell us all about it!