

Easily backup your files from a Mac computer to Koofr with Duplicati
If you’ve ever lost an important file, you already understand why backups matter. If you’re a macOS user, don’t miss this simple step-by-step guide that shows you how to backup your Mac to Koofr using Duplicati over WebDAV protocol. Happy backing up!
Written by human for humans
Are you backing up your data regularly, or are you still putting it off? Do you have a proper place to store your backups? Koofr can help! We’ve put together a simple, step-by-step guide to back up your Mac to Koofr using Duplicati with the help of WebDAV.
So, what do I need to create a backup on macOS?
- A macOS computer.
- Files to backup - the stuff you don’t want to lose.
- Backup software. We will use Duplicati, which is an open-source backup solution with many features.
- Koofr account – a private and safe place to store your backup. Check out our affordable plans and never worry about lost files again.
For this article, the steps were done on a Mac. These instructions work the same way on Linux.
Welcome to Koofr. First 10 GB are free forever.
Lets prepare
Start by signing up for a Koofr account. Then, go to the Duplicati and click on Get started. You’ll need to sign up or log in, set up 2FA, pick your organization type, and decide how often you want to get reports. And don’t forget to accept Duplicati’s Terms of Service and Privacy Policy. If you already have an account, simply login and click on Get started in the left menu.
Then, download the correct installer: download the .dmg file to your computer and install it. Open and drag Duplicati into Applications. You’ll get a warning because Duplicati was not downloaded from the official App Store. Click on Open to confirm you are OK with opening it anyway.
Setup the backup
Open Duplicati by clicking on the Duplicati icon in the status menu (on the right corner of the screen). When you click on it and select Open, Duplicati will open in your preferred browser.
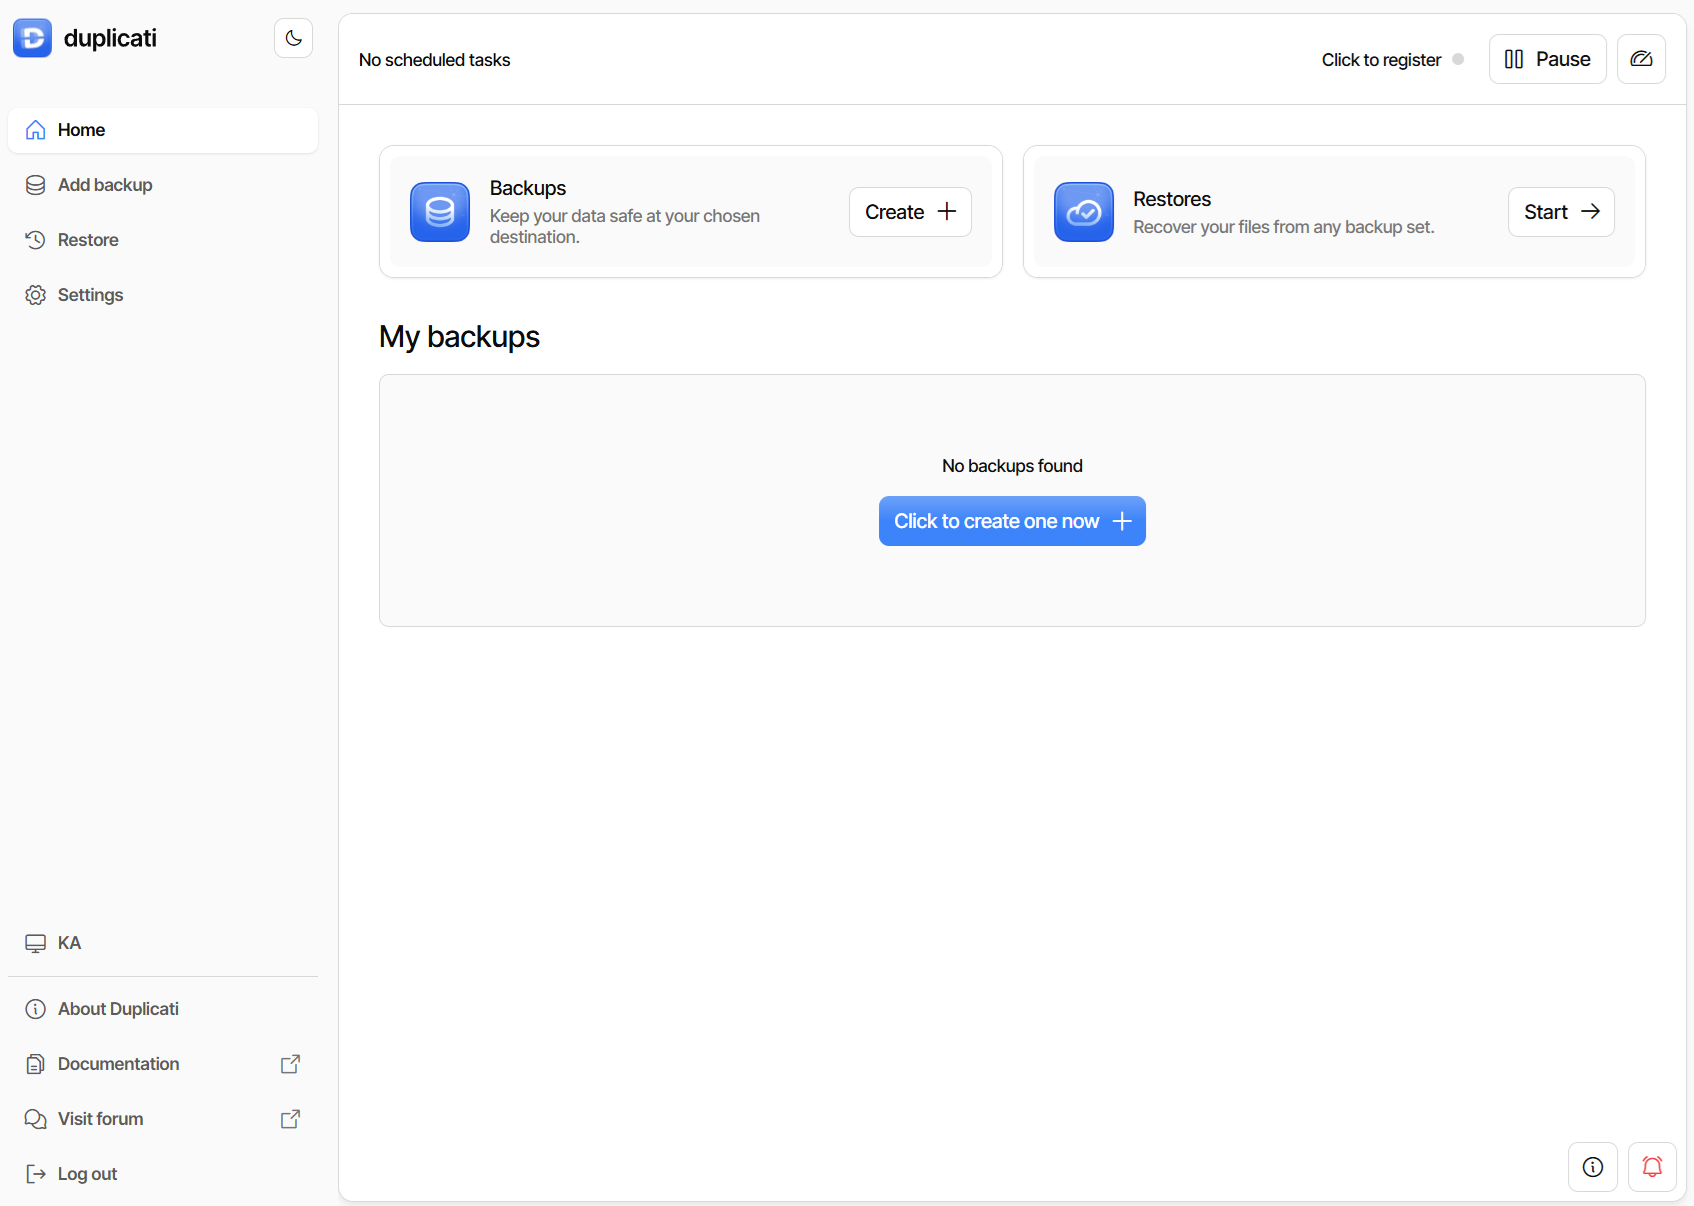
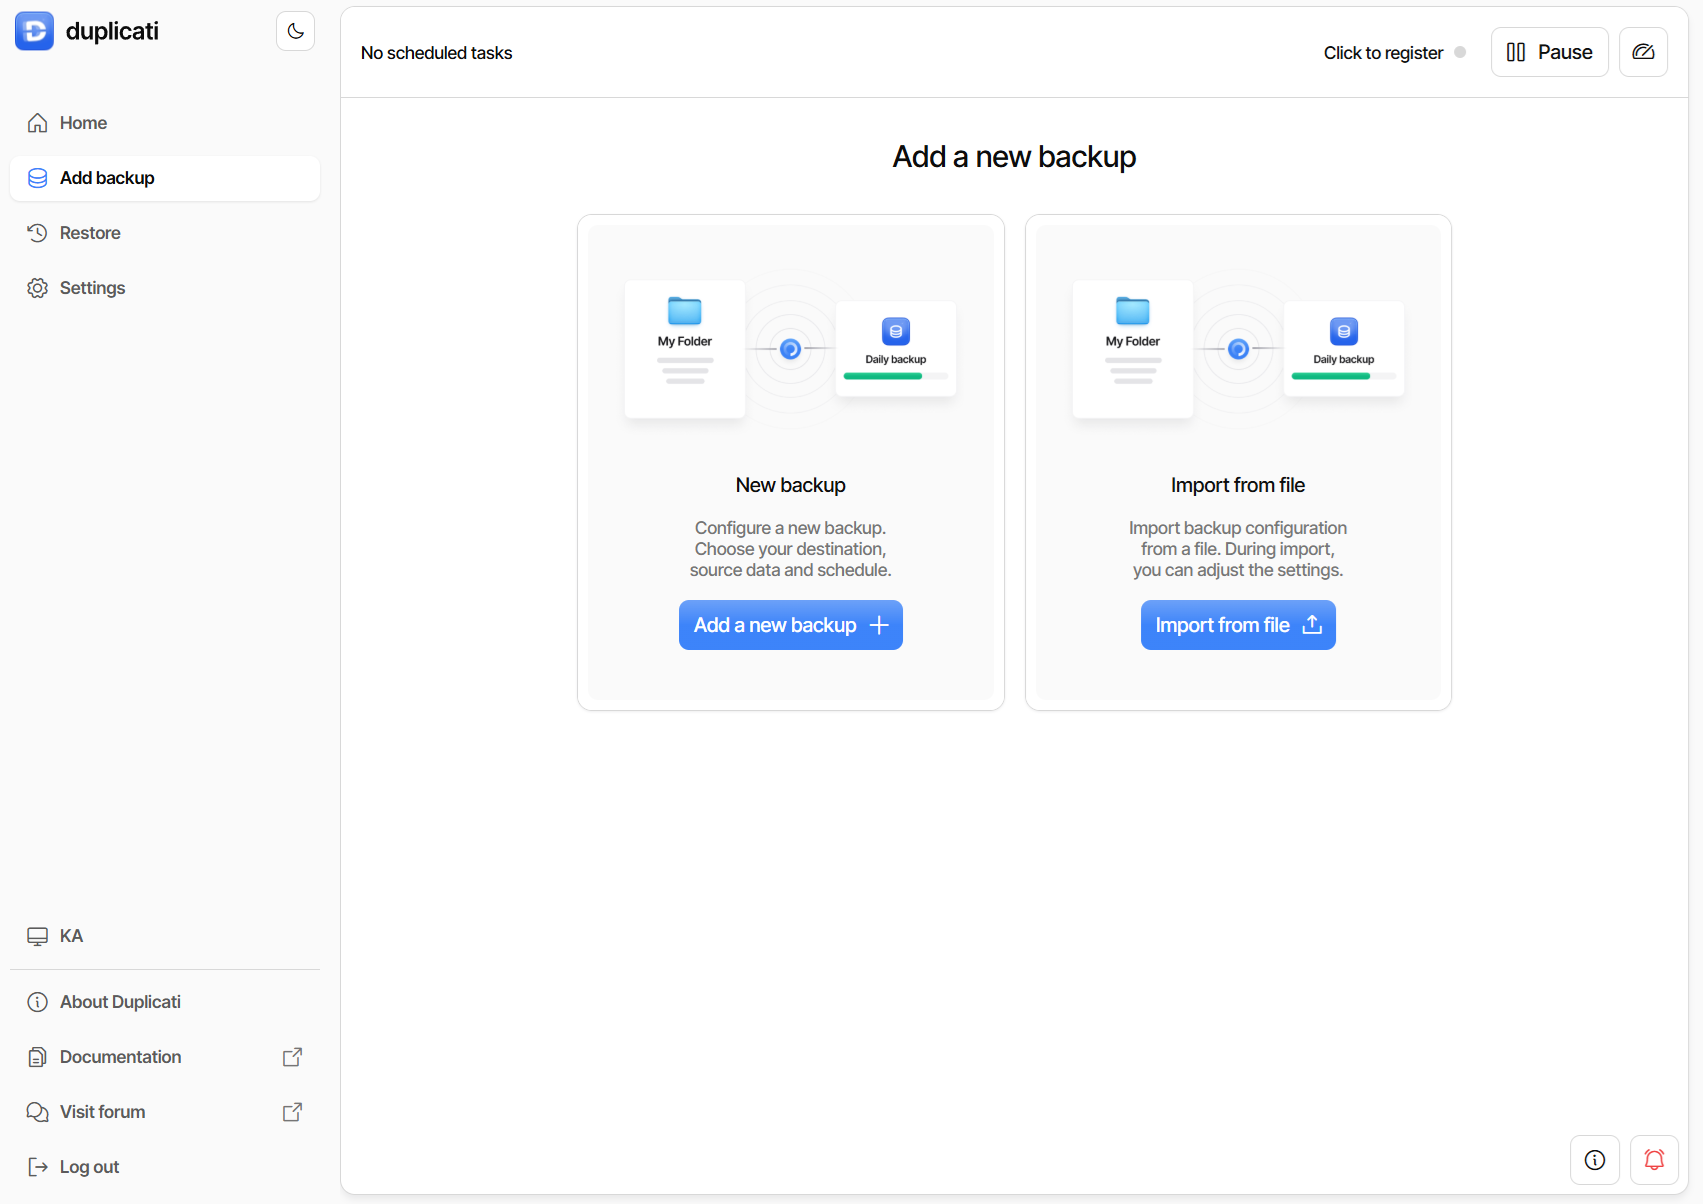
Select Add Backup from the menu on the left and then Add a new backup.
In the General backup settings, name your backup, choose an encryption type, and set a password. You can pick any name you like; we will use My Backup. After naming your backup, select the encryption type. We recommend keeping the default AES-256 encryption. In the final step, choose your password.
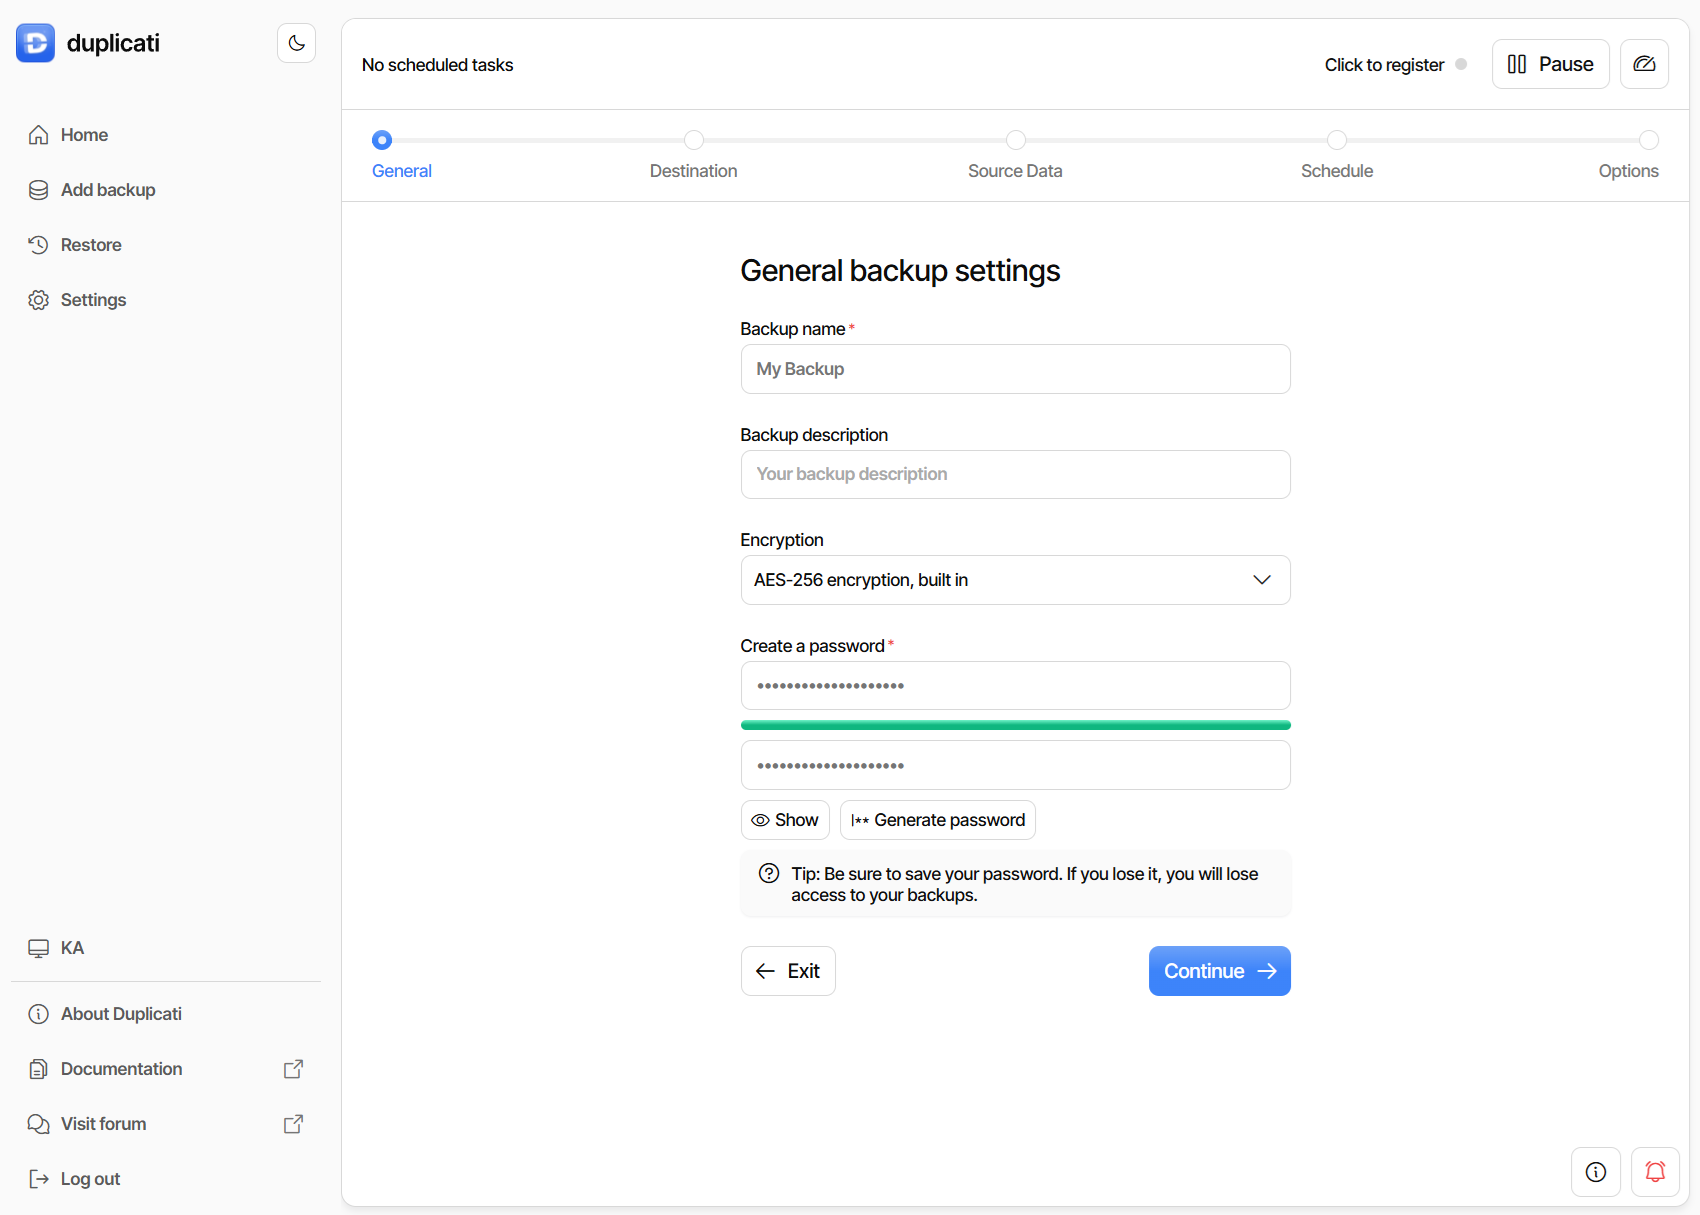
After setting your password, your data will be encrypted before it’s uploaded to the backup location. Make sure to choose a strong password and store it securely in a password manager. Remember, if you forget your password, there’s no way to recover your backup. When you’re ready, click Continue to proceed.
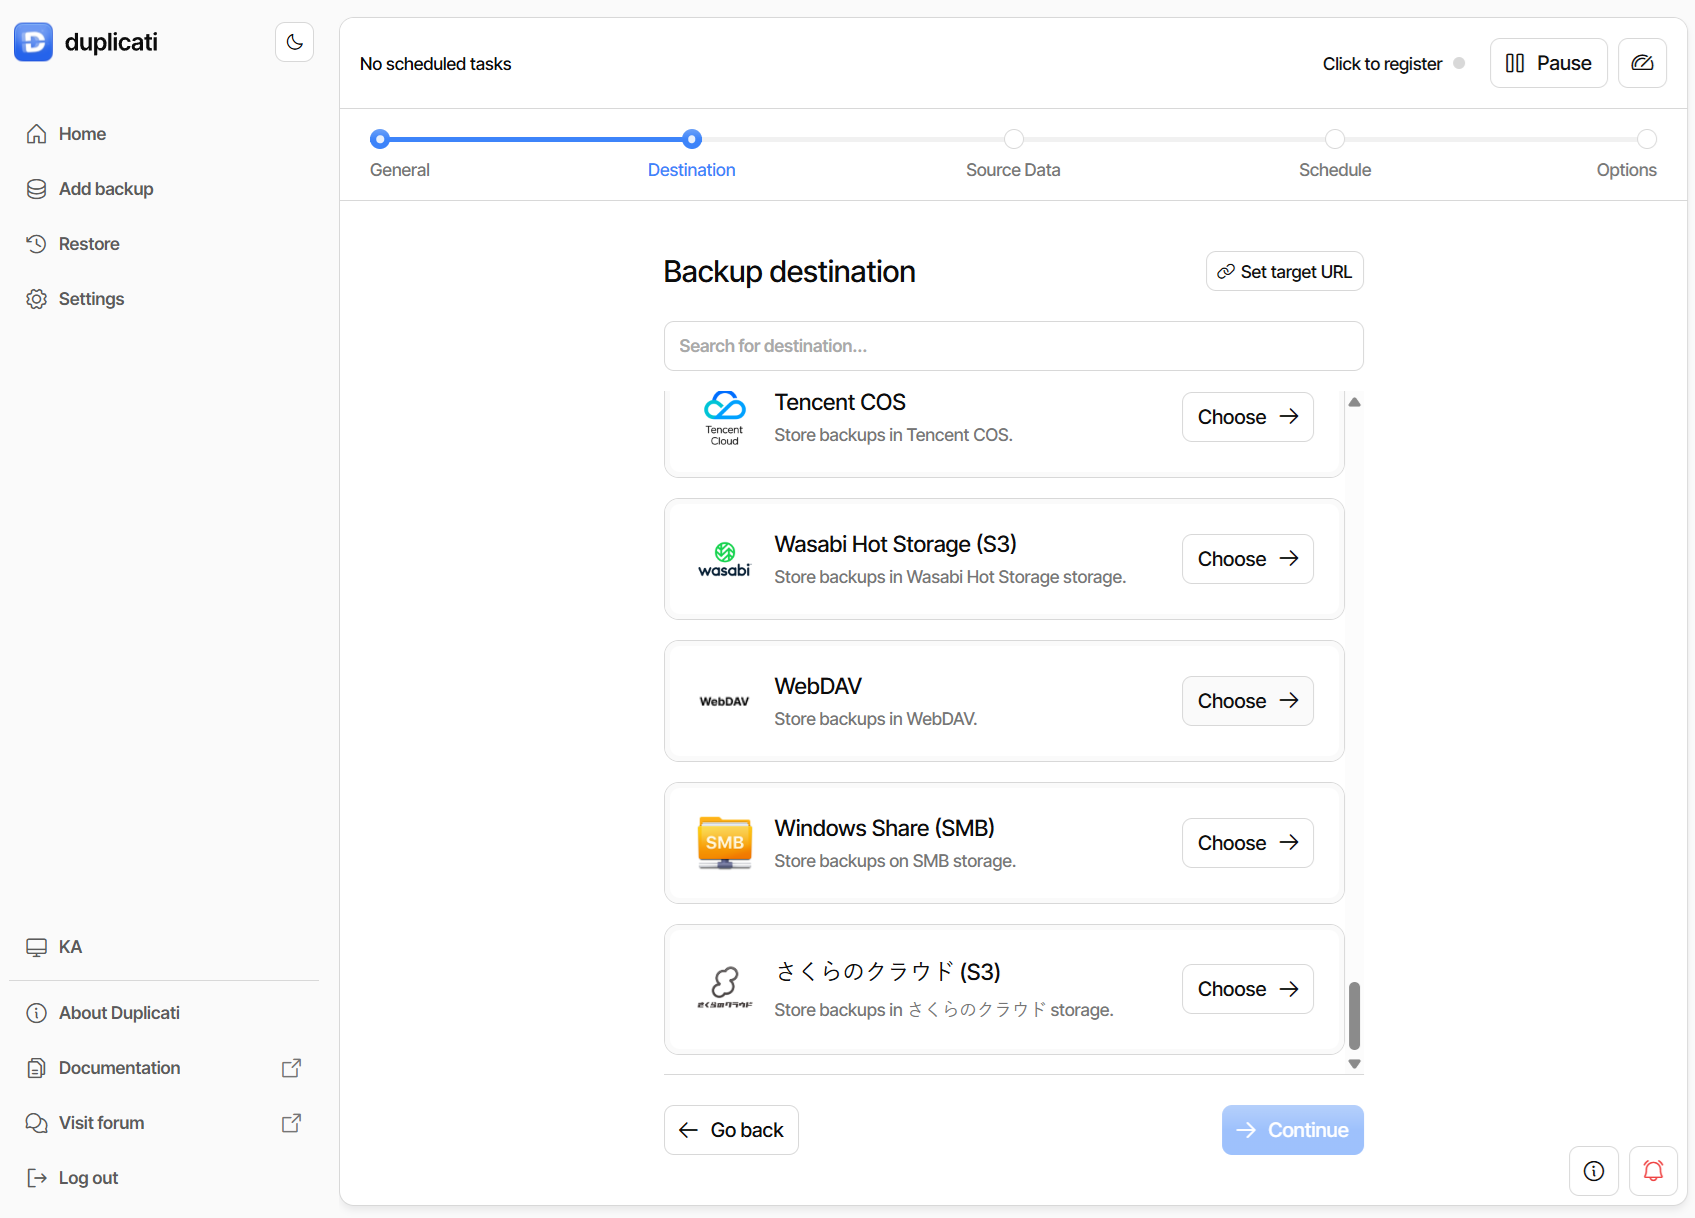
In the next step, choose your Backup destination - select WebaDAV from the drop-down list.
Moving on. In the Server field enter app.koofr.net and for Path on server enter dav/Koofr/My Backup. The path must start with dav/Koofr/ and the last part, in our case My backup, is the name of the folder where the backup will be stored. You can choose any folder, but here we’re using the same name as the backup we created in the first step.
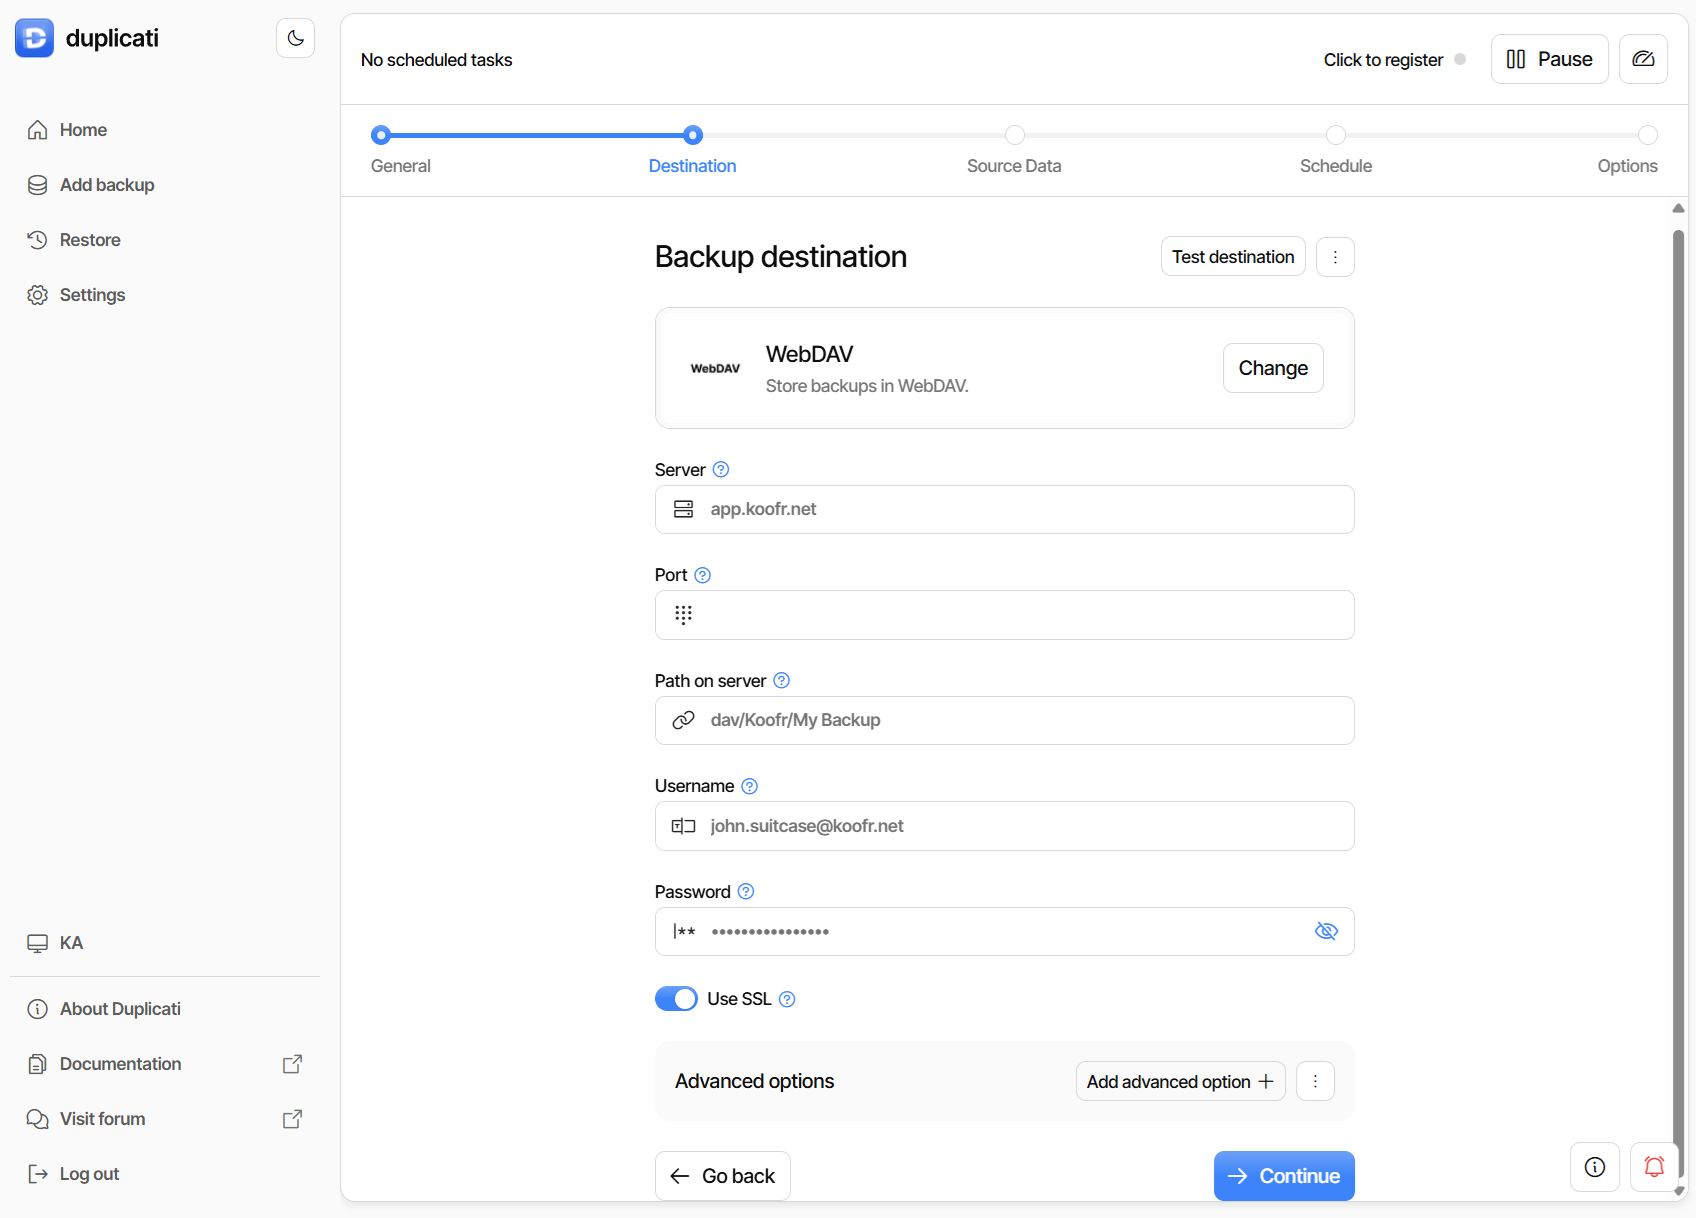
In the Username field enter the email you use to sign-in to Koofr.
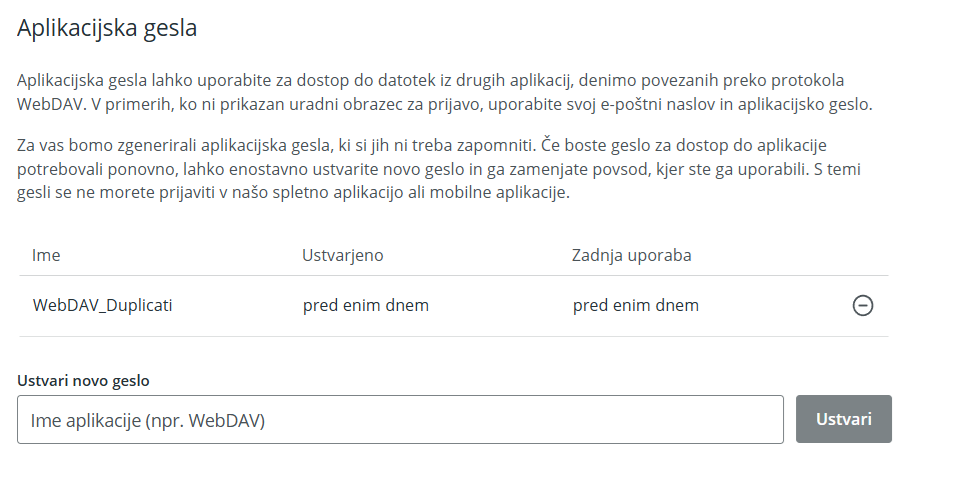
Then, open your Koofr account and generate a new application-specific password. Open Koofr Account menu, click on Preferences. Select Password from the left menu and look for App passwords, click into the Generate new password field, name the new password and click Generate. As shown in the picture below, we named our password WebDAV_Duplicati.
Enter this newly generated password in the Password field in Duplicati.
Finally, toggle the switch new to the Use SSL text.
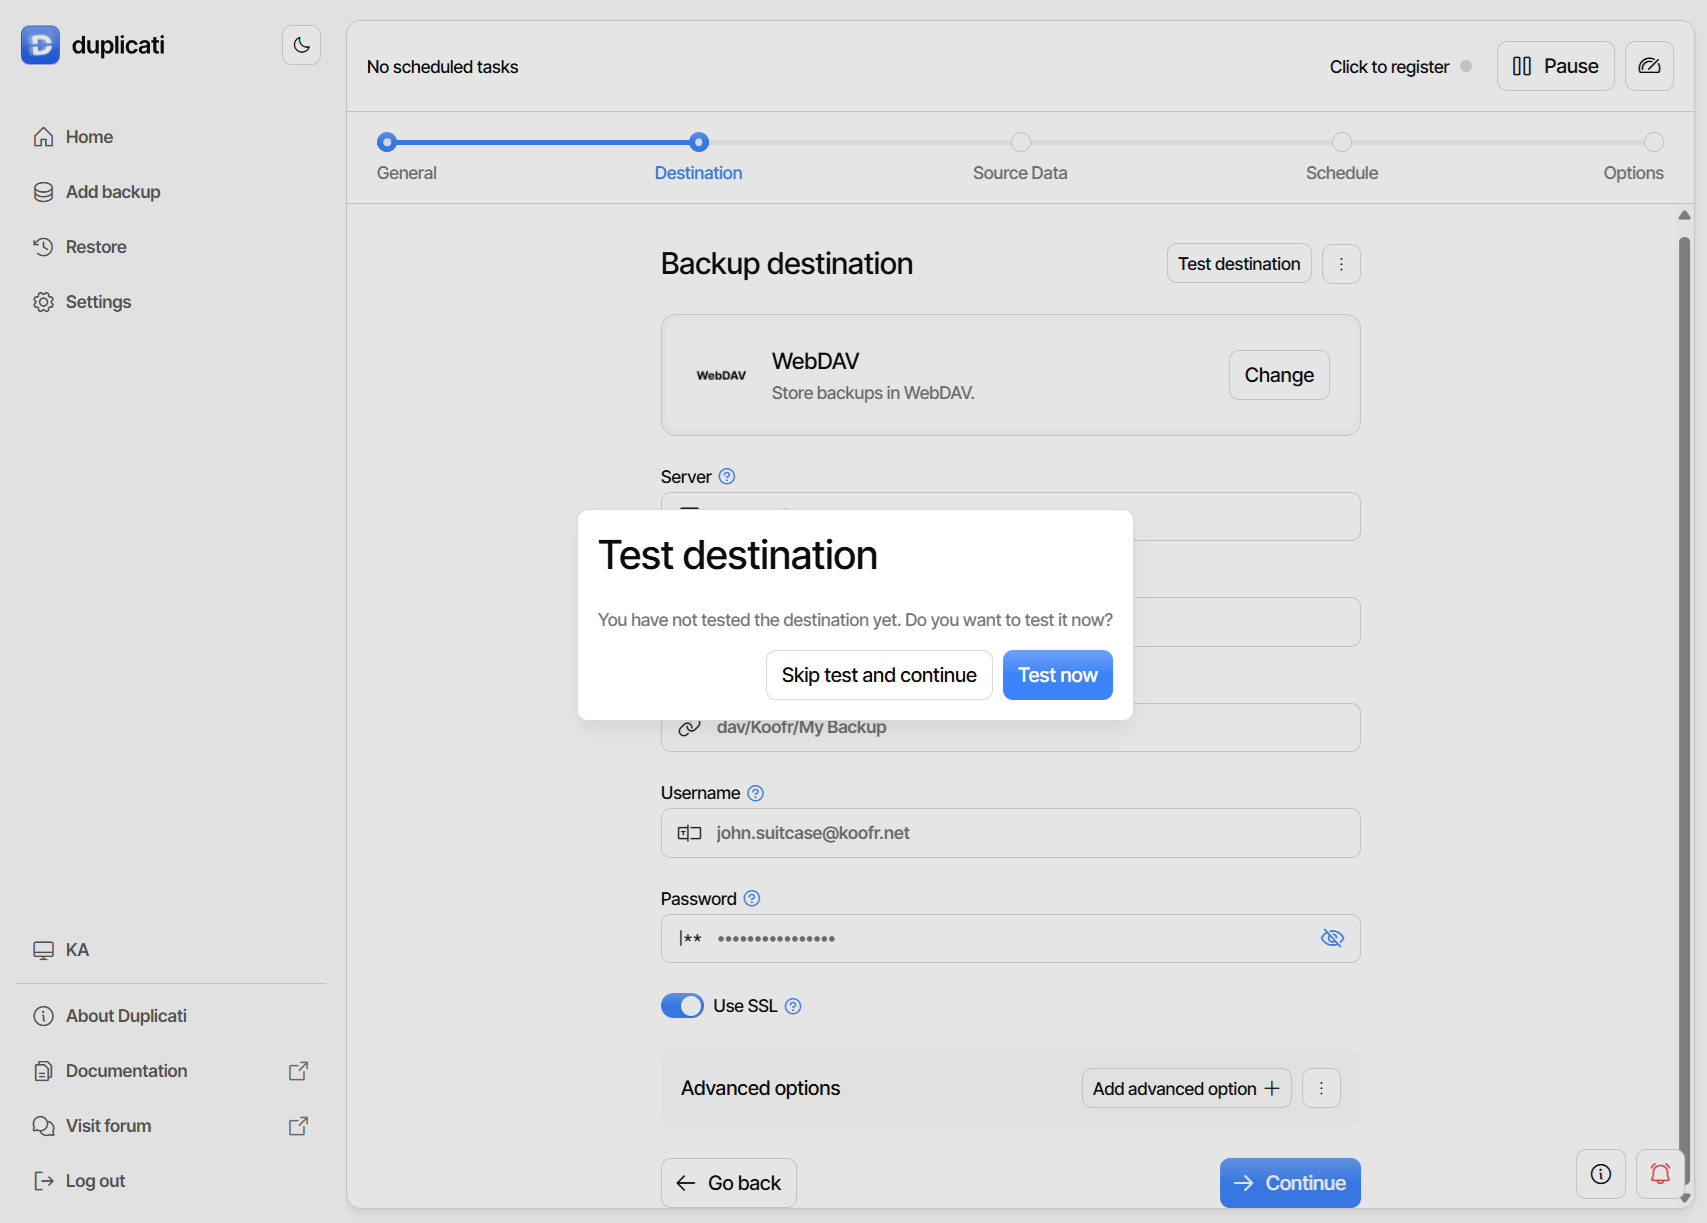
Once you've entered your username and password into Duplicati, click Continue. A new window will pop up, asking you for destination test. Click Test now.
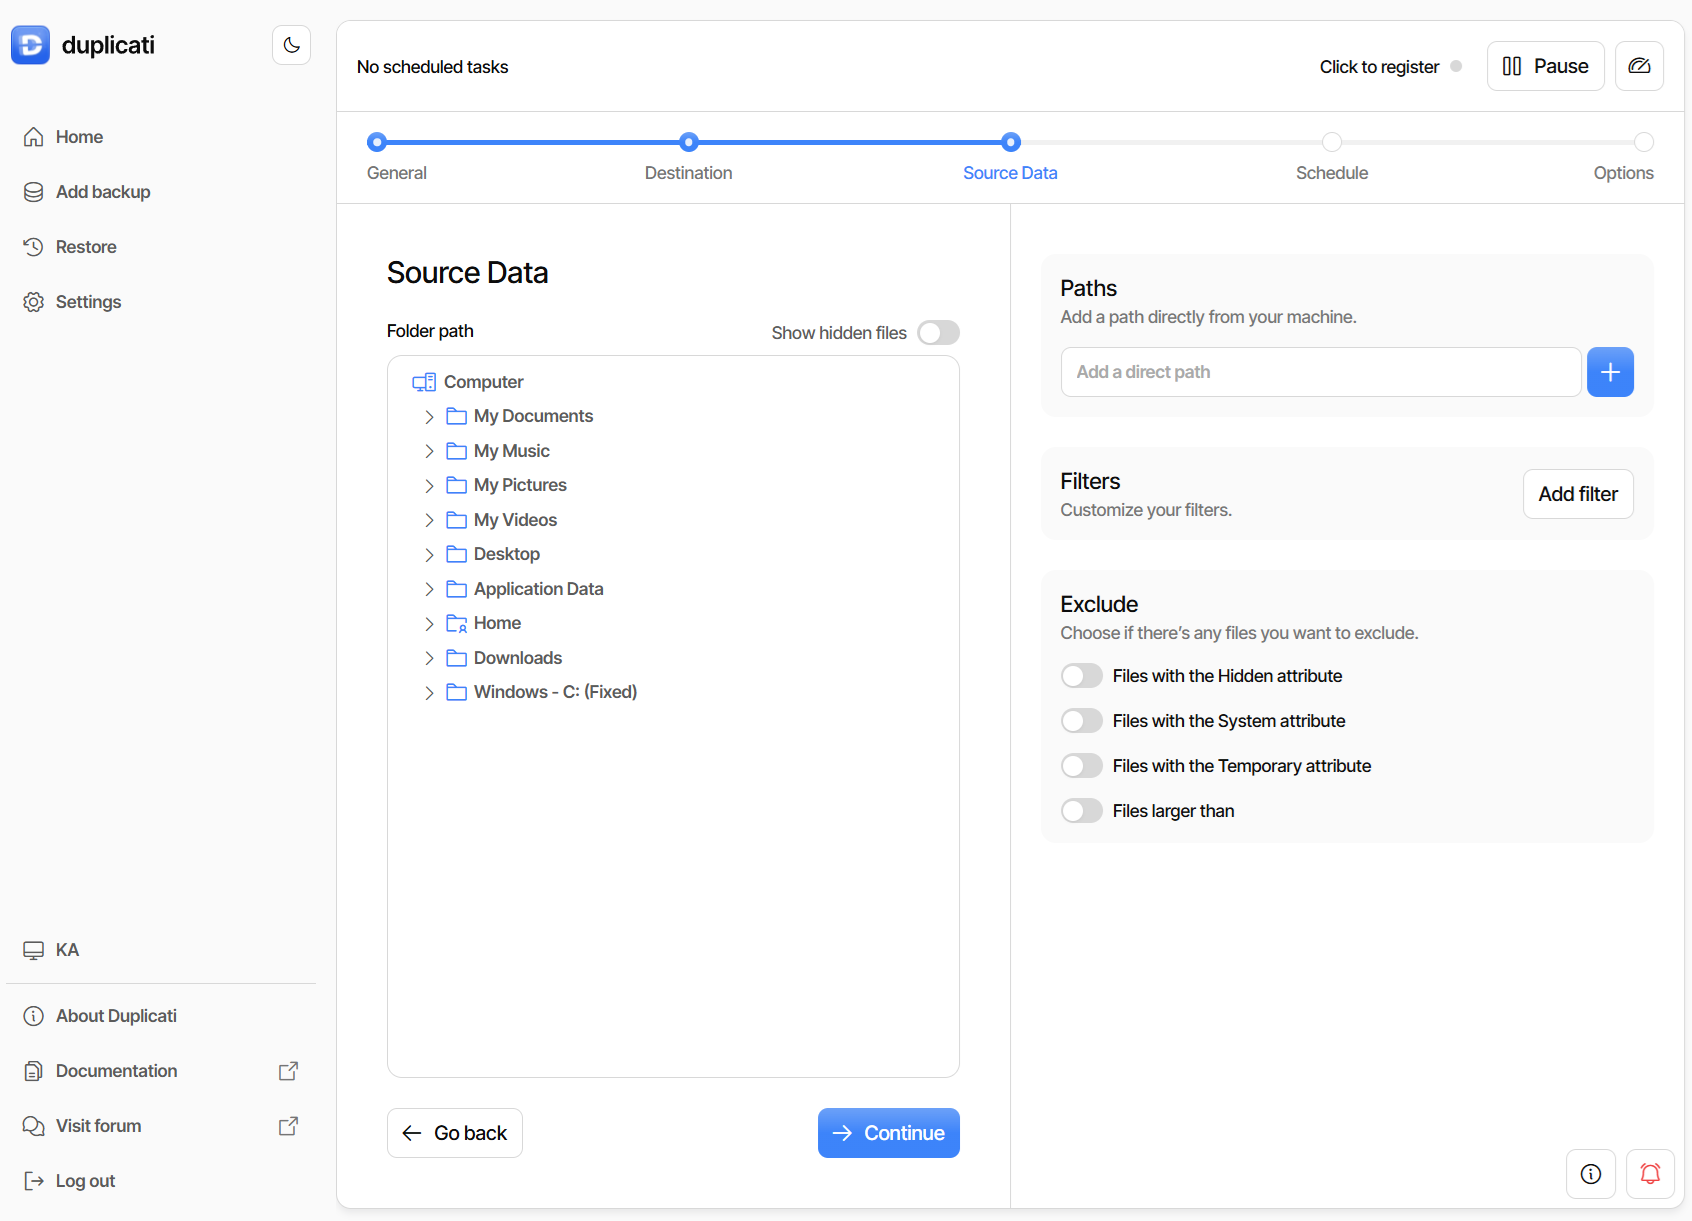
In the following step, you’ll select which files or folders you want to back up.
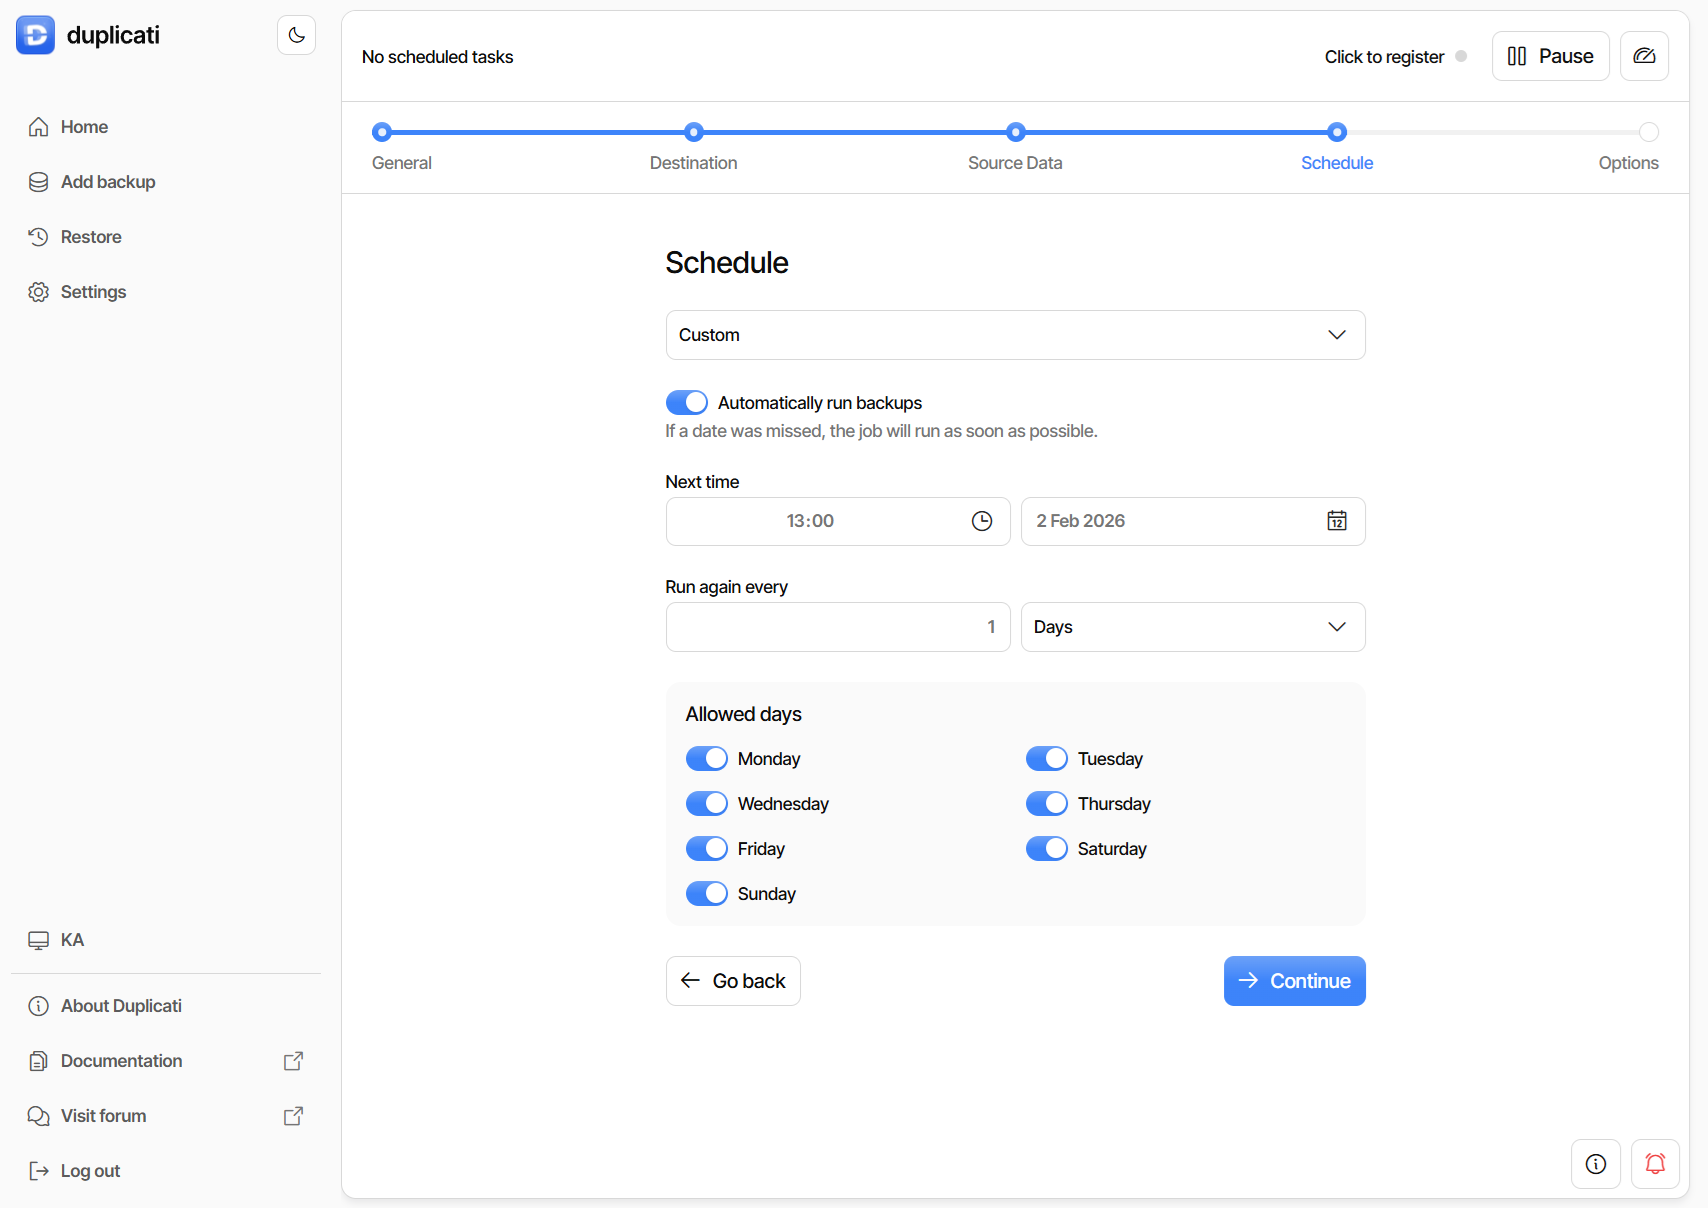
After choosing the files and folders you want to backup, click Continue. In the next step select time for backups. You can pick from Daily, Weekday, Weekly (Monday), or Custom. You can also opt not to run backups automatically. For this example, we choose Custom.
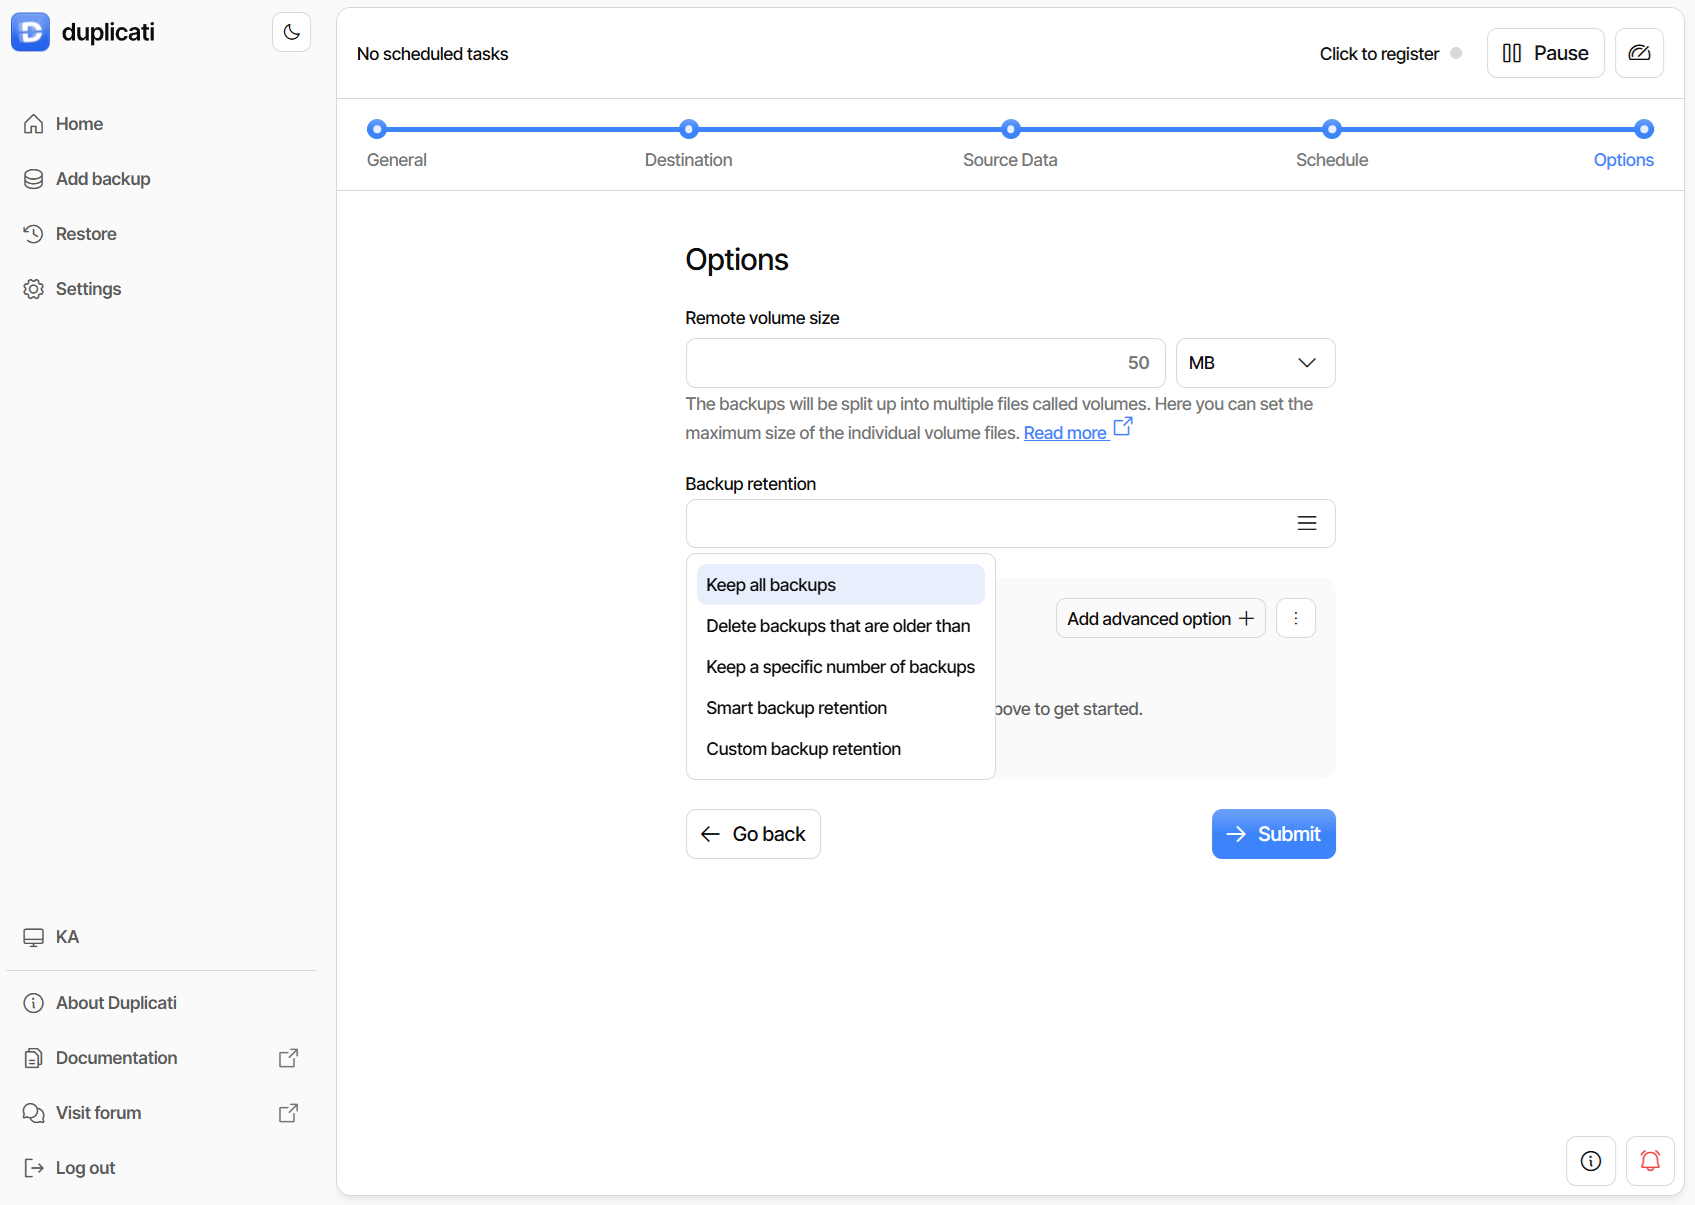
After clicking Continue, you’ll need to select some more options. As Duplicati uploads the backups in chunks, the upload volume size determines the size of a single uploaded chunk. The default of 50MB suits most home user connections, but you might want to lower this to a few MB if you are on a slow internet connection.
The last option determines how many backups will be kept on Koofr: the more backups you keep, the further back in time you can go when restoring your data. However, storing more backups will use more space on Koofr. For a home user, keeping two weeks of daily backups or three months of weekly backups is usually a good balance. You can also enable advanced options such as auto-cleanup, unittest mode, and others.
In the last screen, you are presented with a summary of the configuration. You can click on Start to start a backup now.
Check if everything went OK
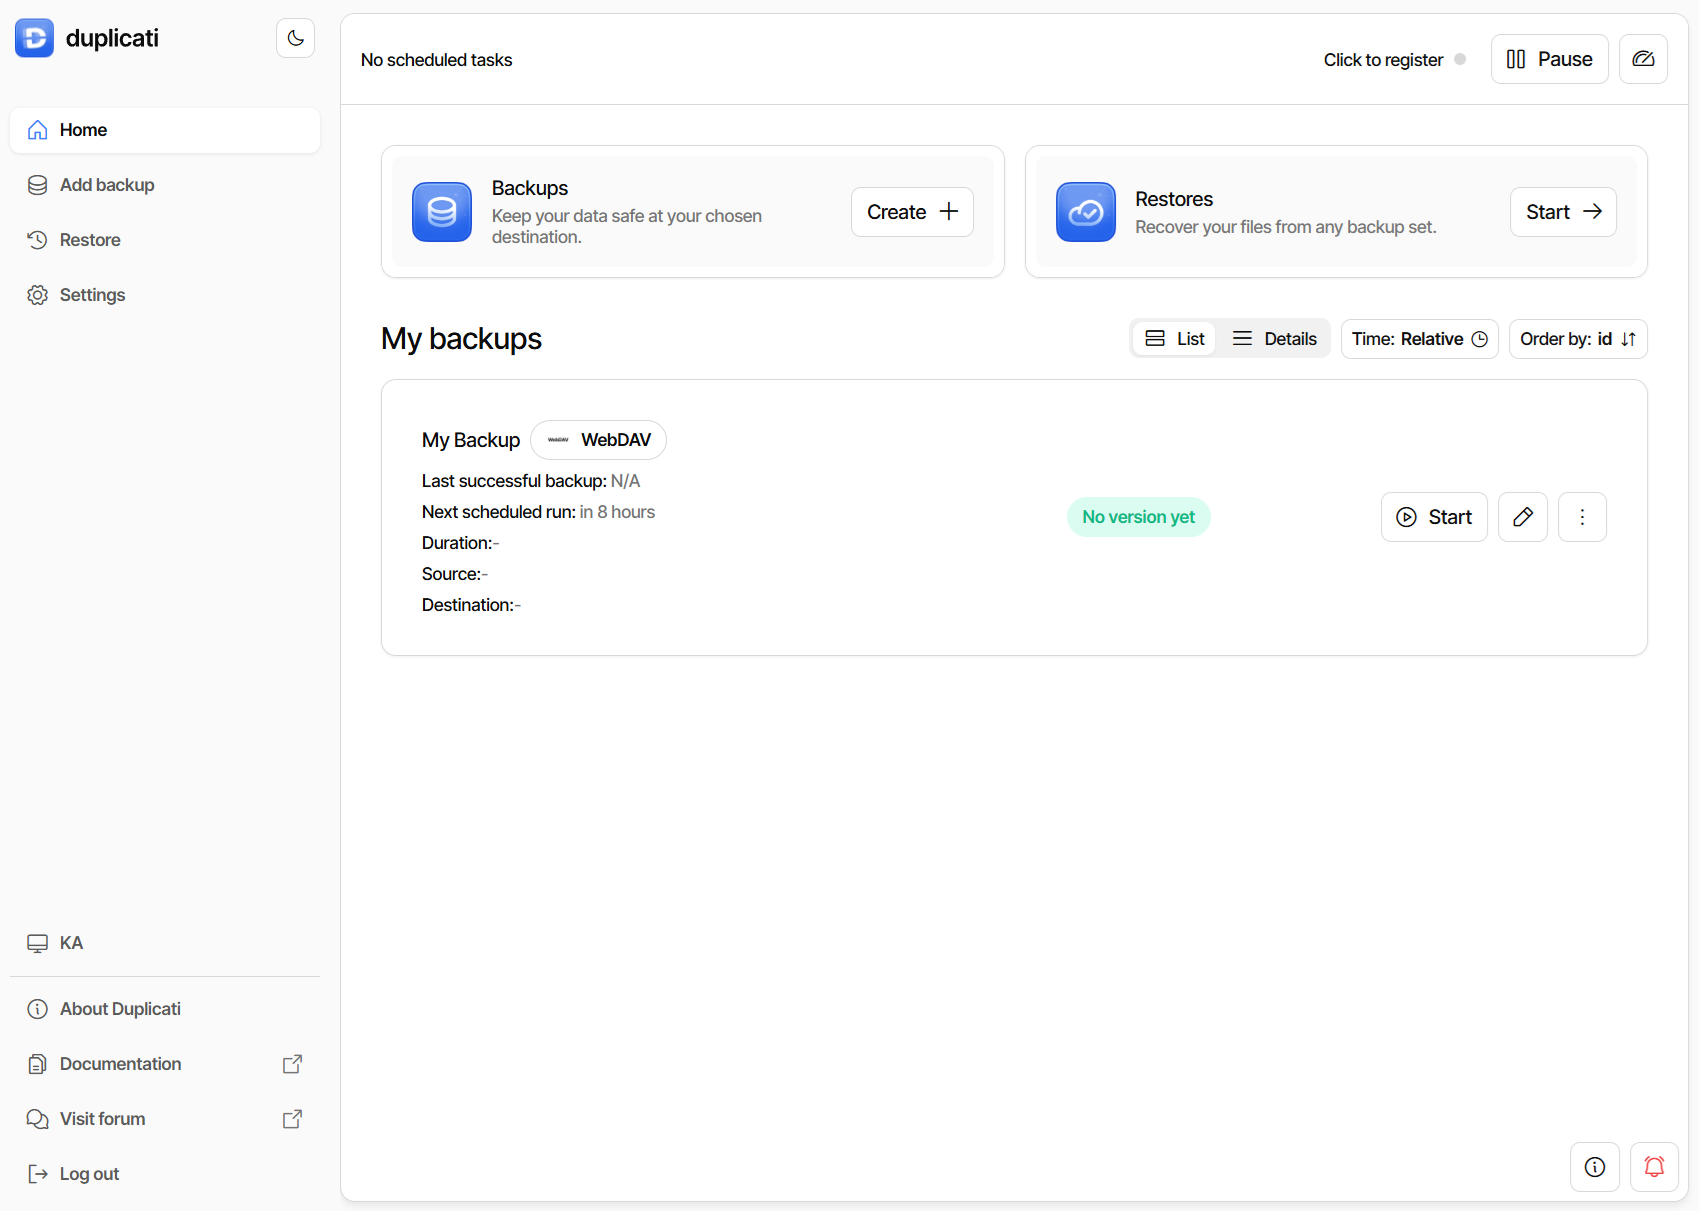
Let's just check if everything went OK. Click on Duplicati icon in the status menu (on the right corner of the screen). When you click on the icon, you will be redirected to the Duplicati application in your browser. When the backup completes, you will see a summary of a backup, along with the number of versions, possible warnings and errors.
You will also see an encrypted backup in the selected folder on Koofr.
And that’s it - we’re all set! Enjoy backing up with Koofr!
Stay safe. Backup your data with Koofr.
Editor's Note: This post was first published in 2019. We've updated and enhanced the content to improve clarity and detail. Whether you're revisiting or reading it for the first time, we hope this improved version offers an even better experience.
Want to talk to us? Join our growing Reddit community!