

How to backup your Ubuntu computer to Koofr
Creating a backup of your Linux PC has never been easier. A step-by-step guide on how to make a backup of your Linux PC to Koofr using WebDAV protocol through Déjà Dup Backups.
Written by human for humans
Given a good response from the previous post on how to back up Windows computer we are publishing instructions on how to back up your computer running Ubuntu or pretty much any other GNU/Linux distribution.
First, we will need to have a program called Déjà Dup Backups installed on our computer.
Déjà Dup Backups is a free, open-source program that and offers encrypted and compressed incremental backups to local, remote, and cloud locations like Koofr, runs on a schedule, integrates with GNOME, and is designed for easy recovery of accidentally lost personal files rather than full system or archival backups.
Welcome to Koofr. First 10 GB are free forever.
Open Terminal and write this command:
sudo apt-get install deja-dup
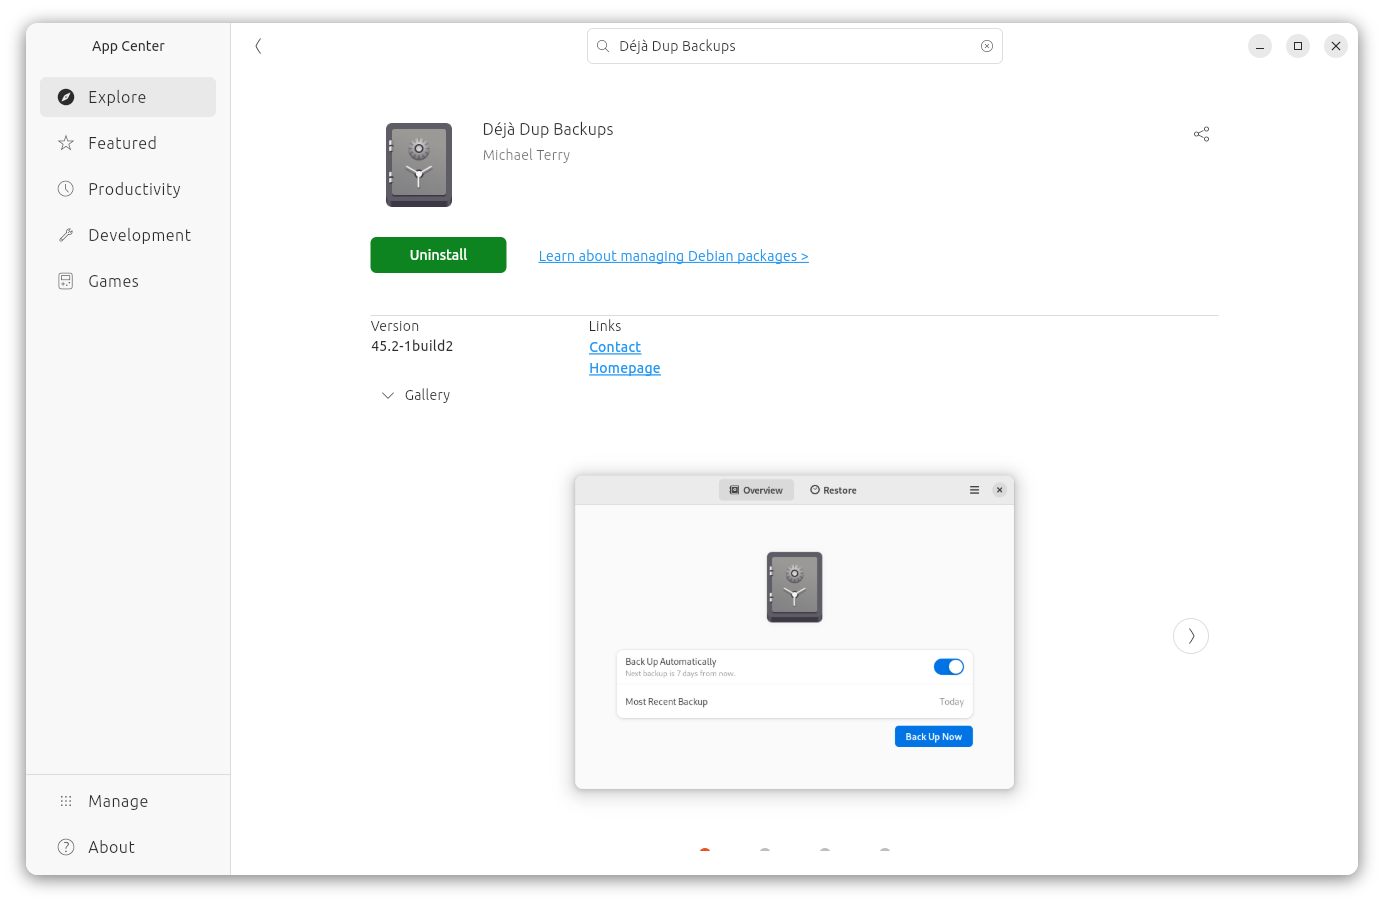
You can also install Déjà Dup Backups from App Center.
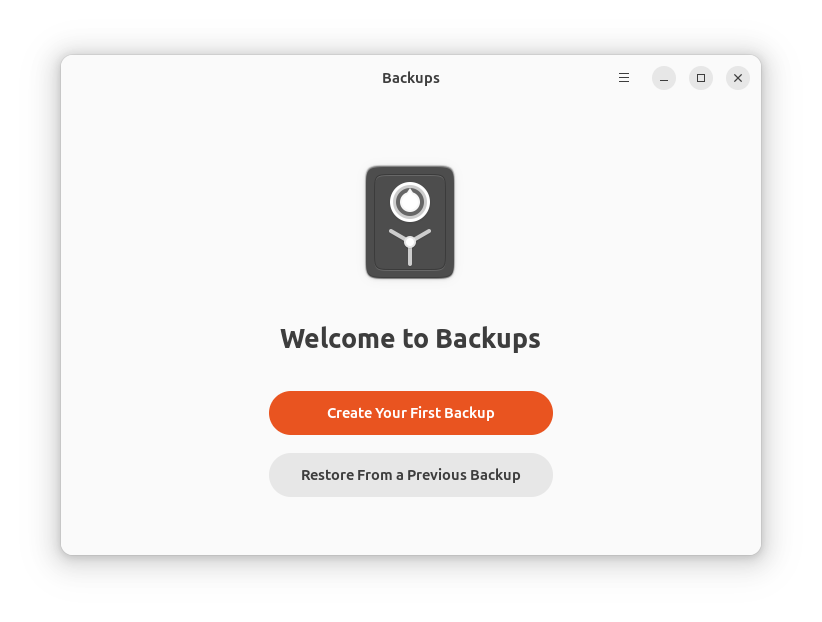
After installation, search for a program called Backup (or deja-dup) in your menu.
When you run it you will see this in its Overview window. Click on Create Your First Backup.
In the first step, choose folders to backup. Your Home directory is probably a good point to start. In the next section - Folders to ignore you choose which folders to exclude from backups, e.g. ~/Downloads and Trash are examples of folders you probably do not need to backup.
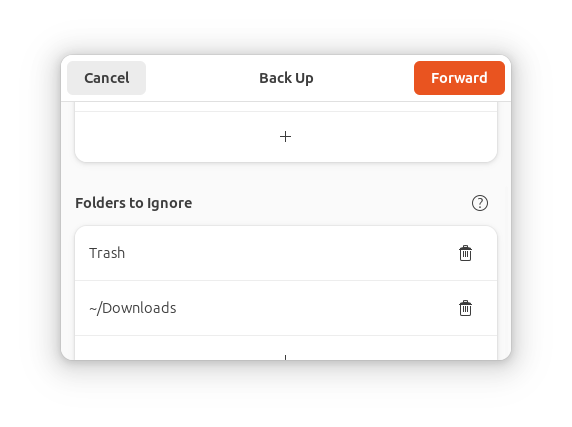
Click on Forward.
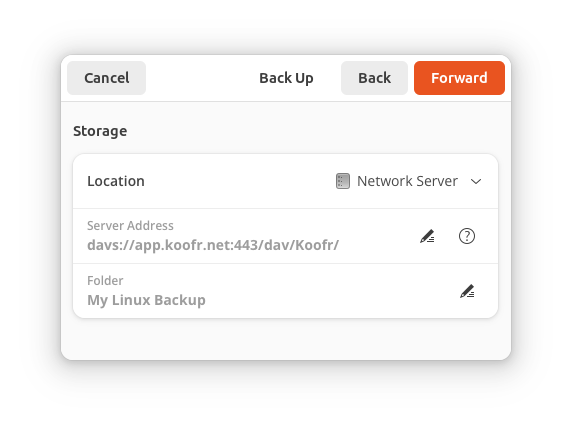
The fourth step - Storage is where the fun begins. Here you will have to choose Network Server as the storage location.
Type in davs://app.koofr.net:443/dav/Koofr/ into the Server Address field. The last part of the settings is the Folder name. We decided to name our backup folder My Linux Backup. Déjà Dup Backups will create this folder inside your Koofr account automatically.
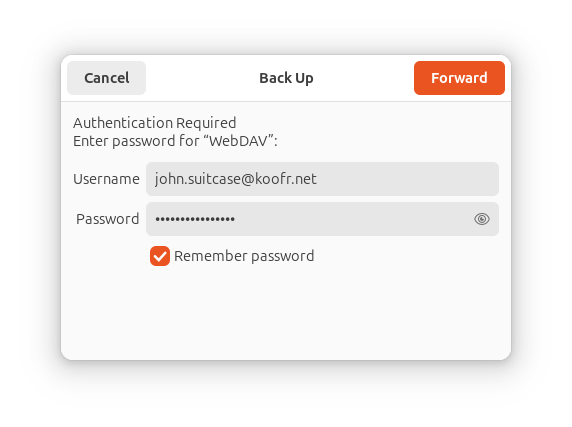
In the next step, you will be prompted for a username and password. Our video tutorial How to generate application-specific passwords for WebDAV connections can help you generate an application specific password needed in our case. Alternatively, follow the instructions below.
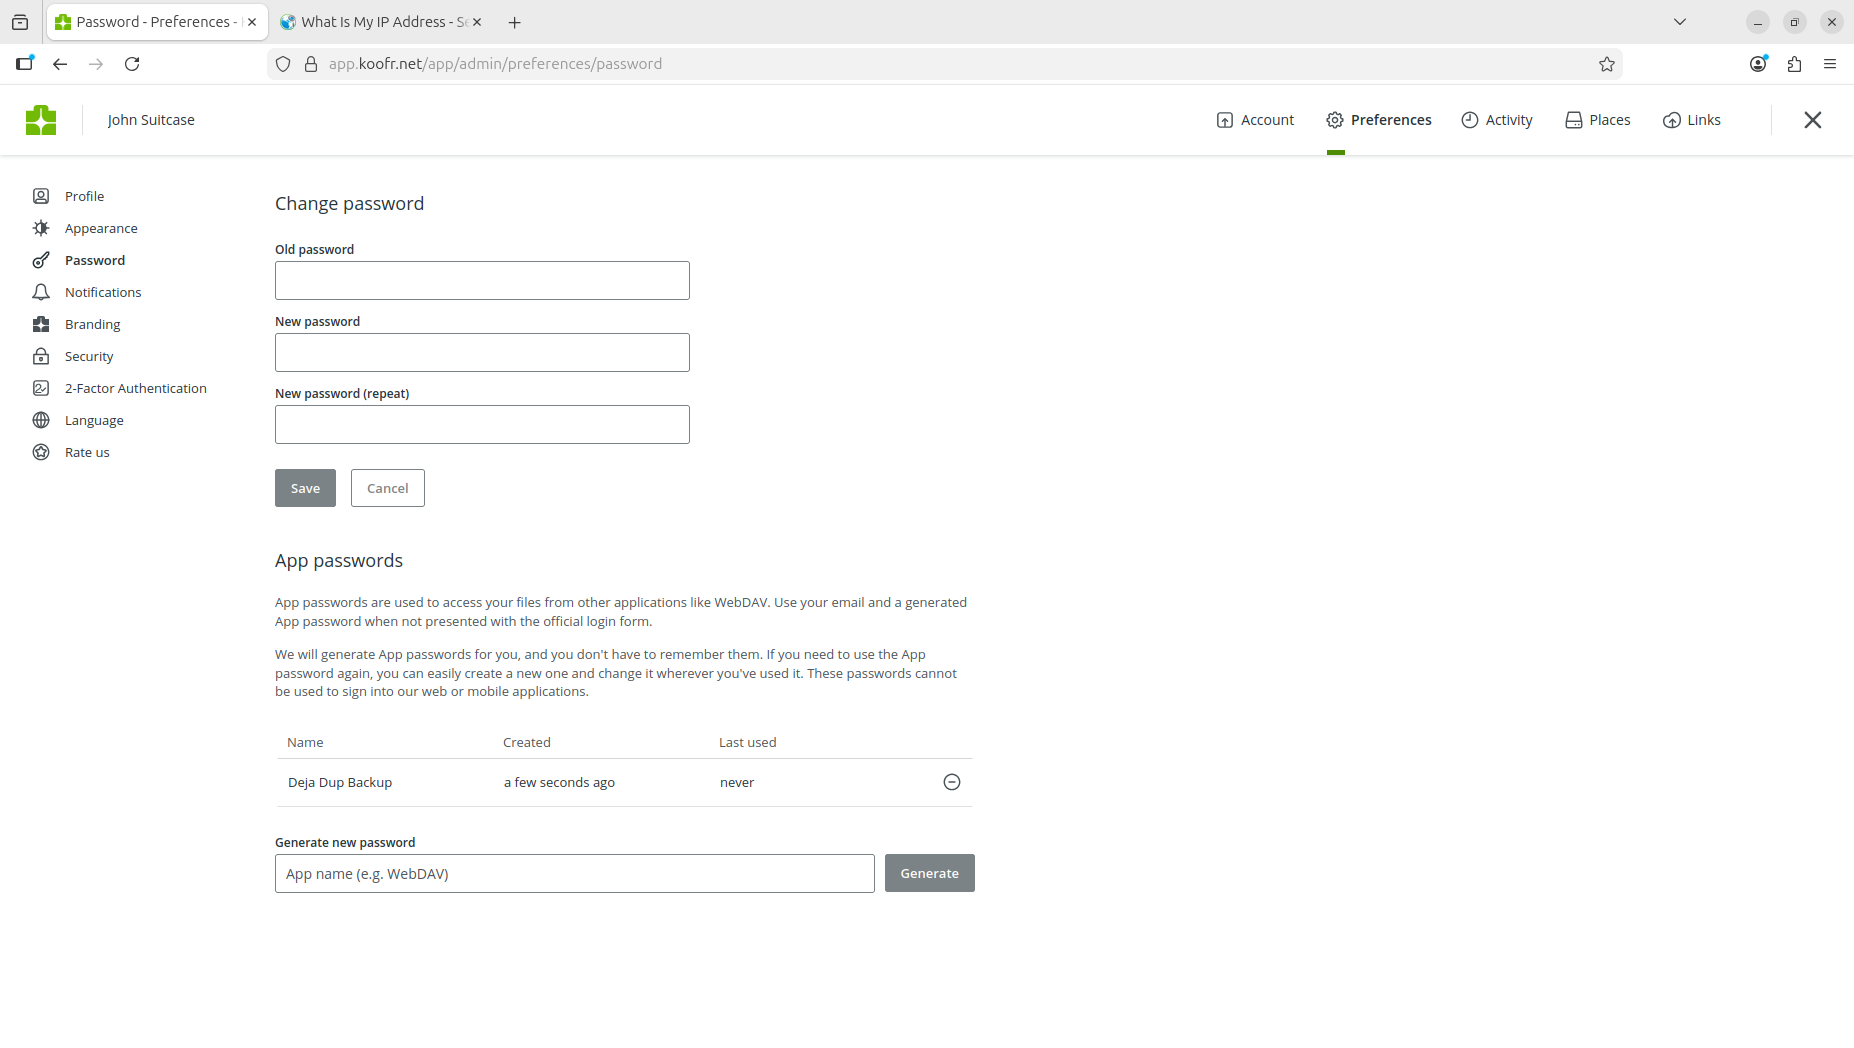
Go to your Koofr account for a moment, open the Account Menu, select Preferences and click on Passwords. Scroll down to the App passwords and type in a new password name in a Generate a new password textbox. This is the password we are going to use for our backup WebDAV connection. We've named it Dejadup_Backup. Click on Generate and a password will appear.
Let's return to Deja-dup now. When you are prompted to enter the password, enter your Koofr account username and the password you generated through Koofr. Don't forget to check the Remember password checkbox. Click on Forward.
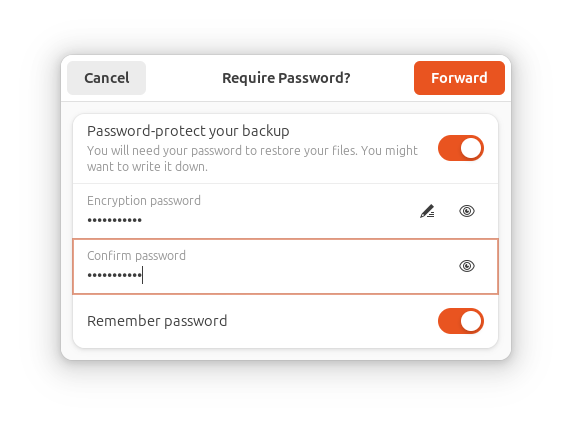
In the next step, you will be asked if you want to password protect your backup. This is advisable, but have in mind that if you forget your encryption password, you will not be able to restore the backup later. So, don't forget to toggle the switch next to the Remember password text and click Forward.
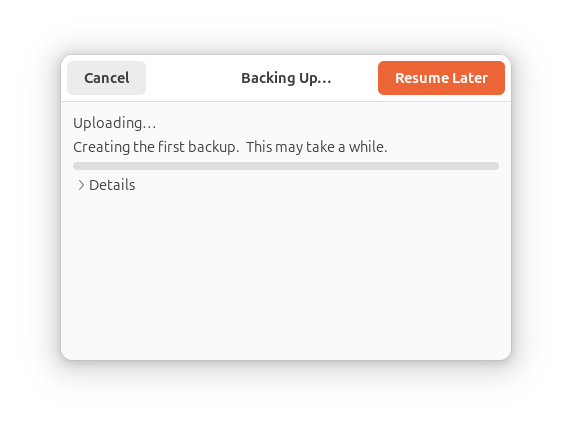
Now we are done, and you should see the backup progress dialogue. The first backup might take a bit longer, as it is a full backup. Next time you do the backup, only files that have changed will be backed up, so it will take less time.
After the backup is completed, you will be redirected to Overview, where you can see when the most recent backup was done and choose whether to back up your computer automatically. Turn on the switch if you want automatic backups.
As mentioned previously, Déjà Dup Backups creates the backup folder inside your Koofr account automatically. You can find your backup there.
And voila, your data is safe. Simple as that!
Stay safe. Backup your data with Koofr.
Discover how Koofr makes your backup private and secure.
Editor's Note: This post was first published in 2015. We've updated and enhanced the content to improve clarity and detail. Whether you're revisiting or reading it for the first time, we hope this improved version offers an even better experience.
Join us on the Koofr Subreddit and share your feedback or tips. We’d love to hear from you!