

How to Backup Your ASUSTOR NAS to Koofr with WebDAV
Are you using an ASUSTOR NAS and thinking of creating a cloud storage backup of your files? A cloud backup is a lifesaver in case of a NAS failure, so it's a good idea to protect any important files. Follow the steps to backup your files to Koofr using ASUSTOR’s Cloud Backup Center app.
Written by human for humans
NAS (network-attached storage) is a computer data storage device connected to and accessed through a local network. NAS can be used for centralized file storage, sharing, and backup. It can also be accessed remotely via an internet connection.
NAS devices can be upgraded with additional storage when needed, which makes them flexible and affordable. But like any other device, there's a whole variety of reasons why they can suddenly fail. If you have an ASUSTOR NAS device, you can use ASUSTOR’s Cloud Backup Center app to easily back up your data to Koofr in real-time or on a set schedule, which can help prevent data loss in the event of an unexpected failure.
So, how can you set up a backup from your ASUSTOR NAS to Koofr?
Before you begin:
-
If you don't already have one, create a free Koofr account.
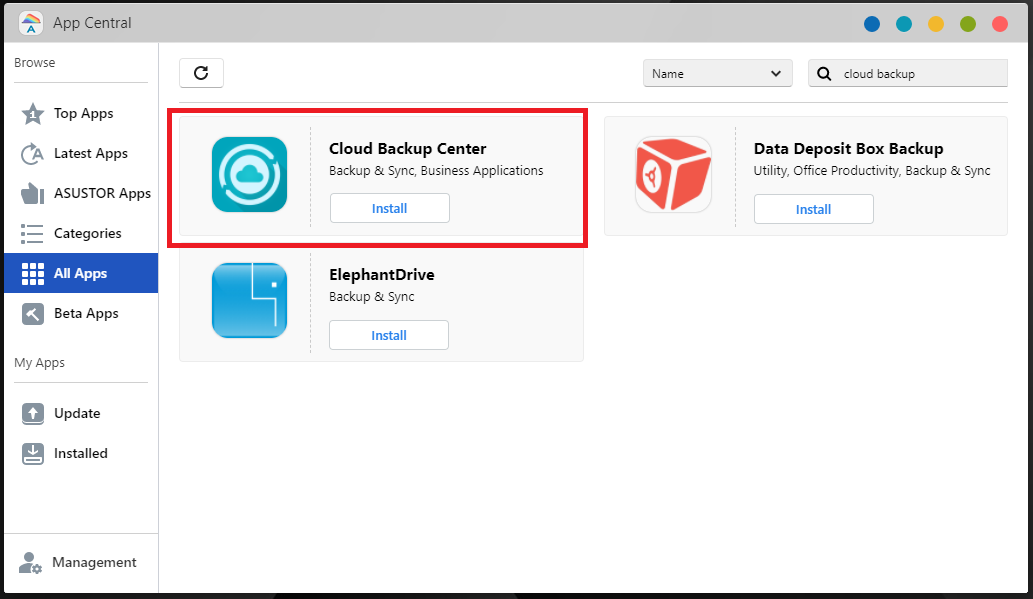
- Install Cloud Backup Center from the App Central of your ASUSTOR NAS.
Setting up the backup
-
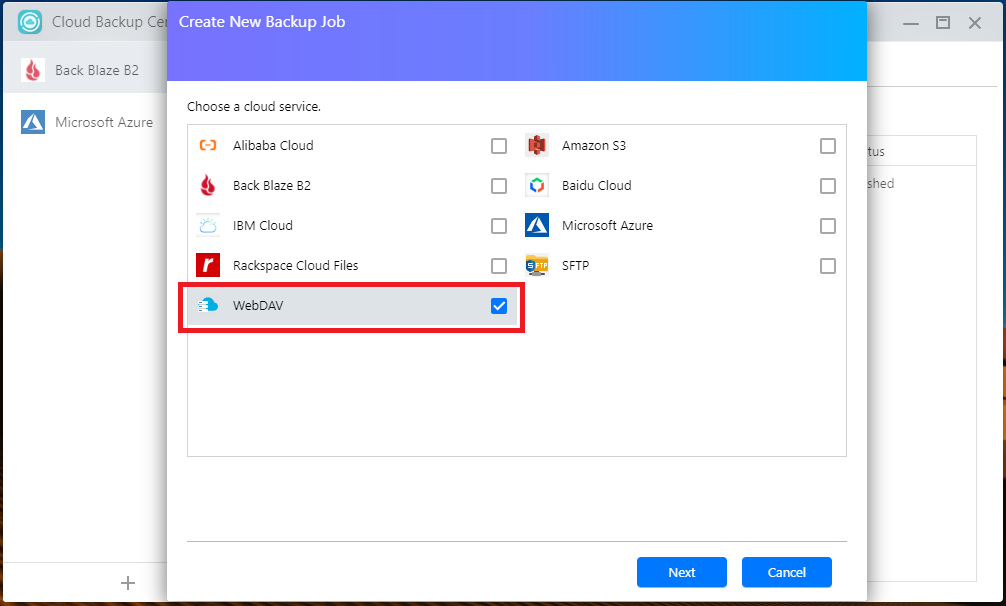
Run the Cloud Backup Center app. Click on the + icon in the bottom left corner, find WebDAV on the list of cloud services and select it. Click Next.
-
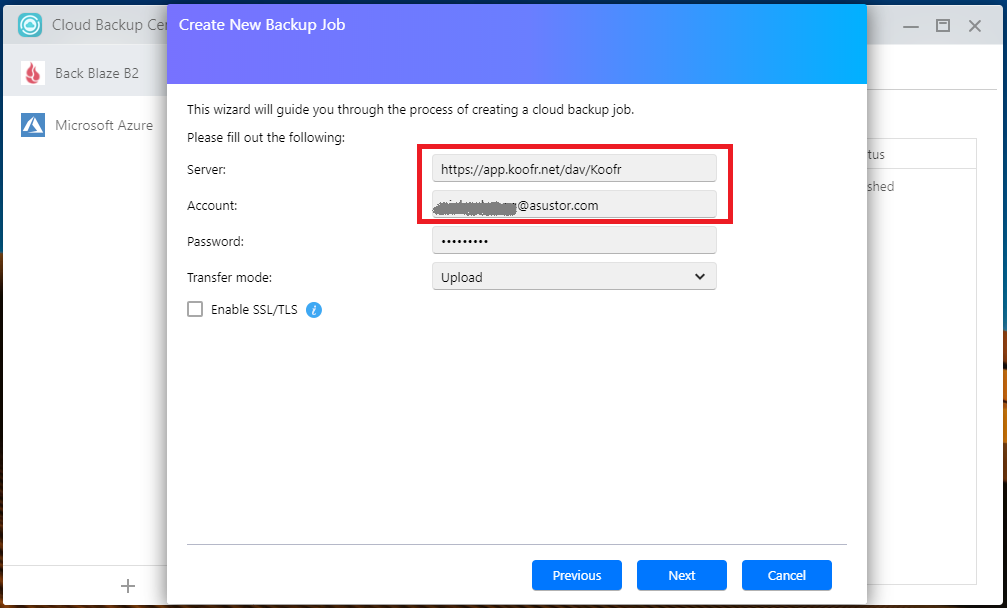
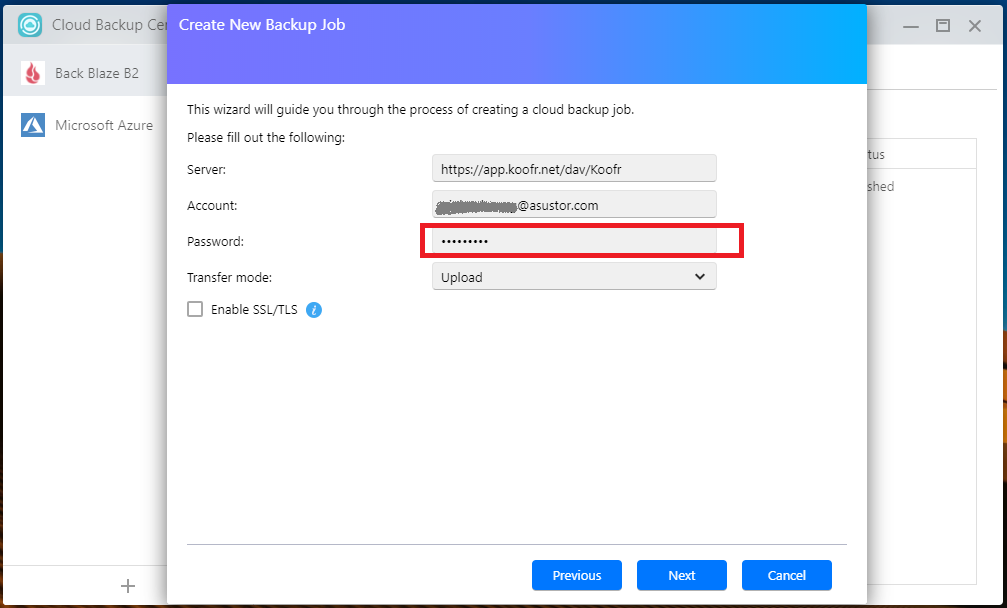
In the Create New Backup Job window, you'll need to enter the credentials needed for your NAS to access your Koofr account. For Server, use the following URL: https://app.koofr.net/dav/Koofr. Use the same email address you're using for your Koofr account to fill in the Account field. You can see an example in the screenshot below.
-
Next, move to your Koofr account for a moment and create a new folder for your backups. We named our folder CloudBackup. You will be able to find your ASUSTOR backups in this folder later on.
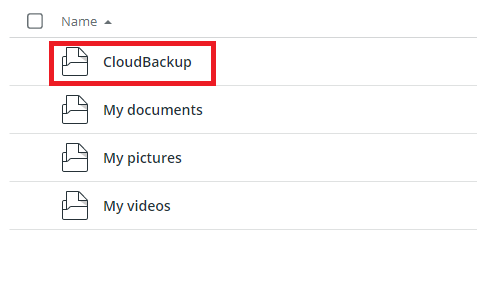 Note: This folder needs to be created for your WebDAV connection to work.
 -
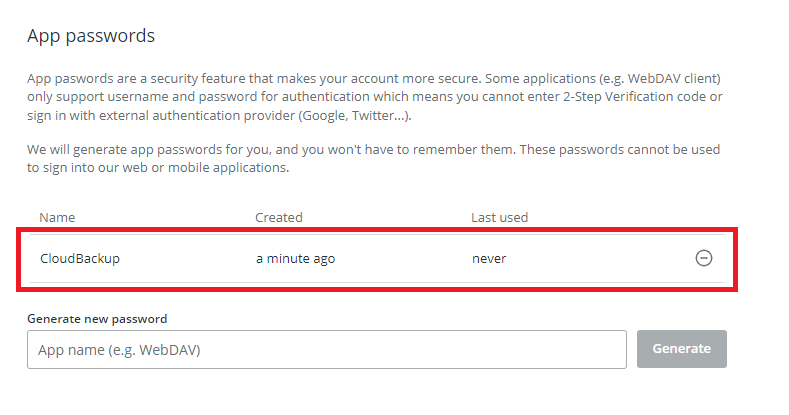
Now we can create an app password to use for the connection with your ASUSTOR NAS. See our video tutorial How to generate application-specific passwords for WebDAV connections for more help on how to do this.
Open your Koofr Account Settings Menu and find the Password tab under Preferences. Generate and name a new app password to use with ASUSTOR. We named our password CloudBackup as you can see in the picture below.
Switch back to the ASUSTOR Cloud Backup Center. Enter the newly created password into the Password field, then click Next.
-
In the Create New Backup Job window, you can choose the folders from your NAS you wish to backup to Koofr.
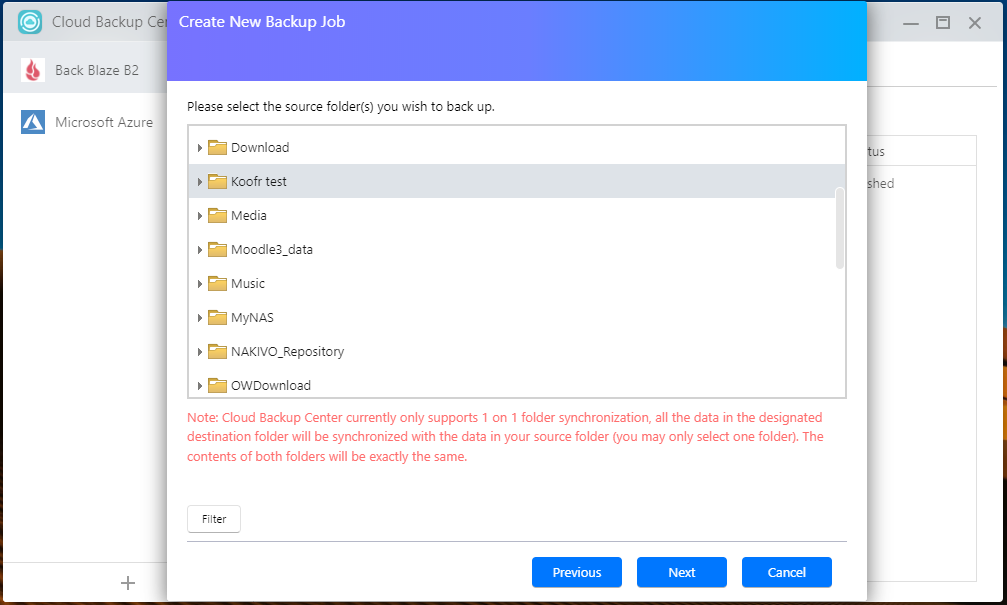
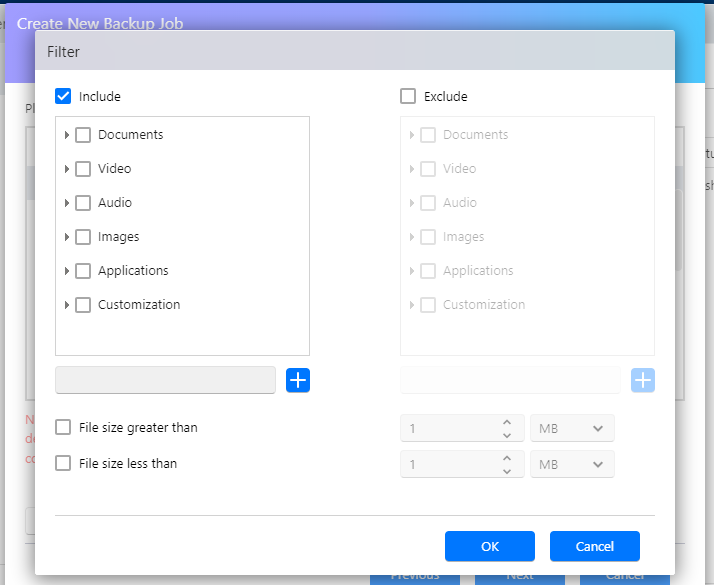
Optional: Click on Filter in the bottom left corner to set up filters for different types of files you might want to include or exclude from your backup.
Click Next to move to the next step.
-
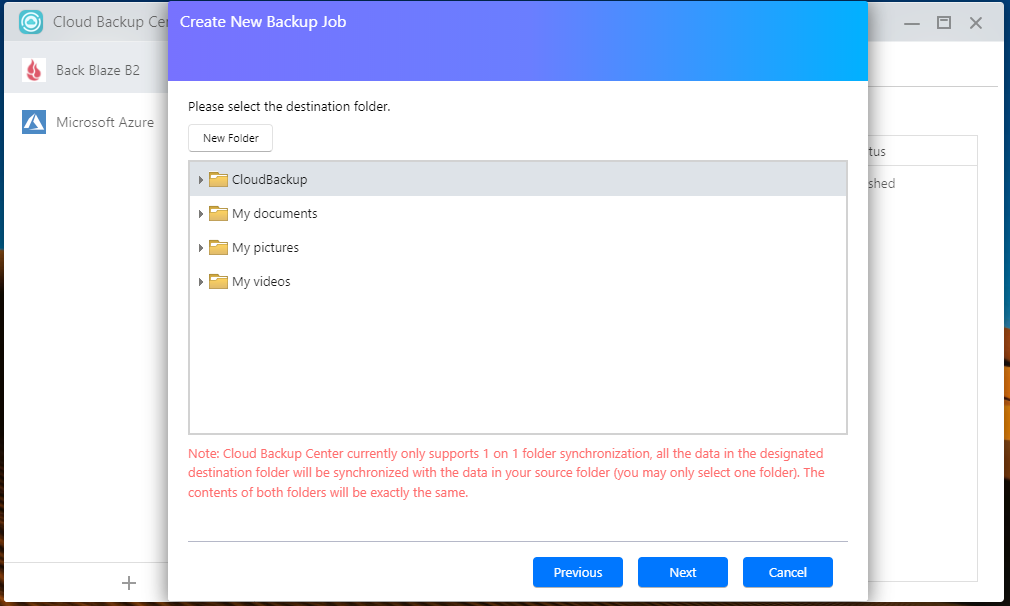
In the Create New Backup Job window, you'll choose the destination folder from your Koofr account. Find and select the CloudBackup folder created in Step 3. This is where your backups will be stored. Click Next to continue.
-
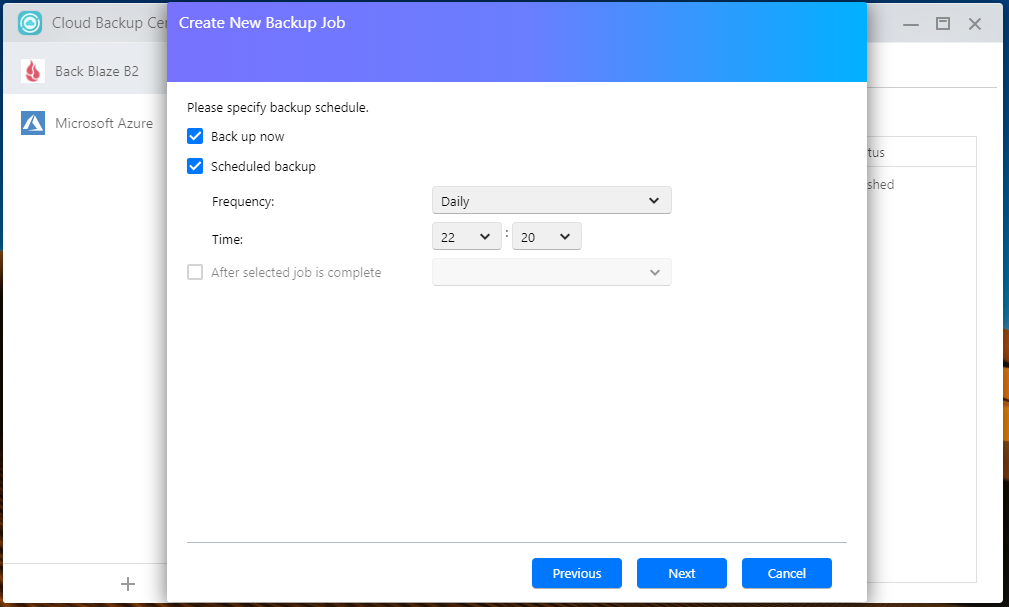
In the Create New Backup Job window, you can select Back up now or you can also enable Scheduled backup for your backups. The system will automatically perform backups at the times you select.
-
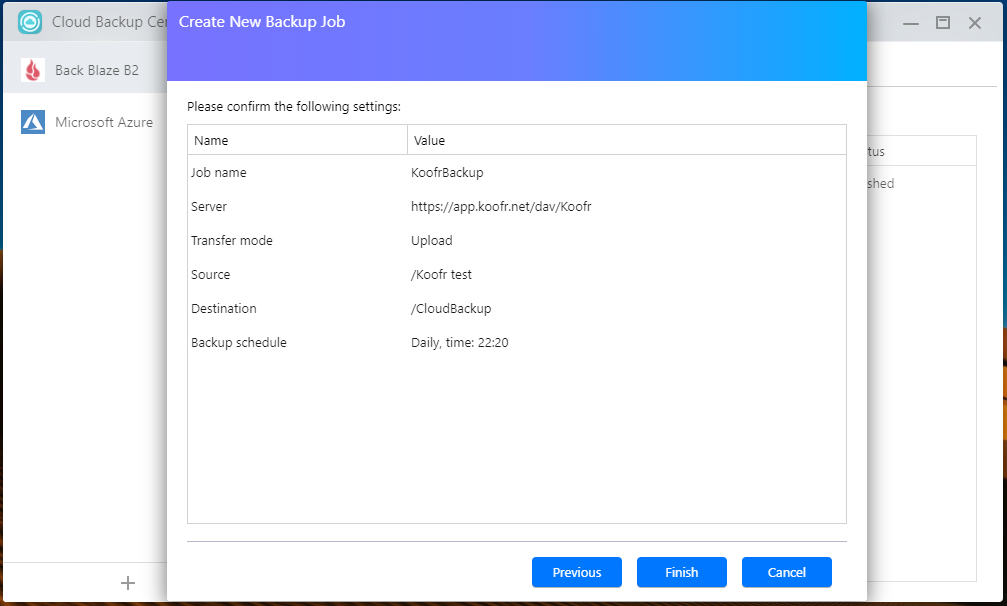
In the Create New Backup Job window, you can name the backup job in the Job name field. We named our backup KoofrBackup.
Here you can also set up Bandwidth limitation. You can also set up Maximum simultaneous transfers and enable multipart uploads for your file transfer.
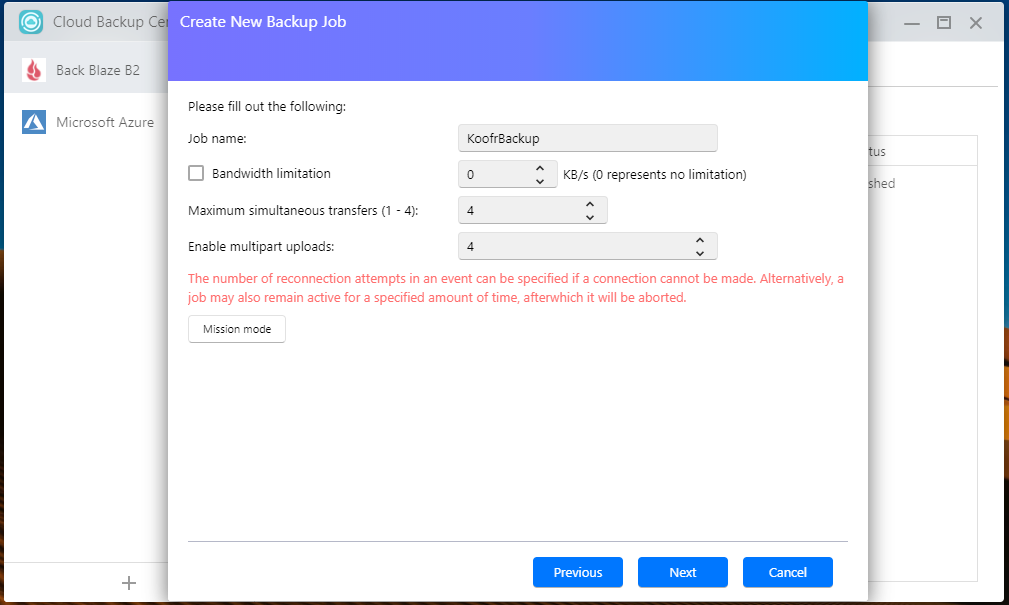
Once you are done with settings, click Next.
-
Click Finish to confirm the start of the backup.
-
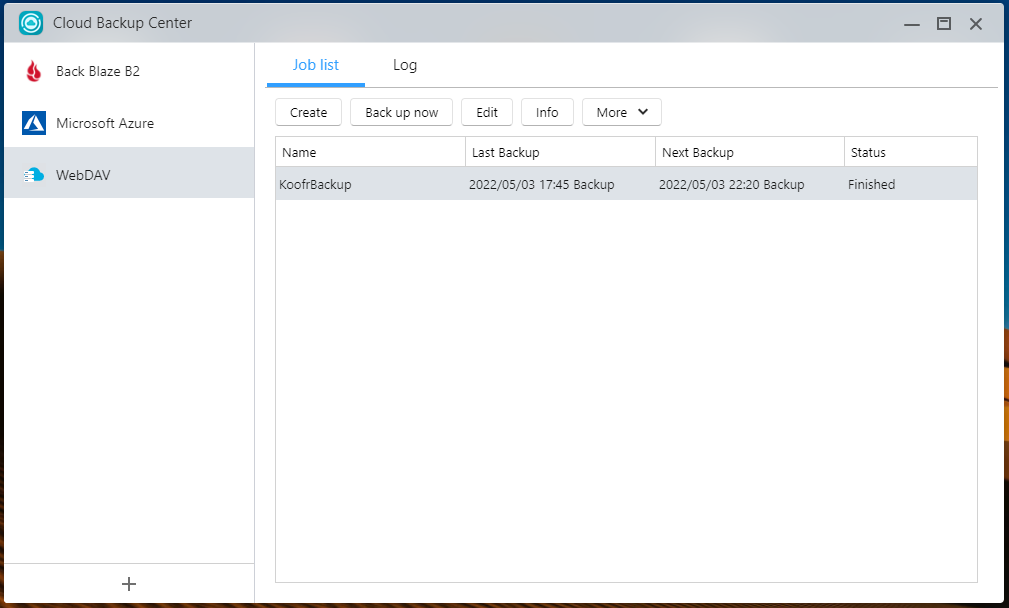
Now, all there is left to do is to wait for the backup to be finished. If you want to change some of the backup settings at a later time, click on the Edit tab (see picture below).
Are you using Koofr as a backup for your NAS device? Join our community on Reddit and talk to us about it!