

How to backup your QNAP NAS to Koofr with Hybrid Backup Sync
Are you using QNAP's NAS and thinking of backing up your files to cloud storage? If you have all of your important files saved on your NAS and it fails, you lose everything, so be smart. Backup your files to Koofr with the help of WebDAV protocol, QNAP's Hybrid Backup Sync app.
Written by human for humans
If you are a QNAP NAS user, you might have read our previous post on how to backup your files to Koofr with the help of WebDAV protocol and QNAP's WebDAV app. Today, we will show you similar steps with the use of WebDAV protocol and QNAP’s Hybrid Backup Sync app.
What is NAS?
NAS is a data storage device used for file backup and data storage. NAS devices are flexible and you can easily add additional storage if you run out of space. But as any device, they can fail for various reasons. We want to show you an easy way to backup your NAS data to your Koofr account. So, in case a failure happens, you are prepared and do not lose anything important.
How can you set up your backup?
(1) First, you'll need a QNAP NAS.
(2) You'll also need to create a free Koofr account.
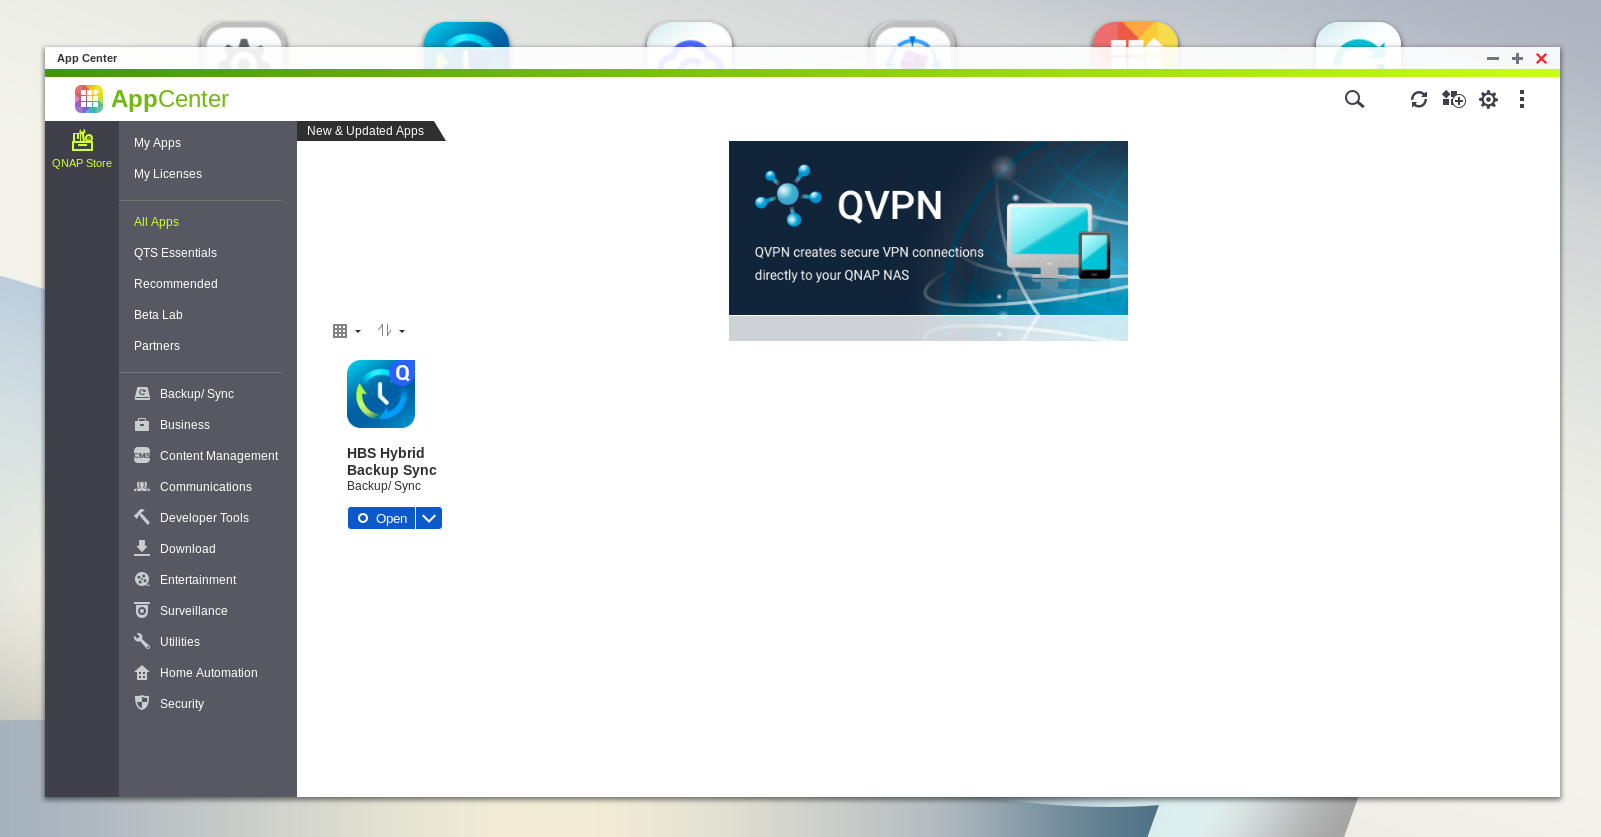
(3) Install the QNAP's HBS Hybrid Backup Sync App from the QTS AppCenter and Open it.
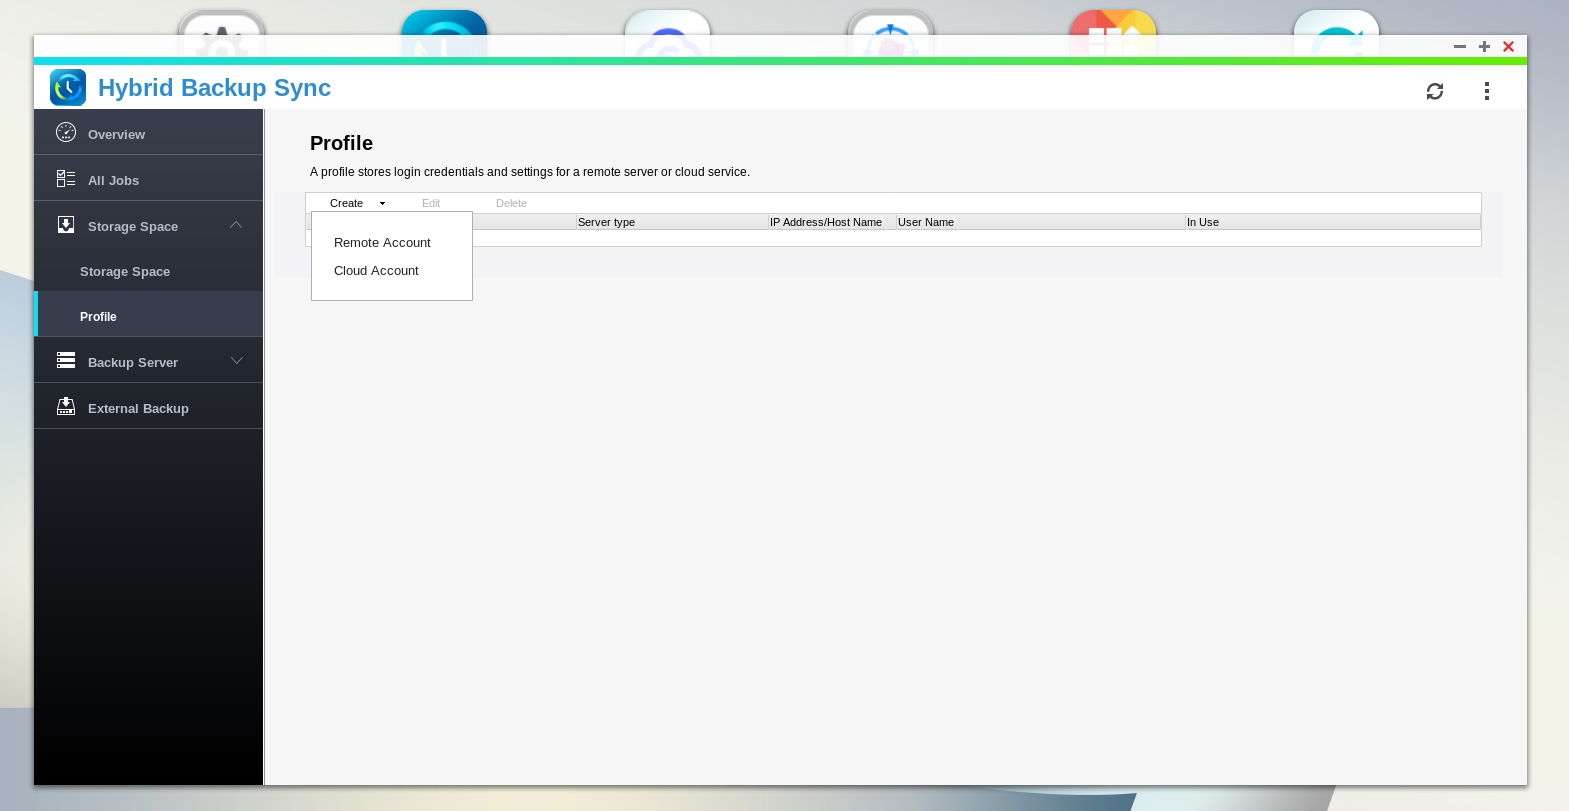
(4) Find the Profile tab in the menu on the left and click on Create. Select Cloud Account from the drop-down menu.
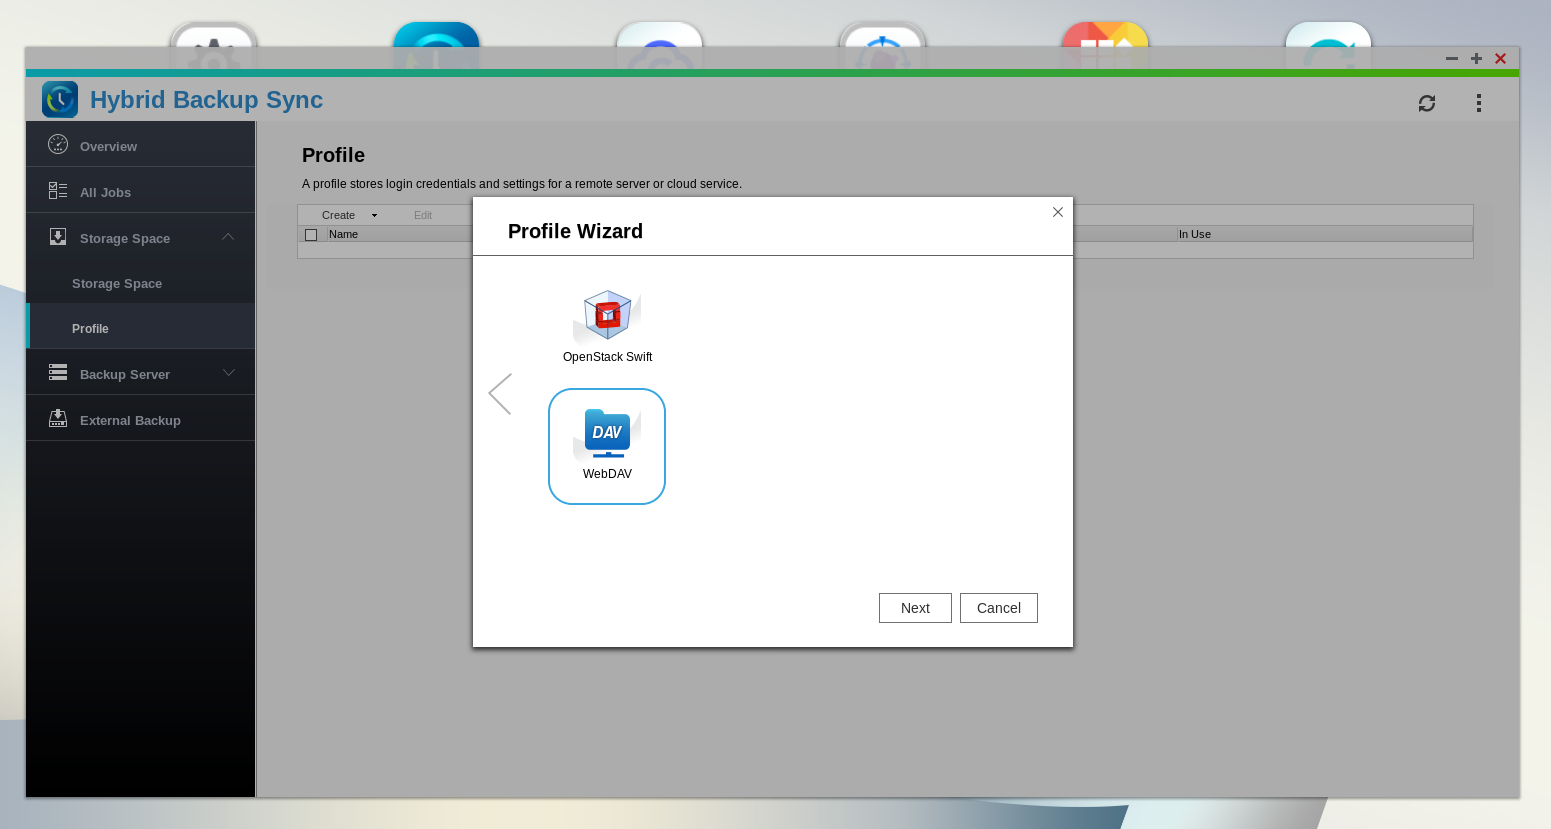
(5) A Profile Wizard will pop-up and you’ll be able to choose WebDAV from the list. Click Next when you are done.
(6) Type in a Display name to name your account. We named our account KoofrBackup. Your User ID is the email you used to create your Koofr account.
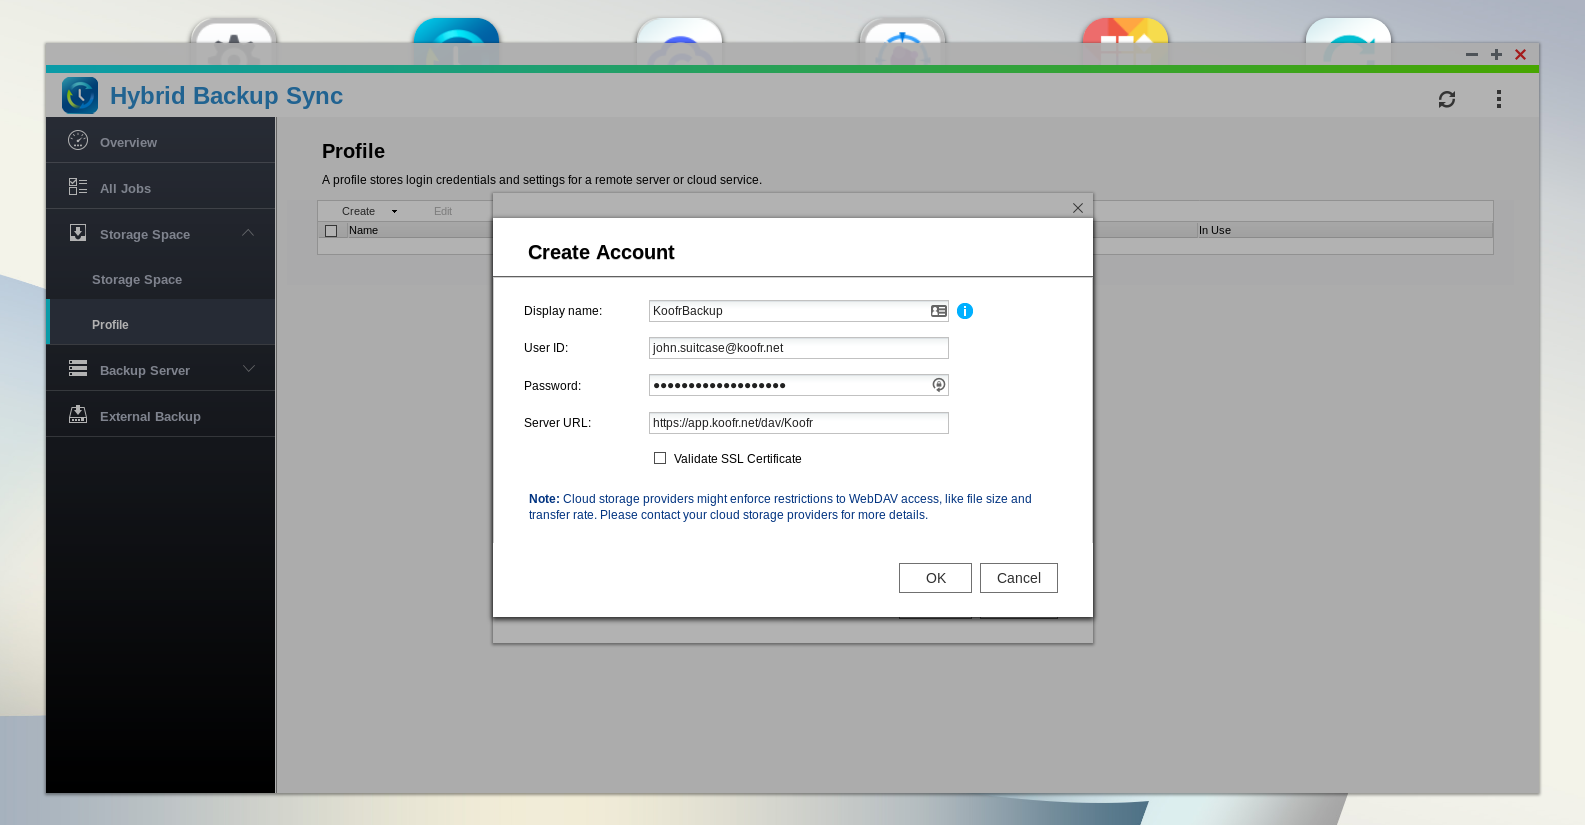
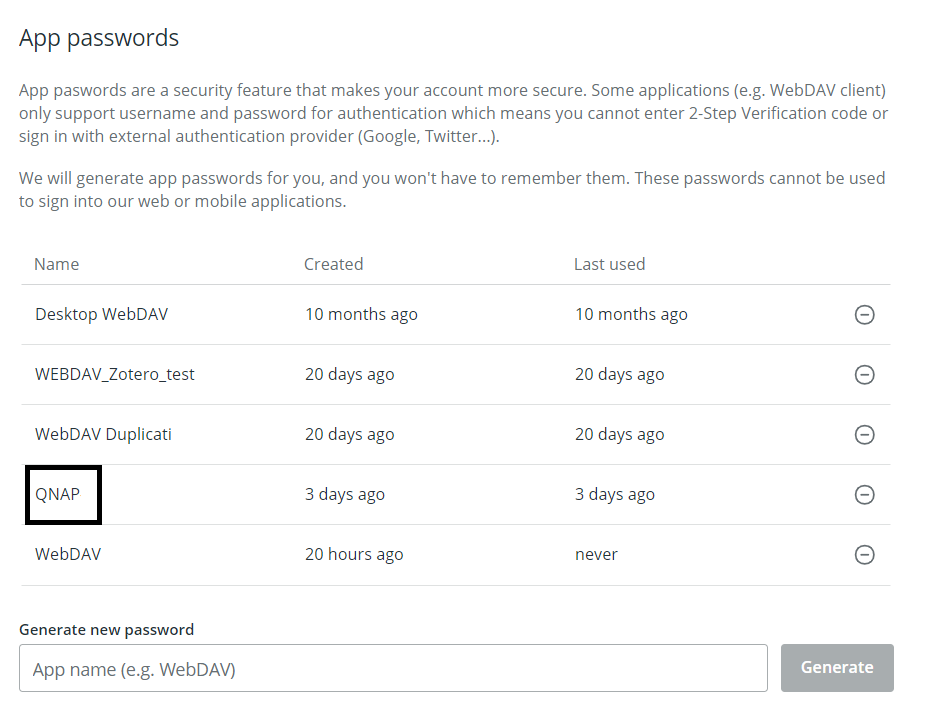
(7) Let's move to your Koofr account for a moment. You will need to generate a new password to use with QNAP's Hybrid Backup Sync app and our video tutorial can help you with that.
You can generate a new password in the Account Settings Menu in Preferences under Password. Scroll down to App Passwords, click into the Generate new password field, name the new password and click Generate. We named our password QNAP as you can see in the picture below. Use this password in the Password field of the QNAP's WebDAV app.
(8) Server URL should be typed in, exactly as it is in the picture below.
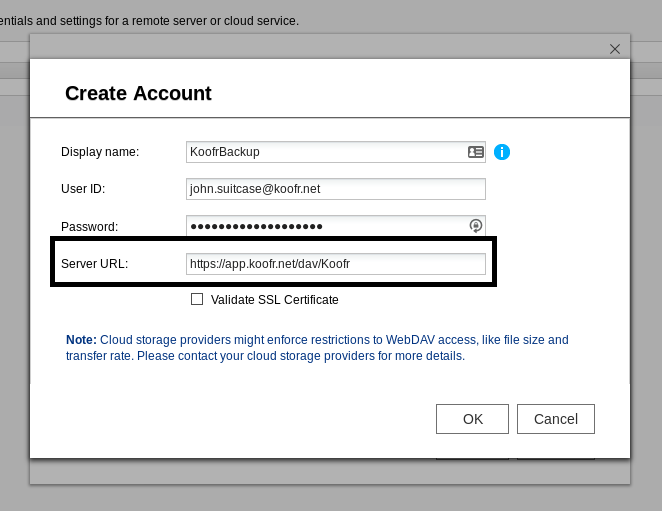
When you are done, click OK.
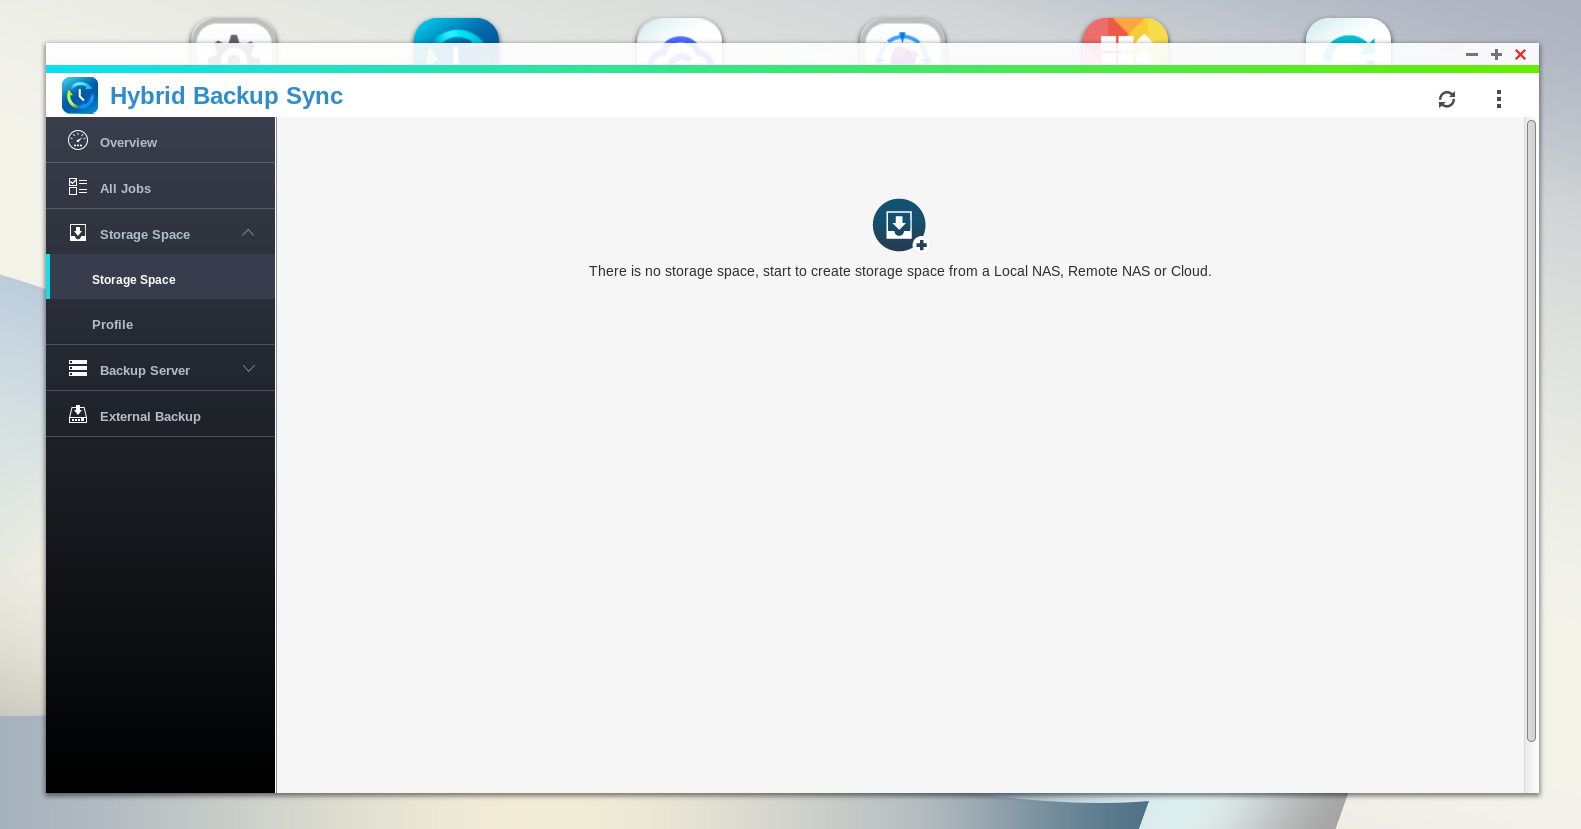
(9) Now you'll need to create storage space. Select Storage Space in the menu on the left. You’ll see a screen like in the picture below. You need to click on the icon to start creating storage space.
(10) Choose On cloud from the available options.

(11) Find WebDAV and select it from the list.

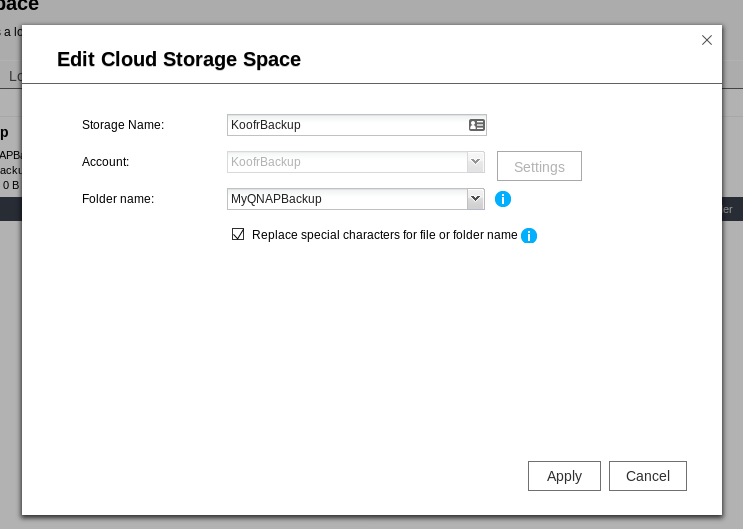
(12) Type in Storage Name. We named our storage KoofrBackup. Type in a Folder name. This is the folder that will be automatically created for you in your Koofr account and will contain your backups. We named our folder MyQNAPBackup. Check the Replace special characters for file or folder name setting. Click Apply when you are done.
(13) Find All Jobs in the menu on the left. Click on Create Job and select Create Backup Job from the drop-down list.
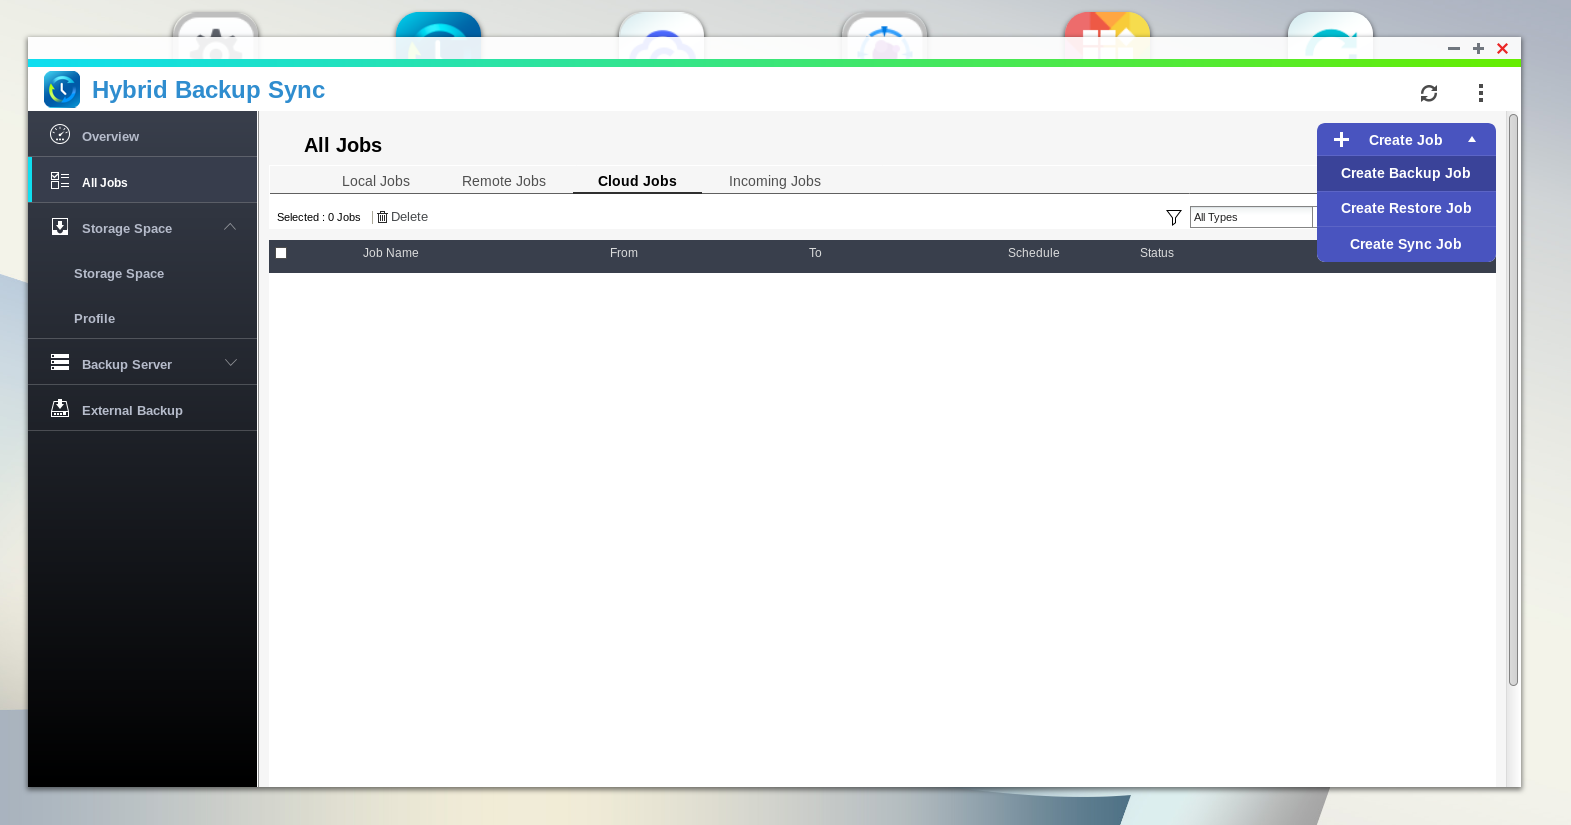
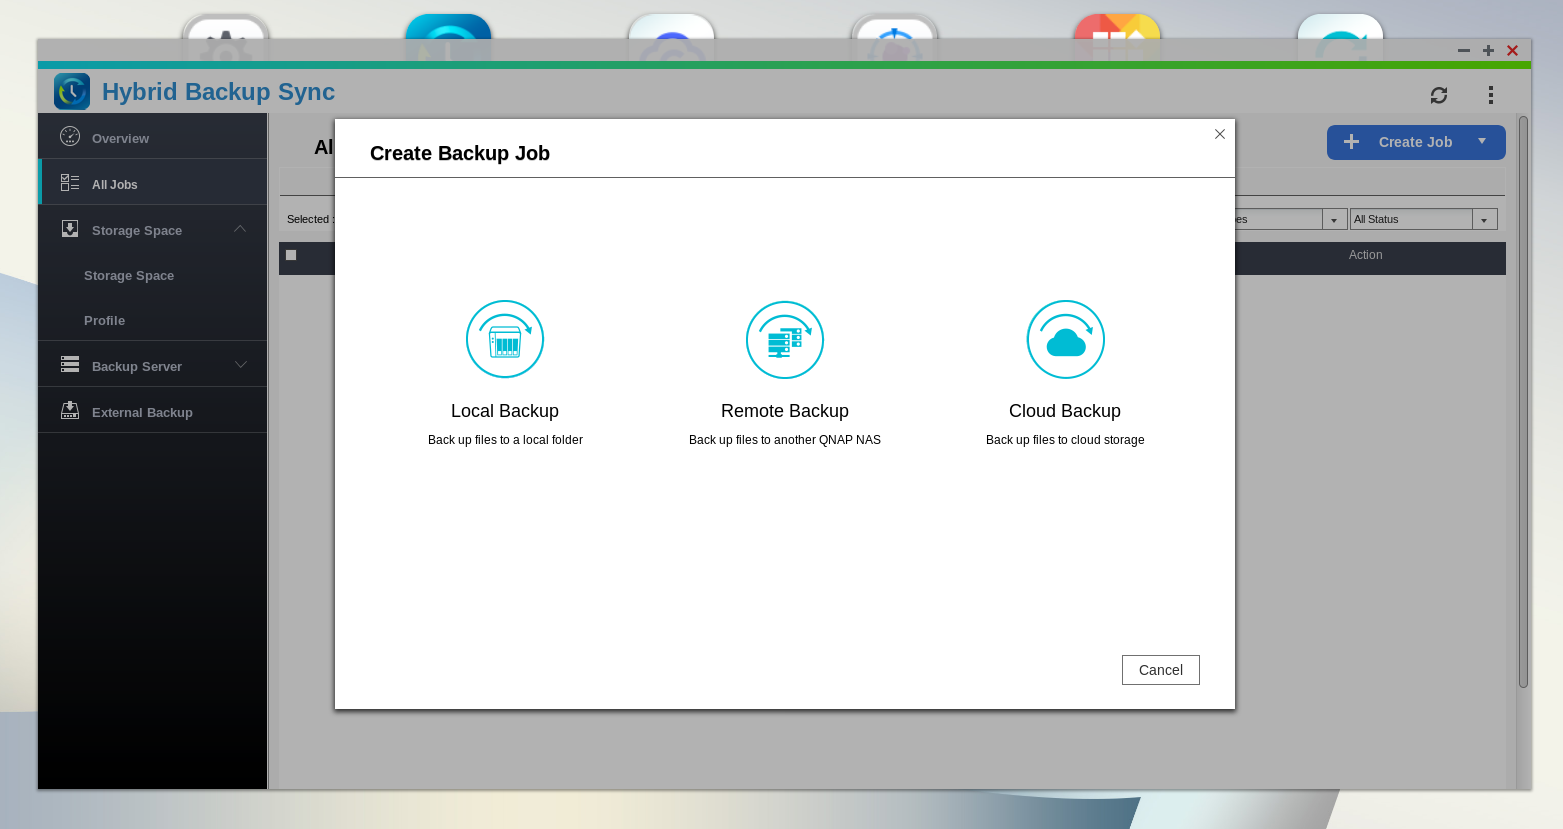
(14) Select Cloud Backup from the available options.
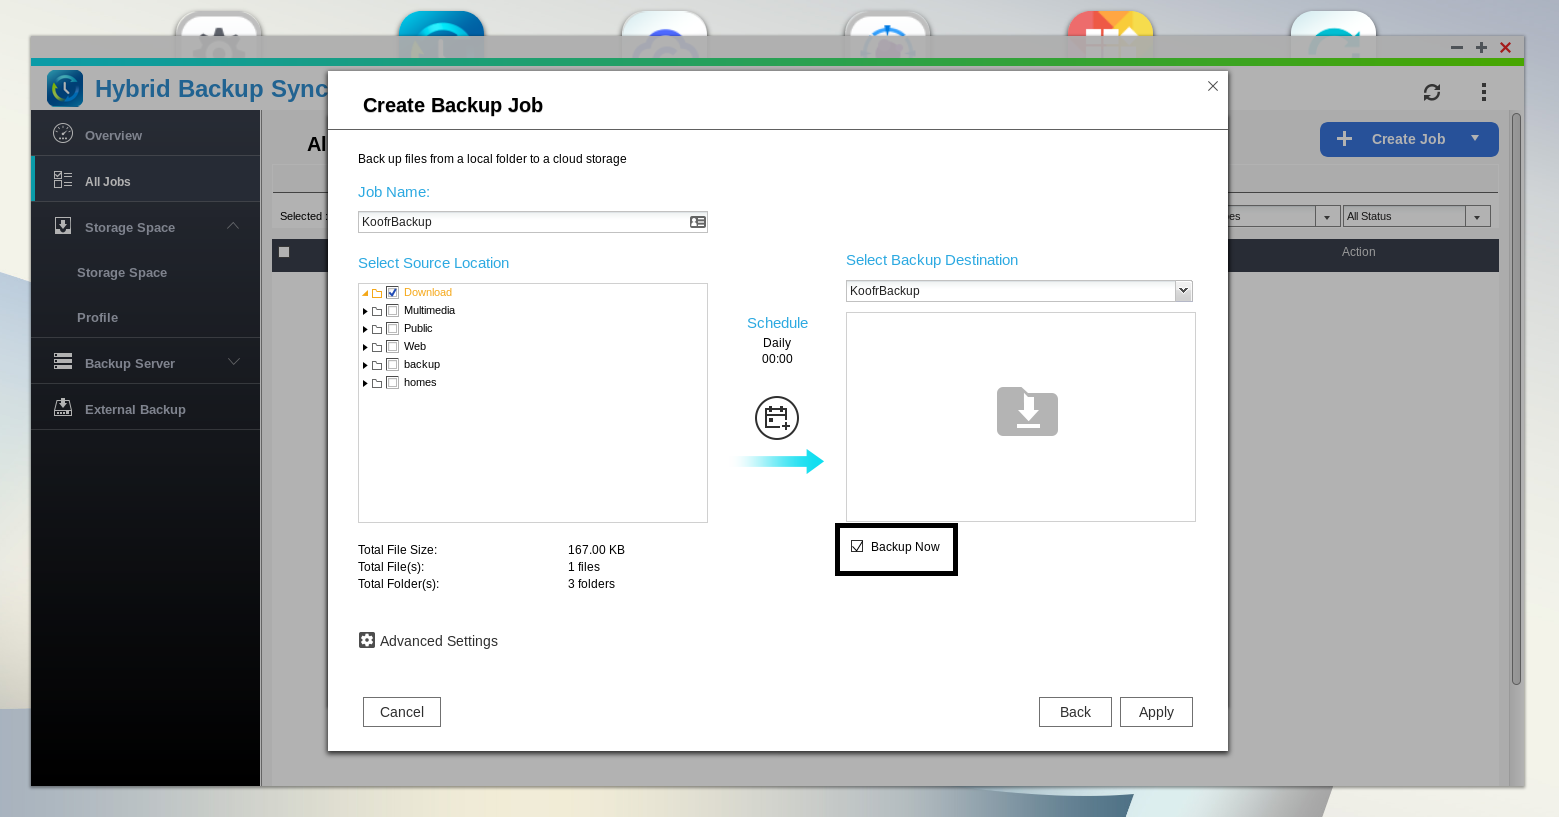
(15) In the next step, select files and folders you wish to backup. We chose to backup our Download folder.
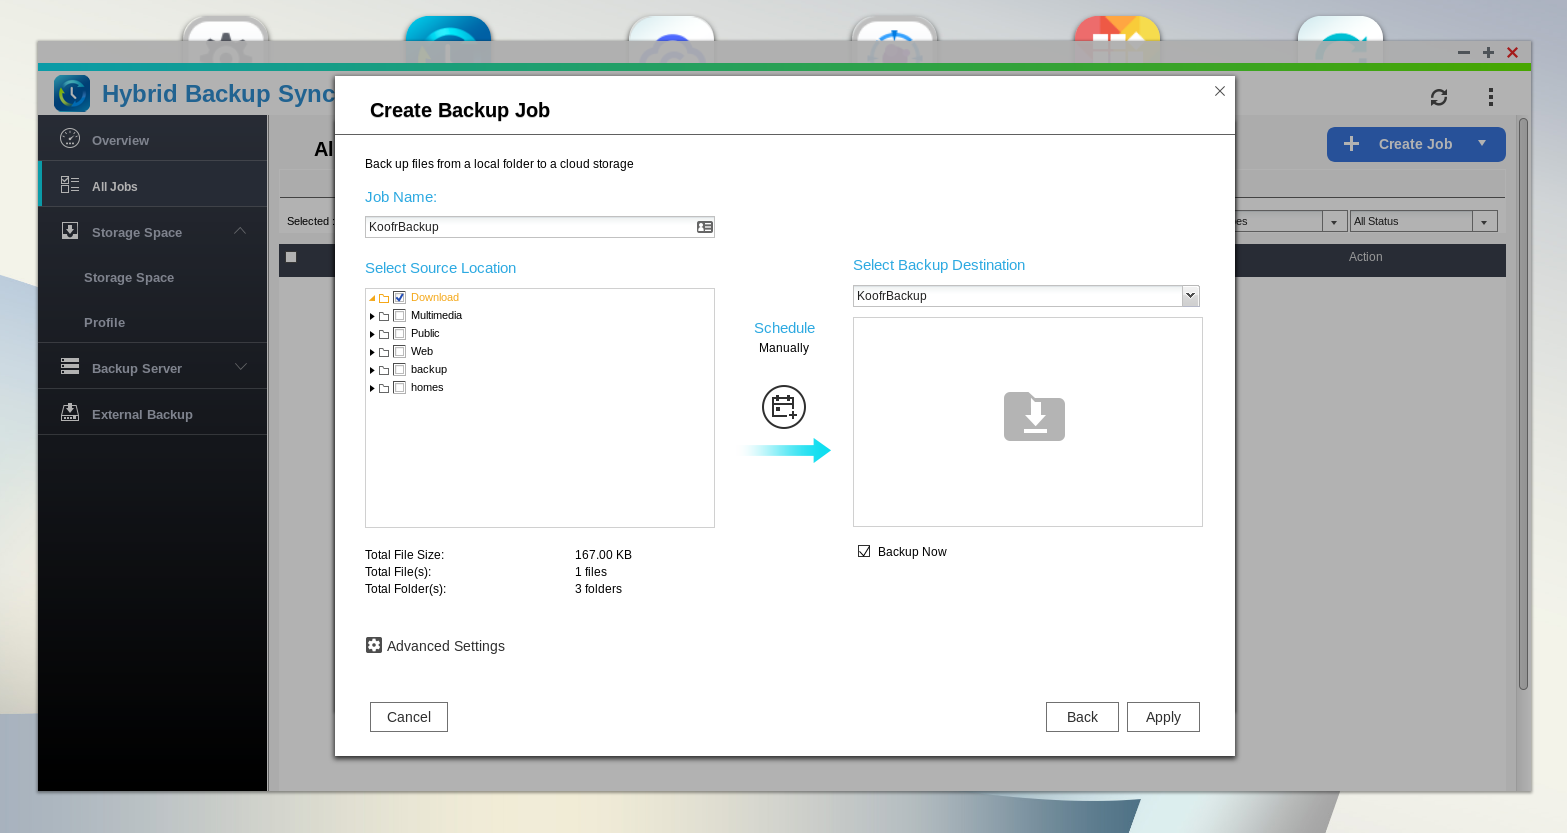
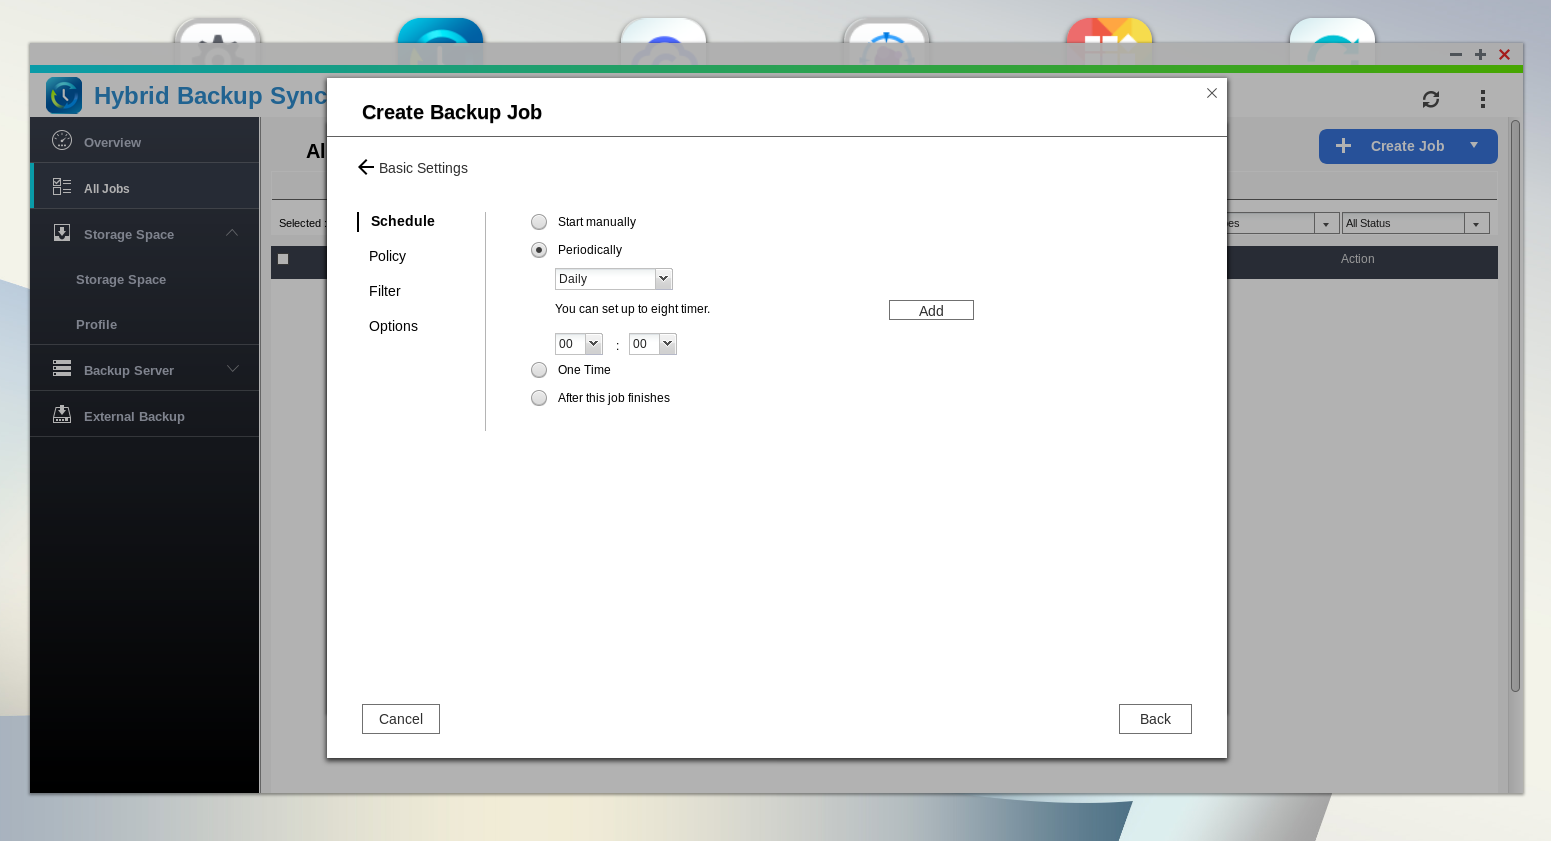
(16) Click on Advanced Settings to change the scheduling settings of your backup, filtering and other options. We set up daily backups.
(17) Check the Backup now option and click Apply.
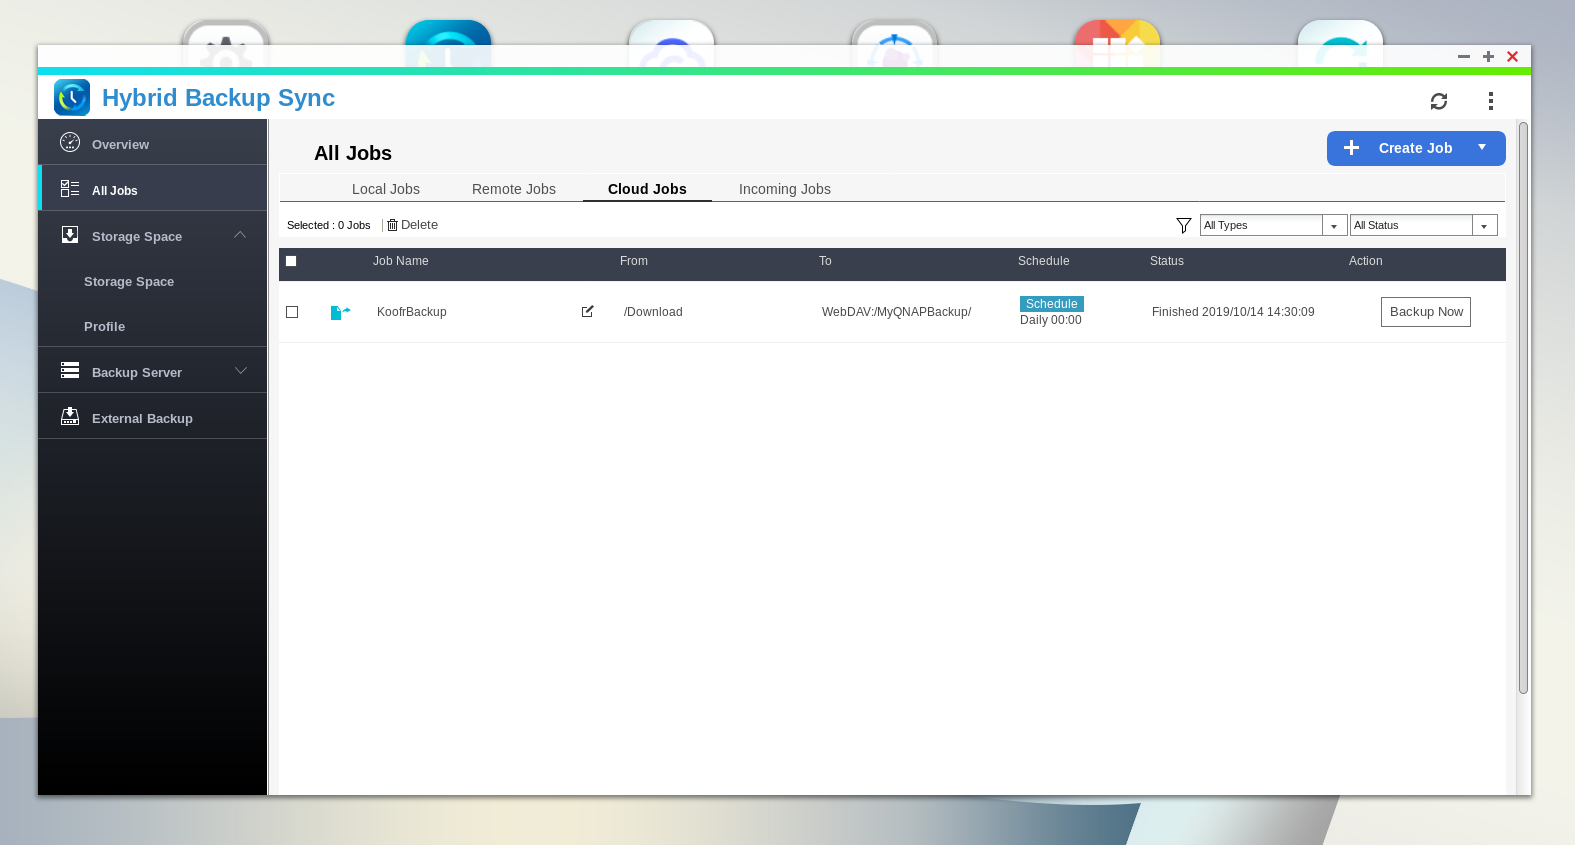
(18) You’ll be able to see the status of your backup under All Jobs in Hybrid Backup Sync app. You can also start your backup manually by clicking on Backup Now button.
(19) If you open your Koofr account, you’ll be able to see your backups folder.
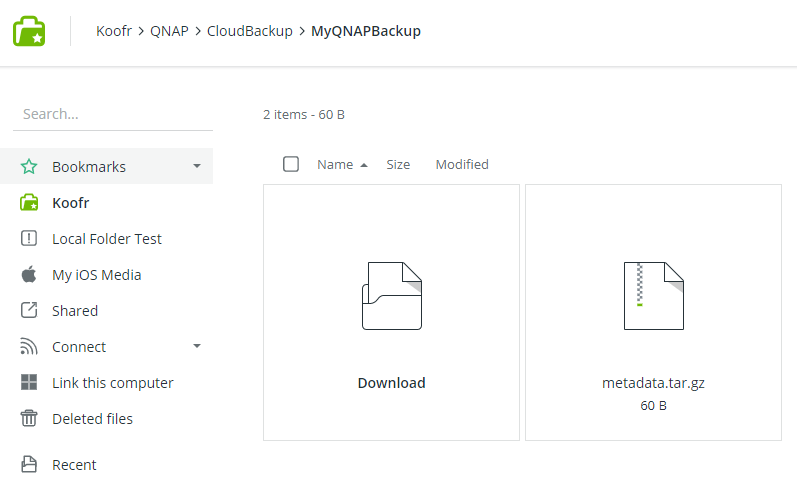
Please note that the files are not backed up to the root folder in Koofr. You'll find them in a folder Koofr/QNAP/CloudBackup/MyQNAPBackup.
Want to talk to us? Join us on the Koofr subreddit!