

How to backup your Synology NAS to Koofr with WebDAV
Are you using a Synology NAS and thinking of backing up your files to cloud storage? If you have all of your important files saved on your NAS and it fails, you lose everything, so be smart. Backup your files to Koofr with the help of WebDAV protocol, Synology's Cloud Sync.
Written by human for humans
NAS (network-attached storage) is a computer data storage device used for file backup, file sharing, storage, centralization and organization of your data. NAS is connected to a network and providing data access to a group of authorized network users from a central location and you can also access your data remotely.
NAS devices are flexible and you can add additional storage when you run out of space. But as any device, NAS devices can fail for various different reasons. With Synology's Cloud Sync you can easily back up your data to Koofr in real-time, minimizing the impact sudden disasters might bring. You can also encrypt your data prior to upload for extra safety.
Let's have a look at how you can set up your backup from your Synology NAS to Koofr.
What to do before setting up the backup?
(1) Create a free Koofr account.
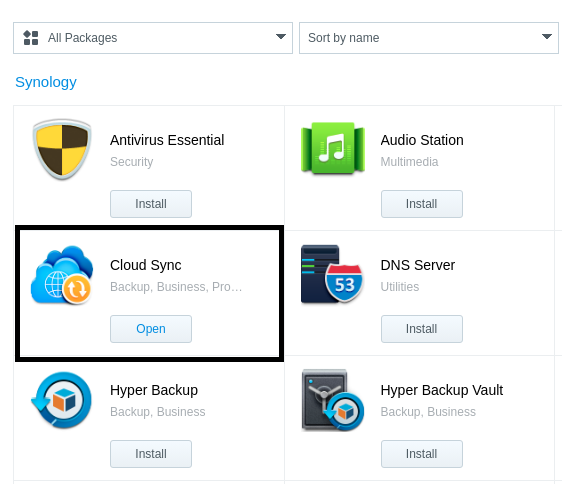
(2) Install Cloud Sync from the Package Center on your Synology NAS.
Now that we've prepared everything, let's go through the actual setup process.
Setting up the backup
(1) Run Cloud Sync
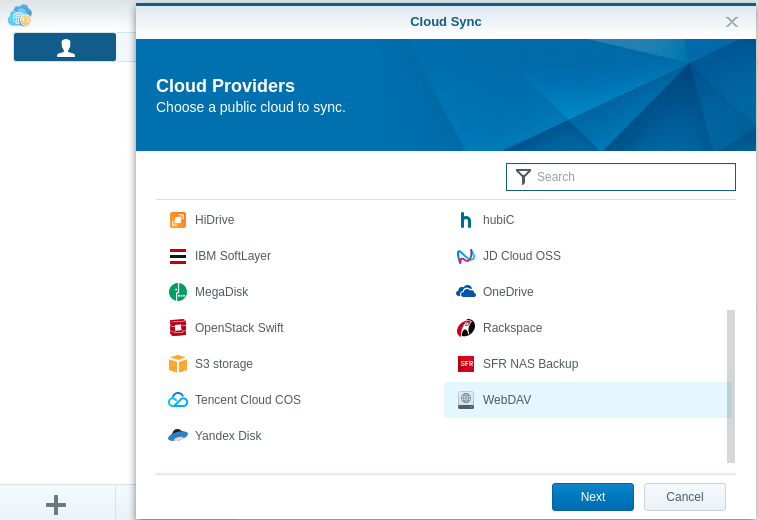
(2) Find WebDAV from the Cloud Providers list
(3) You'll need to type in the Server address as it is done in the picture below.
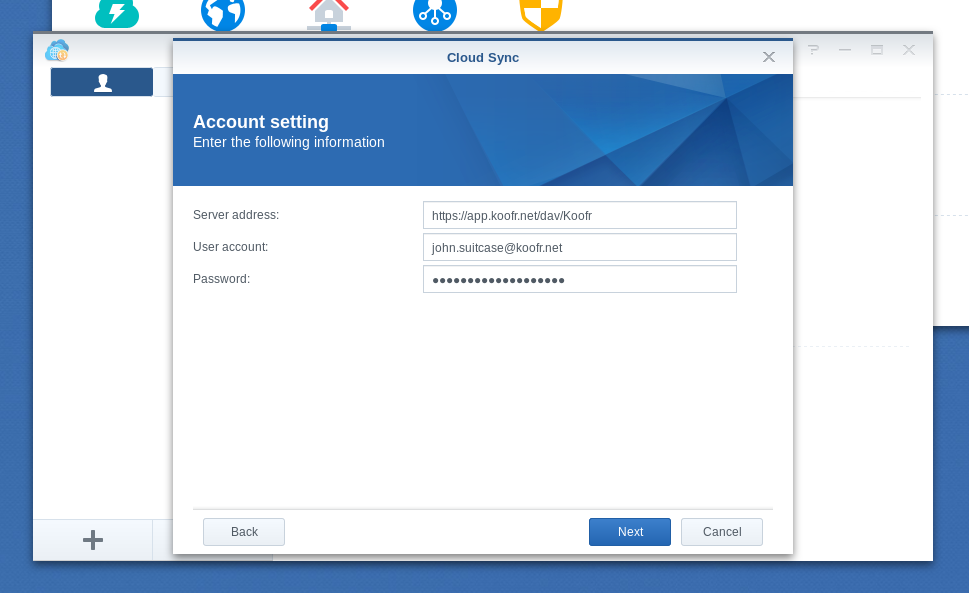
Under User account type in your Koofr user account email address.
(4) Move to your Koofr account and create a folder for your backups. We named our folder SynologyBackup. You will be able to find your Synology backups in this folder later on.
Note: This folder needs to be created for your WebDAV connection to work.
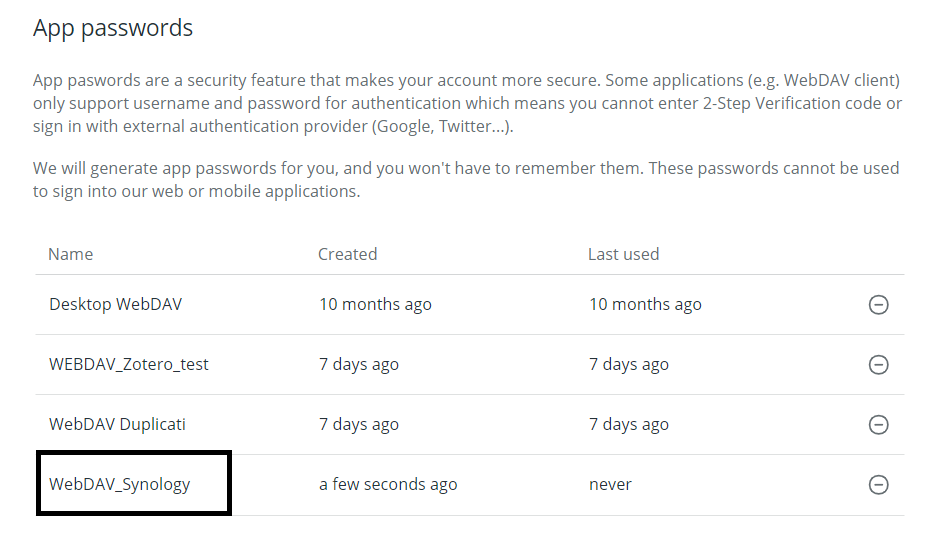
(5) Now we can create a password to use only for the connection with Synology. Our video tutorial How to generate application-specific passwords for WebDAV connections can help you with that.
Open your Koofr Account Settings Menu and find the Password tab under Preferences. Generate and name a new password to use with Synology. We named our password WebDAV_Synology as you can see in the picture below. Insert the newly created password into Cloud Sync under Password and click on Next.
(6) In the Task settings, choose the Connection name and set the Local path to /data/webdav/. For Remote path choose the previously created SynologyBackup folder.
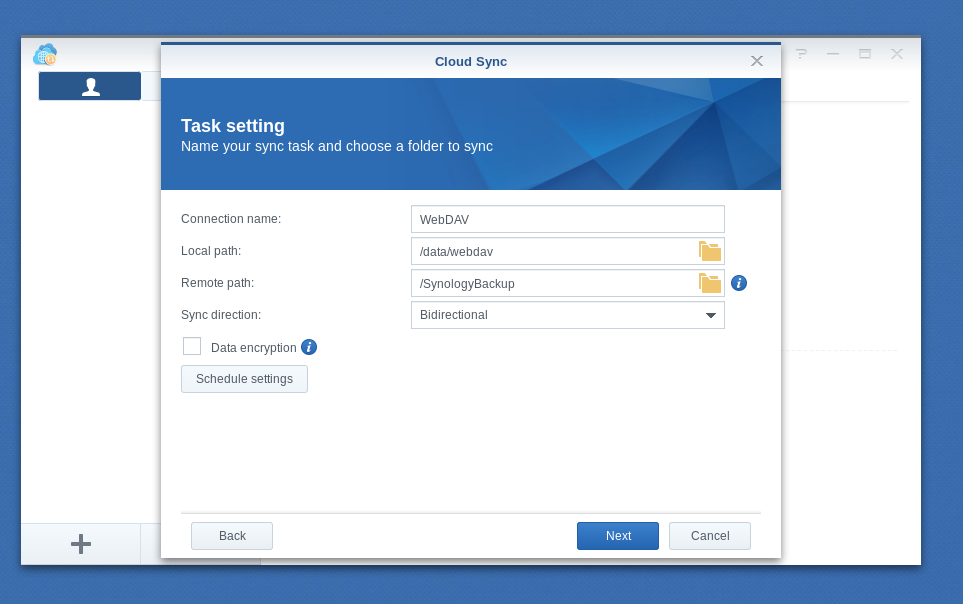
For the Sync direction you can choose Upload local changes only if you want to backup data from Synology's NAS to Koofr. We suggest you tick the Don't remove data in the destination when it's removed in the source setting.
You can also set the Sync direction to Bidirectional if you want to keep your chosen Koofr folder and your NAS in sync.
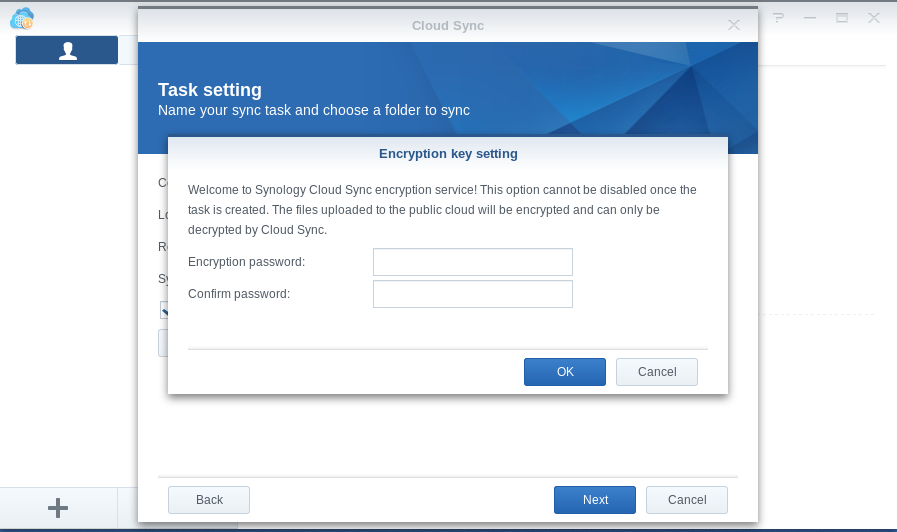
(7) If you decide that you want to encrypt the files before uploading them to Koofr, put a check next to the Data encryption setting, but note that you will not be able to view the content of your files inside your Koofr account if you do that. The encryption process is also irreversible. If you decided to encrypt the files you'll have to type in the encryption password, confirm it and click OK. Once you are done with settings click on Next.
Note: The selected folder on your NAS will remain unencrypted no matter what you decide about the encryption settings.
(8) You can disable the sync for periods of time under the Schedule settings if you don’t want to backup all the time. We left the settings as they were by default.
(9) Now, all there is left to do is to overview and confirm the backup settings. You do that by clicking Apply.
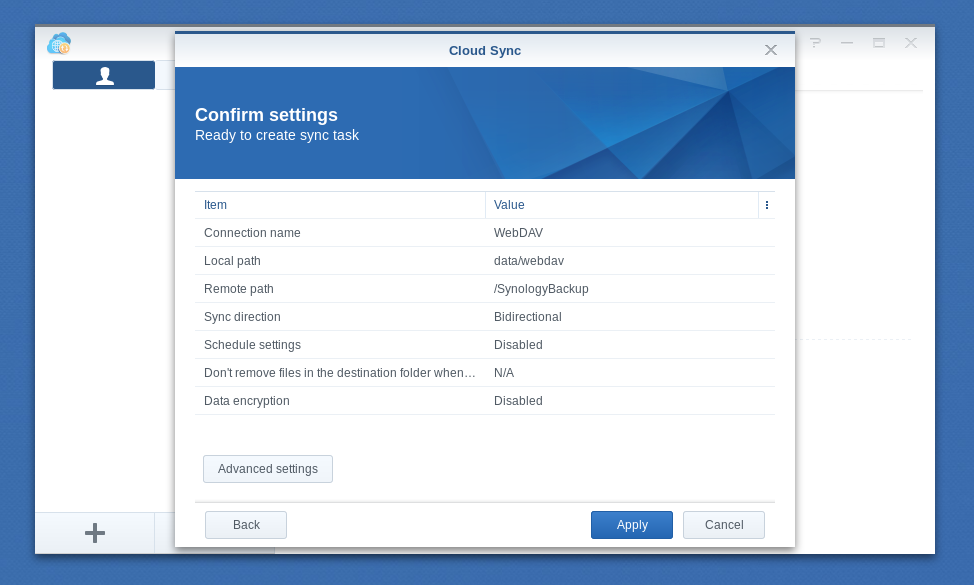
(10) Under Advanced settings you can filter out the files or the file types you don’t want to include in the backup.
(11) You can see the status of your backup in the Overview. Every time you change your files, they will be synchronized to Koofr.
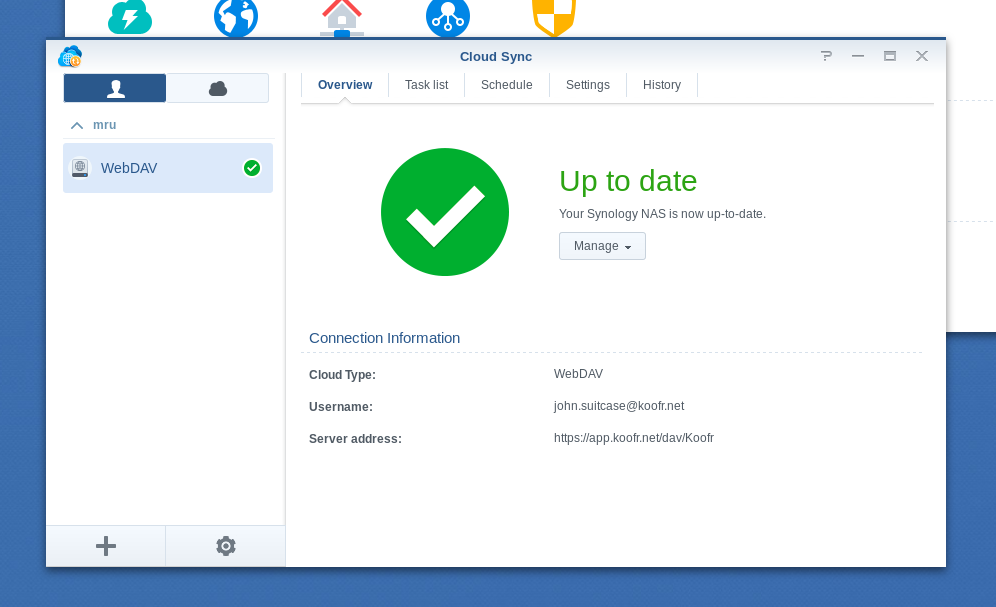
(12) If you enabled the encryption, a key.zip file will be downloaded to your computer. Please keep it safe for future data recovery.
Note: You can also connect to Koofr with the help of Synology's Hyper Backup software via WebDAV. You can follow similar steps to set that up.
This is all. Let the backing up begin.
Want to talk to us? Join us on the Koofr Subreddit!