Manage Koofr files with FE File Explorer on iOS devices
Connect FE File Explorer and Koofr via WebDAV and enjoy the benefits of both applications on your iOS devices. Use the nearby transfer option, play your Koofr media files on Apple TV or lock FE File Explorer to your fingerprint and enjoy in the added security of your files. Find out how you can connect FE File Explorer and Koofr.
Written by human for humans
The FE File Explorer is a file manager application for macOS, iOS, Android and tvOS devices. It can access files on your computer, NAS devices and your cloud storage accounts. With it, you can view and manage your documents, files and photos without downloading them.
You can connect the app to Koofr via WebDAV protocol and enjoy its features while being able to access your Koofr files. FE File Explorer allows nearby file transfer, which can transfer files between devices without using Wi-Fi or LTE connection. You just need to put two devices side by side and you are ready to transfer files.

It supports playing files on Apple TV and it also lets you lock the app to your fingerprint, bringing additional security to your iOS files. With FE File Explorer connected to Koofr, you can enjoy in additional security on your iOS devices. You can lock the FE File Explorer with a password or to your fingerprint.
How can you establish a connection between FE File Explorer and Koofr?
Let's go step by step.
(1) Download the FE File Explorer app to your iOS device and open it.
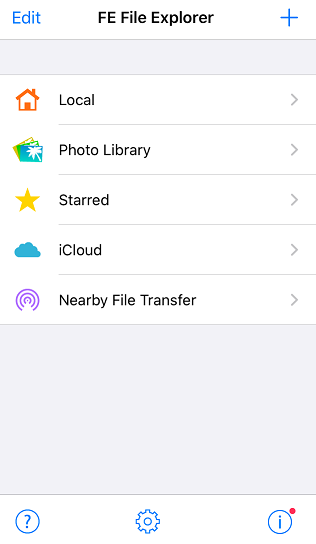
(2) Click on the plus in the top-right corner to add a new connection. Various options will open, select WebDAV.
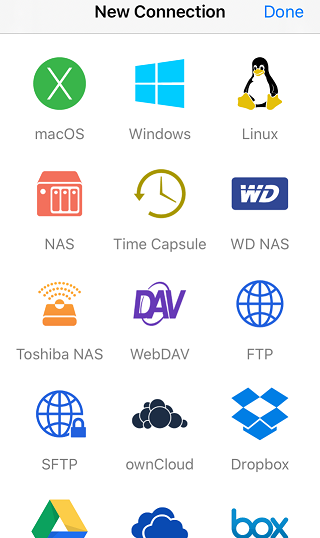
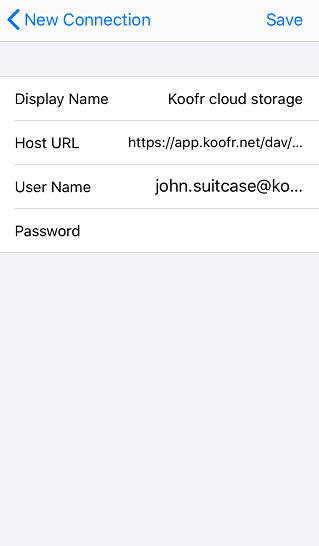
(3) A screen will open where you'll need to input the correct WebDAV settings to connect your Koofr account to FE File Explorer.
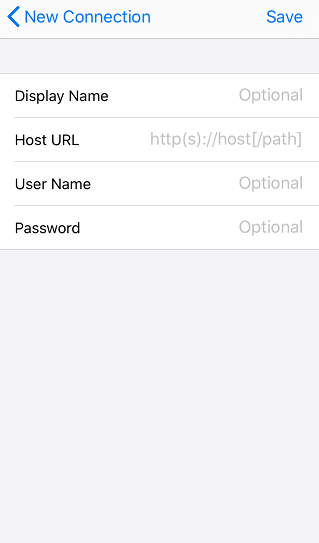
(4) Select a wanted display name for your connection. We named our connection Koofr cloud storage. Type in the correct host details https://app.koofr.net/dav/Koofr and insert the email you use to log in to your Koofr account under Username.
(5) Move to your Koofr account for a moment to generate an application-specific password to connect to FE File Explorer. You can do that by clicking on your profile picture icon the top-right corner of the Koofr web app. When the Account menu opens, click on Preferences and select Password from the menu on the left. Scroll down to App passwords, type in a new password name into the Generate new password text box and click on Generate. We named our password FE_Fileapp.
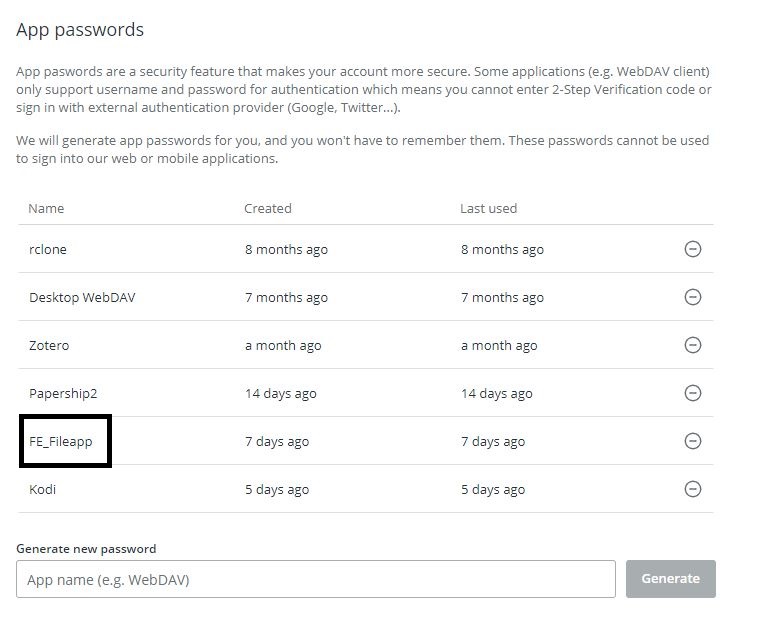
See the whole process of generating a new password in our video tutorial How to generate application-specific passwords for WebDAV connections in Koofr.
(6) Input the newly generated password under Password in the FE File Explorer settings and press Save. You'll see a WebDAV connection to Koofr appear in your FE File Explorer menu.
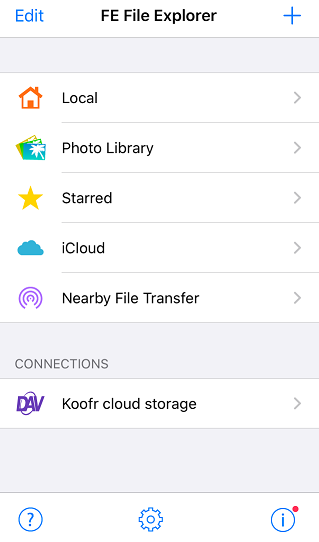
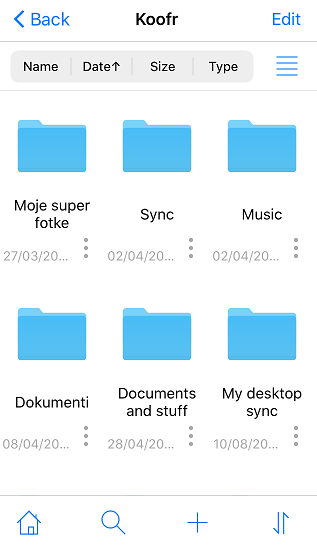
(7) Click on the connection and you'll be able to see your Koofr files.
(8) If you want to lock the FE File Explorer to your fingerprint, press on the Settings icon at the bottom of the screen in the FE File Explorer. Press on Set Password and select Enable Password. Input a password and confirm it. You'll also need to input the Question 1 and Question 2 and both of the answers.
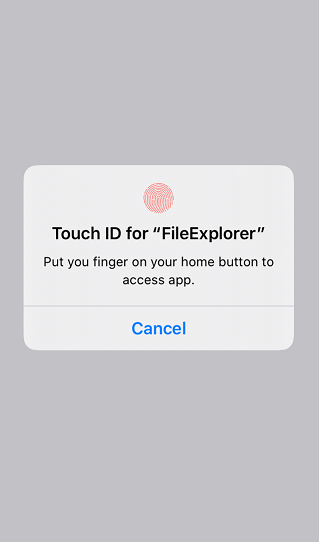
If you do not feel like inputting your chosen password each time, enable the Touch ID and you'll be able to unlock the app with your fingerprint. Do not forget to Save your settings and press Done.
Note: Each time you want to change the security settings you'll be asked to input the password and confirm it.
Note: Select Lock immediately in the password settings if you want your app to lock as soon as you leave it. In that case, you'll see a screen like in the picture below, each time you open your FE File Explorer app.
Want to talk to us? Join us on the Koofr subreddit!


