

Export Your Genius Scan Documents to Koofr via WebDAV
Genius Scan is a mobile app alowing you to scan your documents on the go, helping you go paperless. Connect it to Koofr via WebDAV and store your scans in your cloud storage.
Written by human for humans
[Updated, Oct 2023: Use of the WebDAV protocol is only available as part of a premium Genius Scan plan].
Genius Scan is a mobile app available for Android and iOS mobile devices. It allows you to quickly scan your documents on the go. It is a powerful tool that helps you organize, share, or archive your documents. Going paperless is easy as it supports remote and fieldwork, letting you you simply create expense reports and quickly share your brainstorming sessions. In its pro version, Genius Scan+, it also allows you to export your documents to Koofr via the WebDAV protocol.
How to connect Genius Scan+ and Koofr?
(1) Set up the Genius Scan+ app on your Android or iOS device.
Note: These instructions were prepared in the Genius Scan+ app on Android. The instructions for the iOS app should be similar.
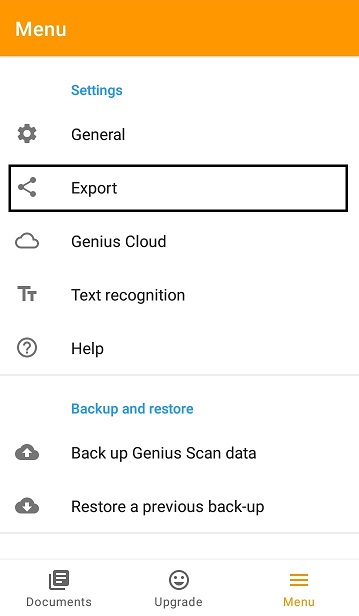
(2) Open the Genius Scan+ and open the app Menu. Click on Export and then on Add destination.
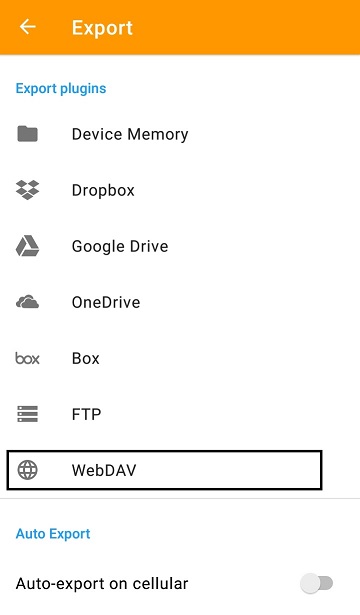
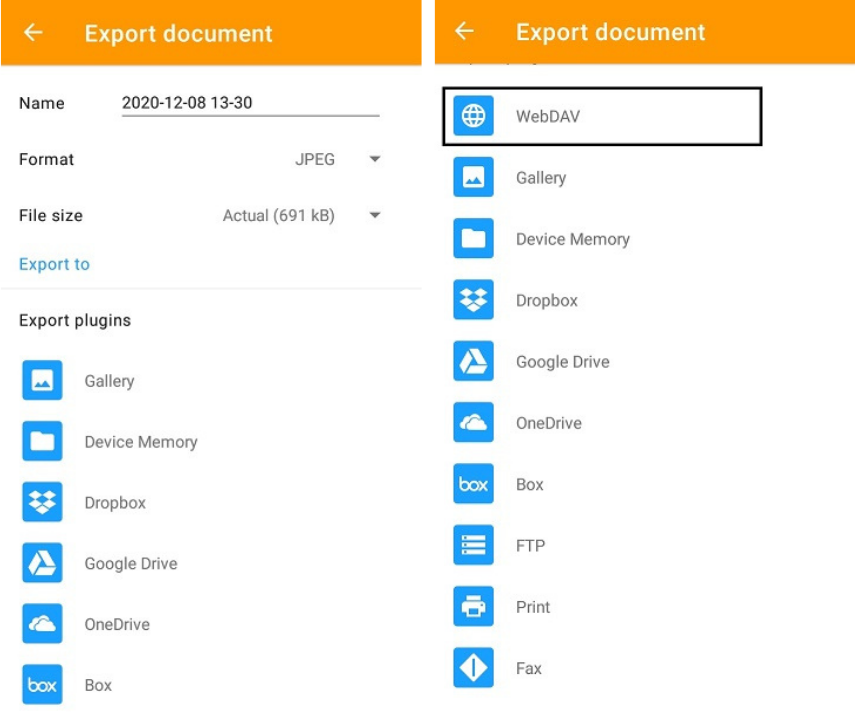
(3) Select WebDAV from the list of the export options.
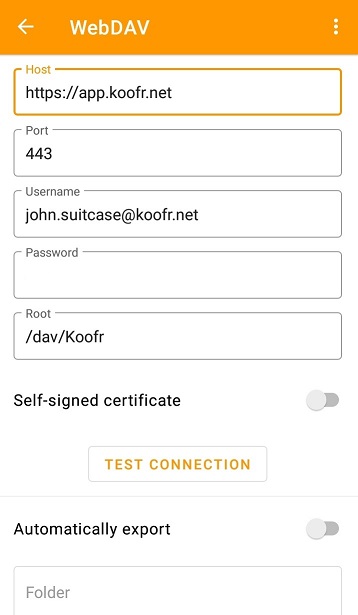
(4) Input the Koofr WebDAV settings, as you see them in the picture below. How do I connect a service to Koofr through WebDAV?
(5) Move into your Koofr account and create an application-specific password to use with the Genius Scan+ app. Find out How to generate an application-specific password in Koofr? or watch our video tutorial How to generate application-specific passwords for WebDAV connections in Koofr.
(6) Type-in the newly-generated password into the Password field of the Genius Scan+ WebDAV settings.
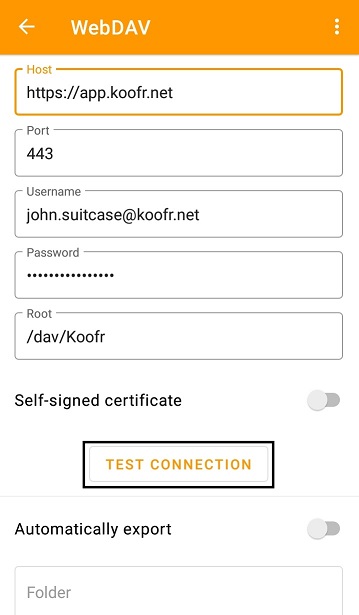
Press the Test connection button.
Note: If you have trouble establishing your WebDAV connection with the details provided here, please contact our support through our Help and support center and we will do our best to help you.
(7) Once your WebDAV connection is established, you'll be able to see this under the Export options.
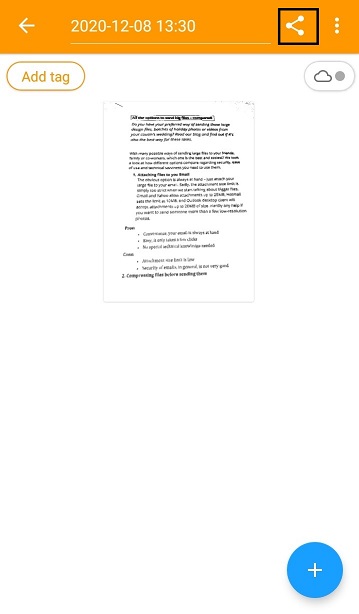
(8) Open your scanned document and press the Share icon in the top-right of the screen.
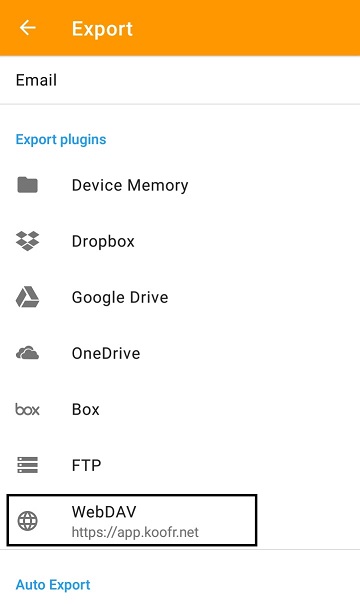
(9) The Export document options will open. Find WebDAV on the list and press on it.
(10) By default the root folder in your Koofr account will be selected, but you can select any folder from the list of folders to save your document to. Select the wanted folder and press on the checkmark in the lower right corner.
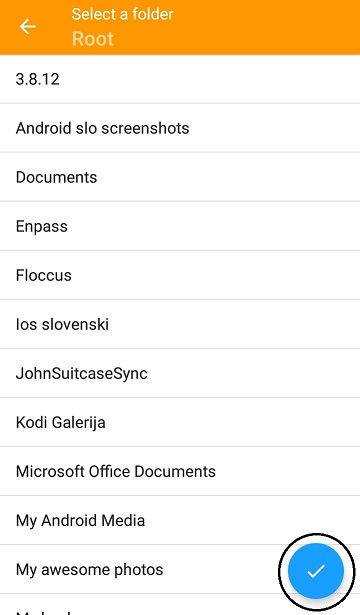
Note: We selected the root Koofr folder.
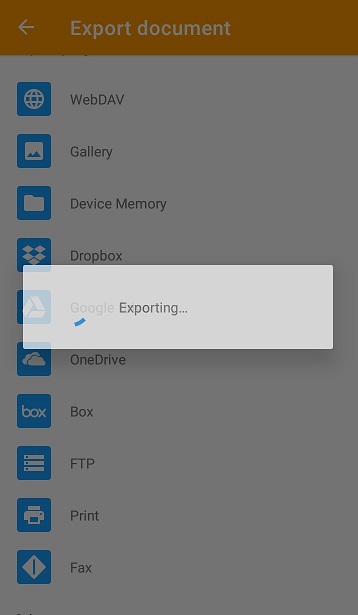
(11) Your document will be exported to Koofr.
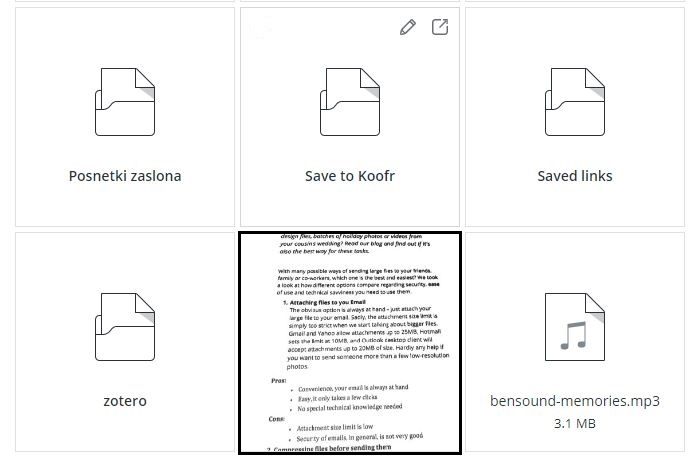
(12) Find your document in the Koofr folder you selected.
Happy scanning!
Want to talk to us? Join us on the Koofr subreddit!