

Transfer a Copy of Your Facebook Photos and Videos to Koofr
Use Koofr's shortcut to transfer a copy of your Facebook media to cloud storage. It's a quick and simple way to save your memories to your own space. Follow our guide and transfer your photos and videos from Facebook to Koofr today!
Written by human for humans
[Updated in May 2024: new descriptions and screenshots added.]
Back in 2020, Koofr was one of the first cloud storage services to be supported by Facebook's data portability toolset. Since then, thousands of users have transferred their photos and videos from Facebook to their Koofr accounts.
Thanks to one of our recent updates, you can now use a shortcut in the Koofr web app to transfer your Facebook content to your cloud storage! As you may have noticed, we've added a Facebook icon to the left-hand sidebar menu in Koofr to make it even easier to transfer your data.
If you're concerned about privacy, then don't worry - we don't access your Facebook account or anything like that. We just provide a handy link that takes you directly to the data portability tool in Facebook's account settings, saving you a few clicks on the way. The only permissions you'll be granting is for Facebook to upload photos and videos to your Koofr account, and this is automatically revoked once the transfer is complete.
Follow the steps below to save a copy of your Facebook photos to your Koofr.
How to transfer Facebook photos and videos to Koofr
Note: Make sure you are logged in to Facebook before you start, otherwise you'll need to start over.
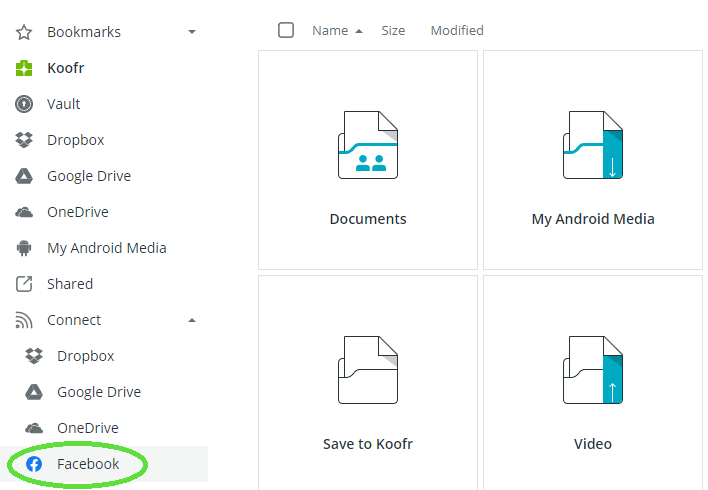
In the Koofr web application, open the Connect submenu in the left-hand sidebar, then click on Facebook.
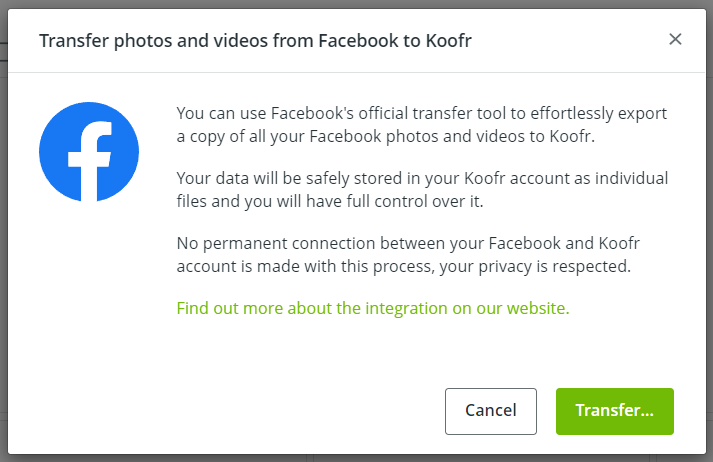
Get started with the data transfer by clicking on the Transfer button. You'll leave Koofr and move to Facebook in the next step.
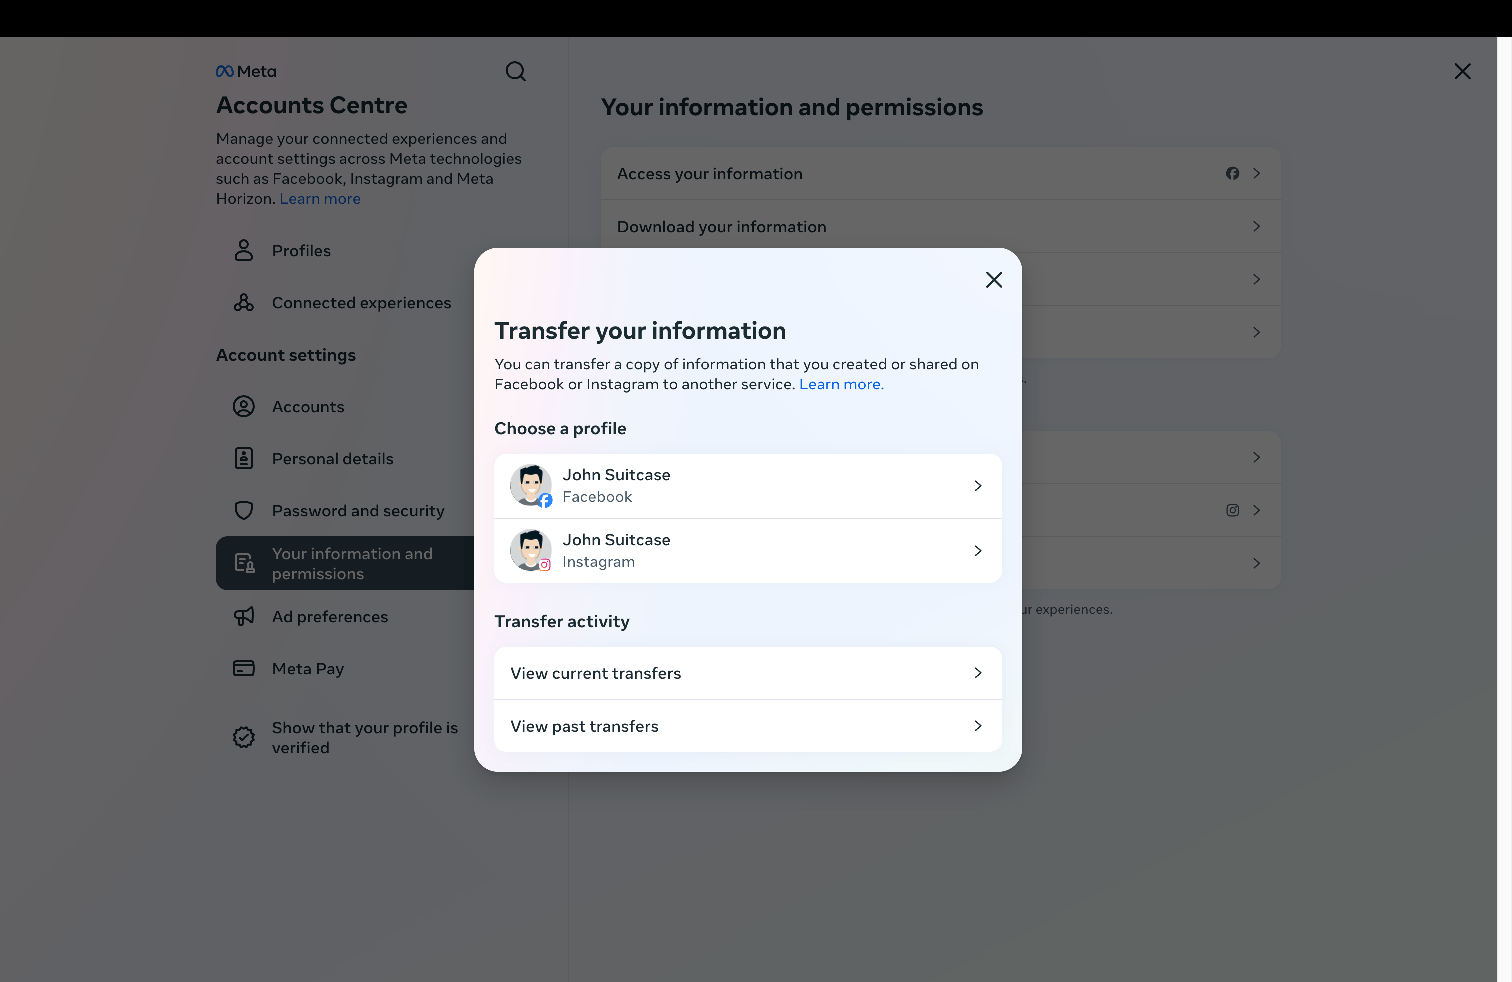
Next, select if you want to transfer a copy of your Facebook or Instagram information to Koofr. Select Facebook profile.
Note: If you selected an Instagram profile in the previous step, you will transfer a copy of your Instagram photos and videos to Koofr.
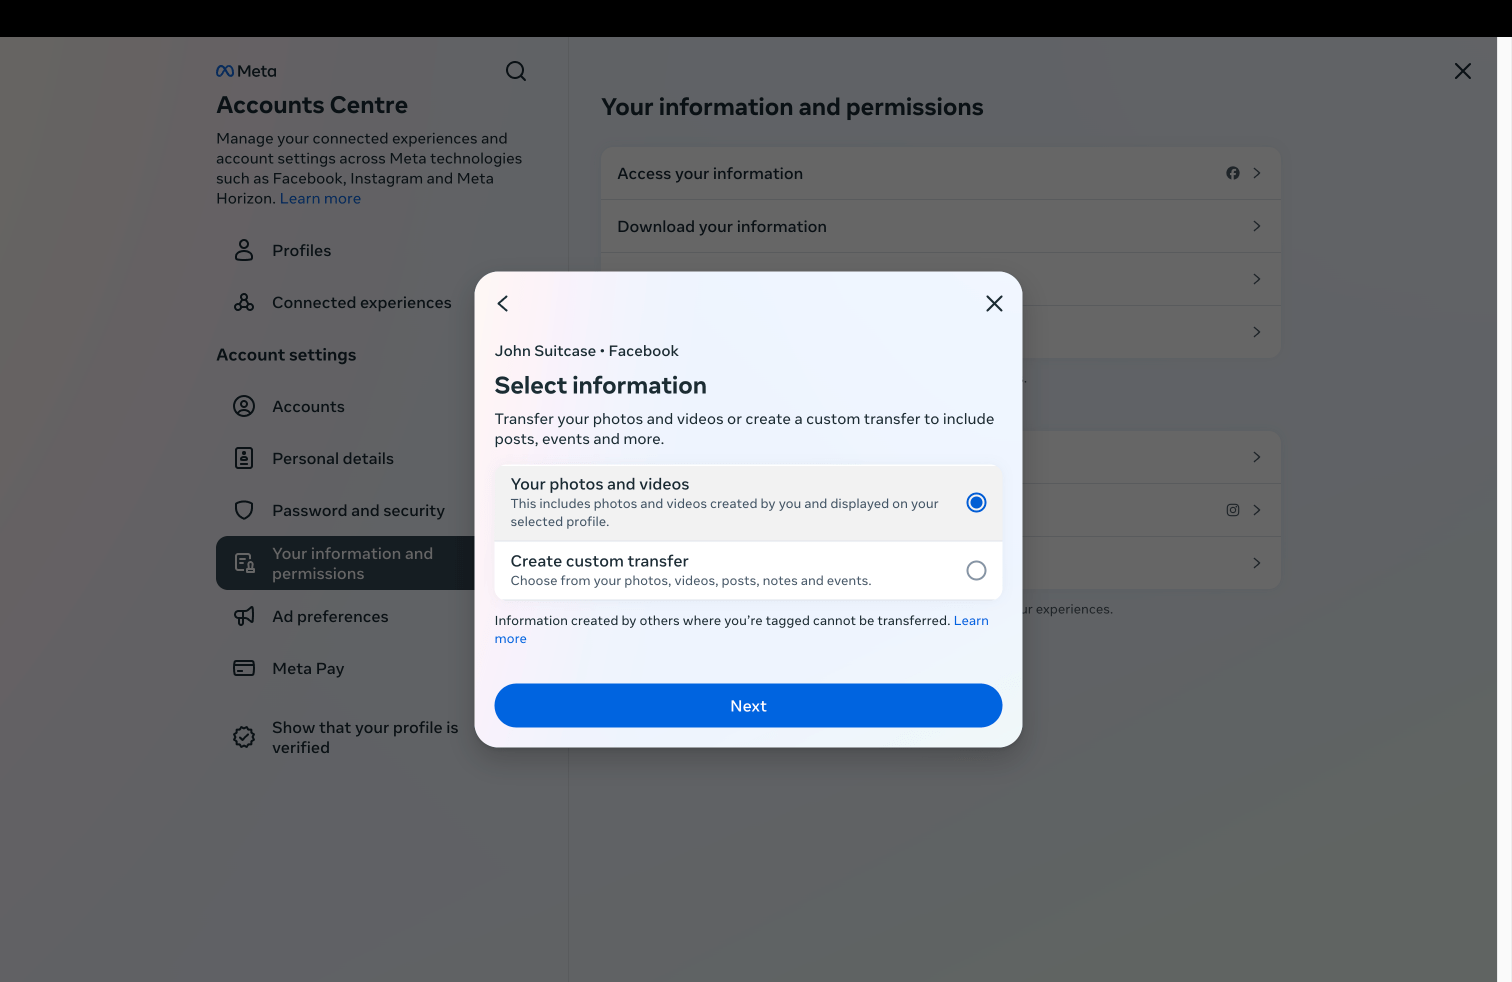
In the next step, choose if you want to transfer your photos and videos or create a custom transfer. Then, click on Next.
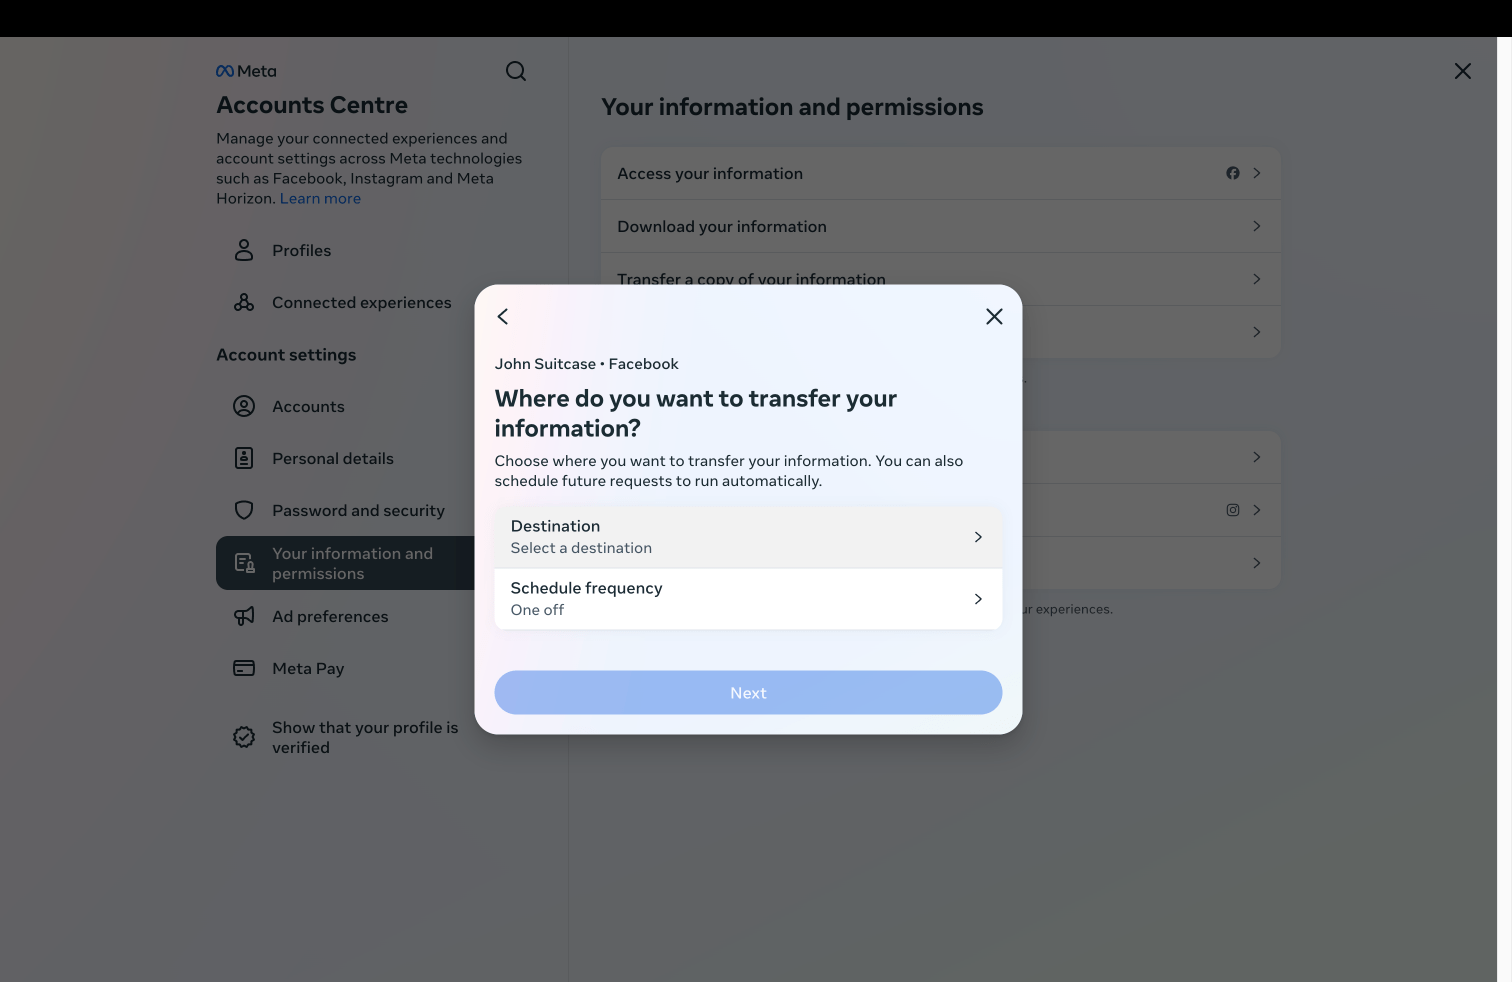
Next, choose Koofr as the Destination and schedule the frequency for the transfer. When scheduling future transfers, they will include details not included in previous transfers. You have several options: a one-time transfer, daily for one year, monthly for two years, or annually for three years. After selecting, click on Next.
If you previously created a custom transfer, choose to transfer a copy of your photos and/or videos to Koofr.
Note: You cannot transfer a copy of your posts, notes and events.

Then, click on Connect, and if you're not already logged in, you'll be prompted to log into your Koofr account.
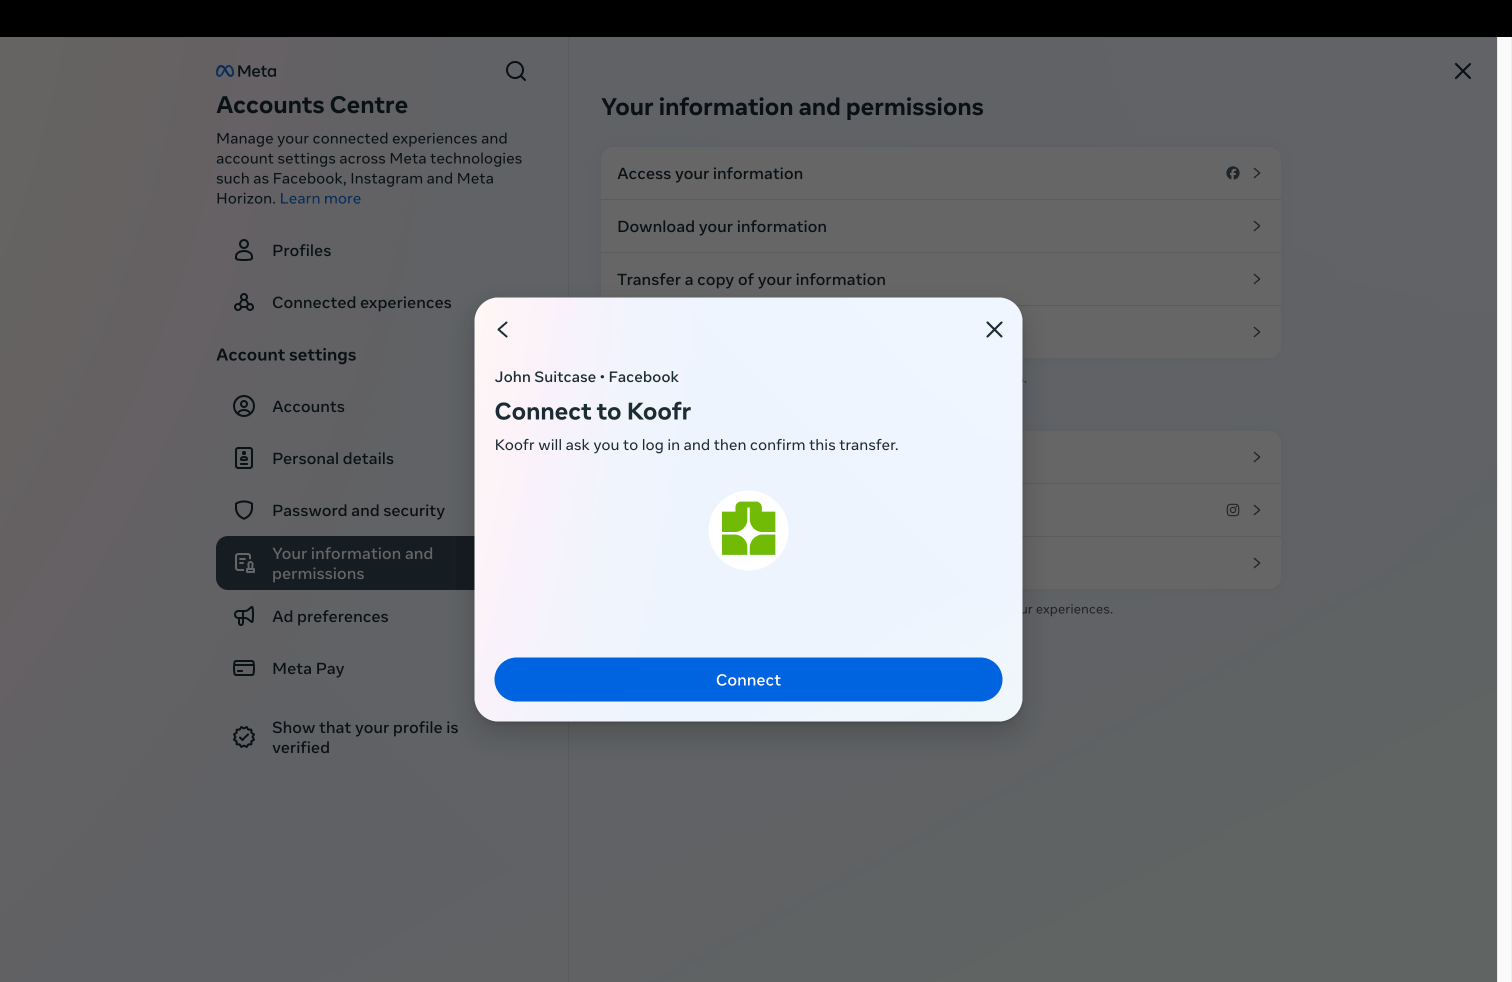
After logging in, grant Meta temporary write-only access to your Koofr account.
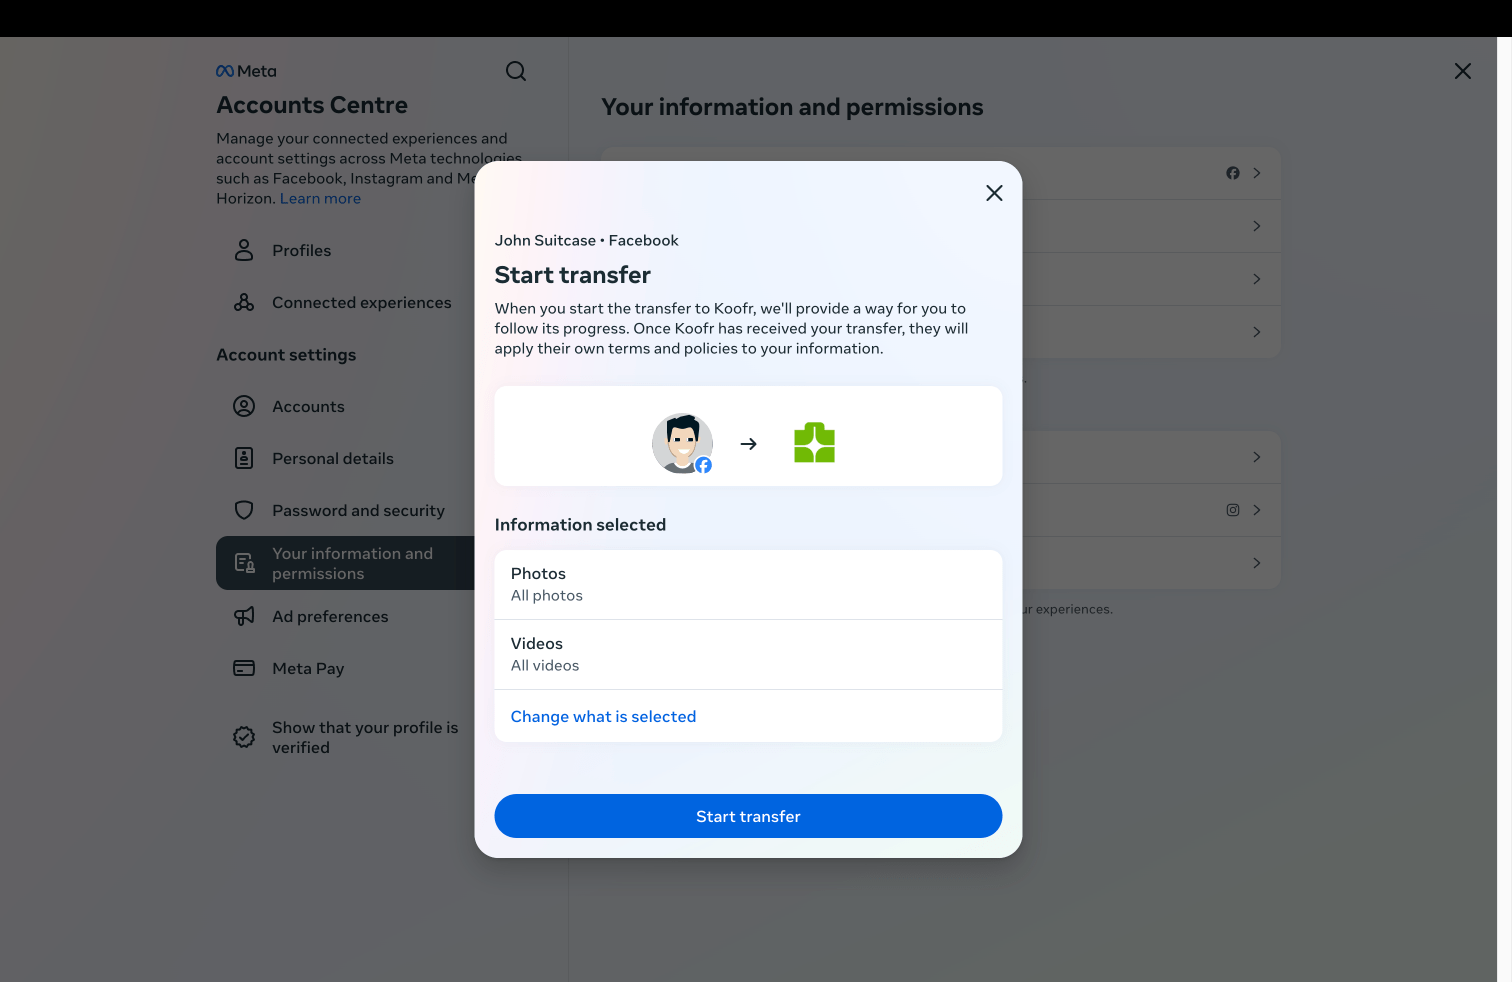
In the next step you can still change what you want included in the transfer. When you are satisfied with your choice, click on Start Transfer. If prompted, re-enter your Facebook password and click on Continue. Your transfer to Koofr will then begin. It may take some time to complete.
You'll receive a notification once the transfer is complete.
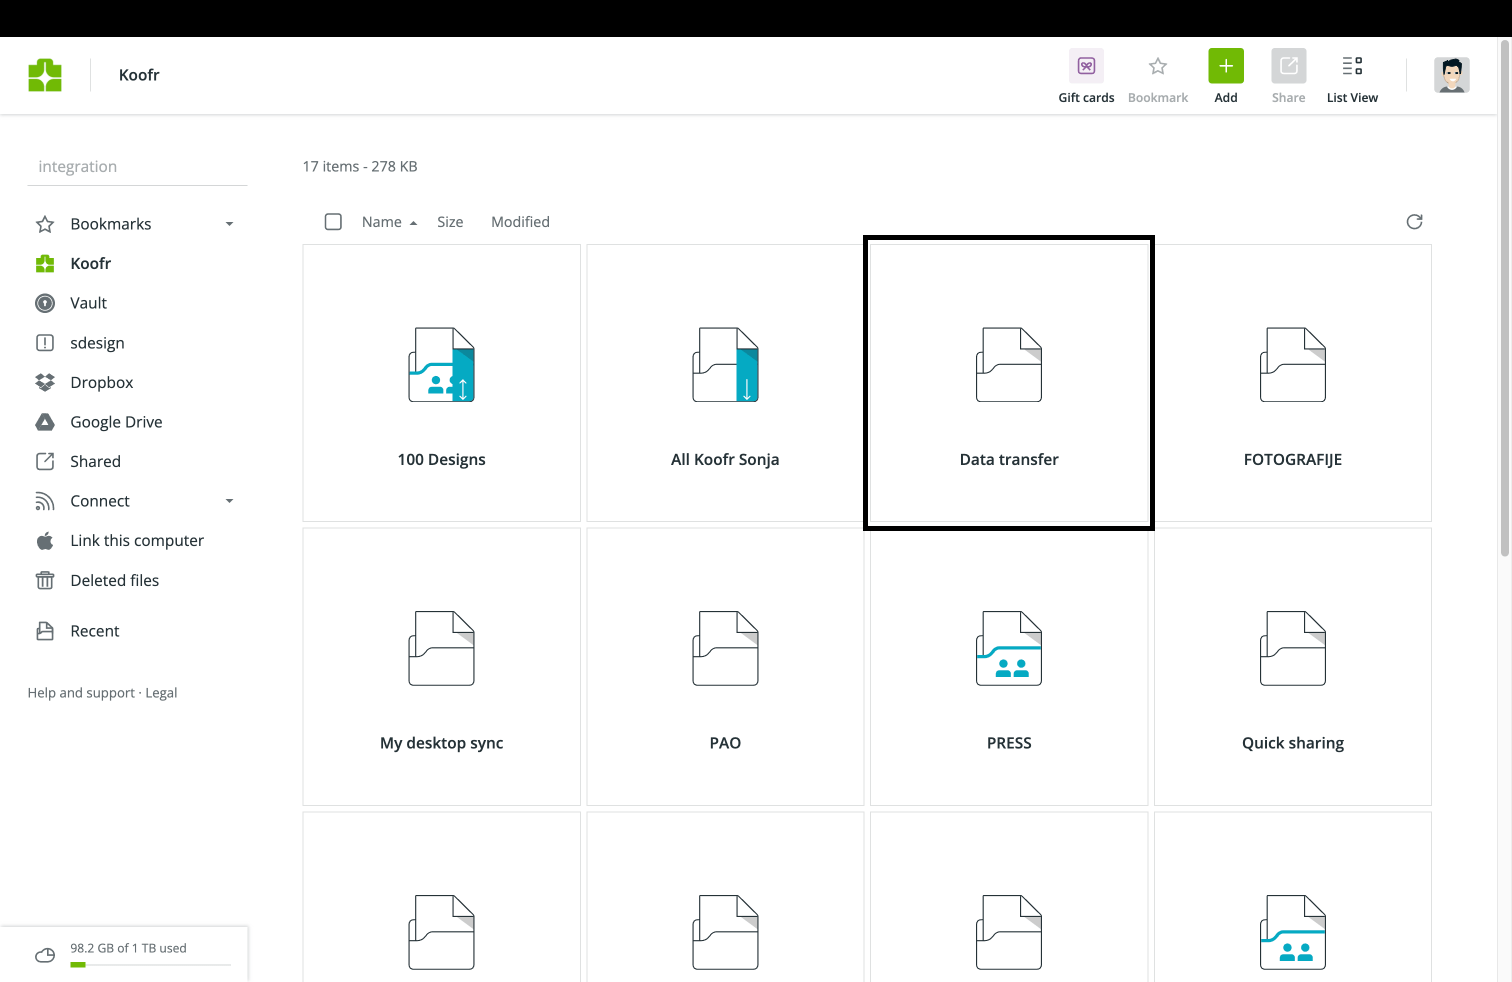
Moving back to Koofr, you'll see a newly created folder: Data transfer. This is where all Facebook content is transferred to. The Data transfer folder contains up to two subfolders, depending on whether you exported photos, videos, or both.
That's all, folks! You've successfully transferred your media from Facebook to Koofr. You can repeat the process with customized settings whenever you like.
Want to talk to us? Join our community on Reddit.