

3 ways to map Koofr as a network drive explained
If you want to access your Koofr files with the file manager on your computer, setting up Koofr as a network drive is a way to go. There are a few different ways to map Koofr as a network drive - we will explain all of them and let you know how you can set up Koofr as a network drive on your computer.
Written by human for humans
Accessing your Koofr files with the file manager on your computer is definitely a practical solution. But how does it work and how can you set it up? There are a few different ways. But, we cannot explain network drive mapping without saying a few words about the WebDAV protocol that is making it possible in the first place.
A network drive or mapped drive is a drive, shared directory, or network-attached storage (NAS) located on another computer or server within the same network. Mapped to a letter drive (eg. D:\, E:\, or another arbitrary letter), it allows users to access it like a local disk drive, but the data is not stored locally, instead, it is accessed over the network on demand. Cloud storage is not a network drive, but it can be mapped on your computer and accessed like one.
What is WebDAV protocol?
Abbreviation WebDAV means Web Distributed Authoring and Versioning and is an extension to HTTP protocol - the foundation of data exchanges on the web. And while HTTP is a client-server protocol which lets you view webpages and interact with them, WebDAV goes one step further. It enables a web server to act as a file server and thus allows the user to create, move, copy, edit and delete files and folders.
WebDAV protocol enables remote content reading and editing, and in our case, this means that WebDAV protocol supports an alternative way of accessing and editing data in Koofr directly from your computer. You can upload, download, copy, delete and move files or folders using this type of connection. All changes made on files or folders will be seen in the Koofr application and vice versa.
Note: WebDAV connection does not allow you to synchronise data or share items stored in the cloud.
So, how can you map Koofr as a network drive?
(1) Mapping through the Koofr desktop app [for beginners]
The simplest and the Koofr recommended way to map Koofr as a network drive is by installing the Koofr desktop client and enabling the Network Drive in the desktop client Settings.
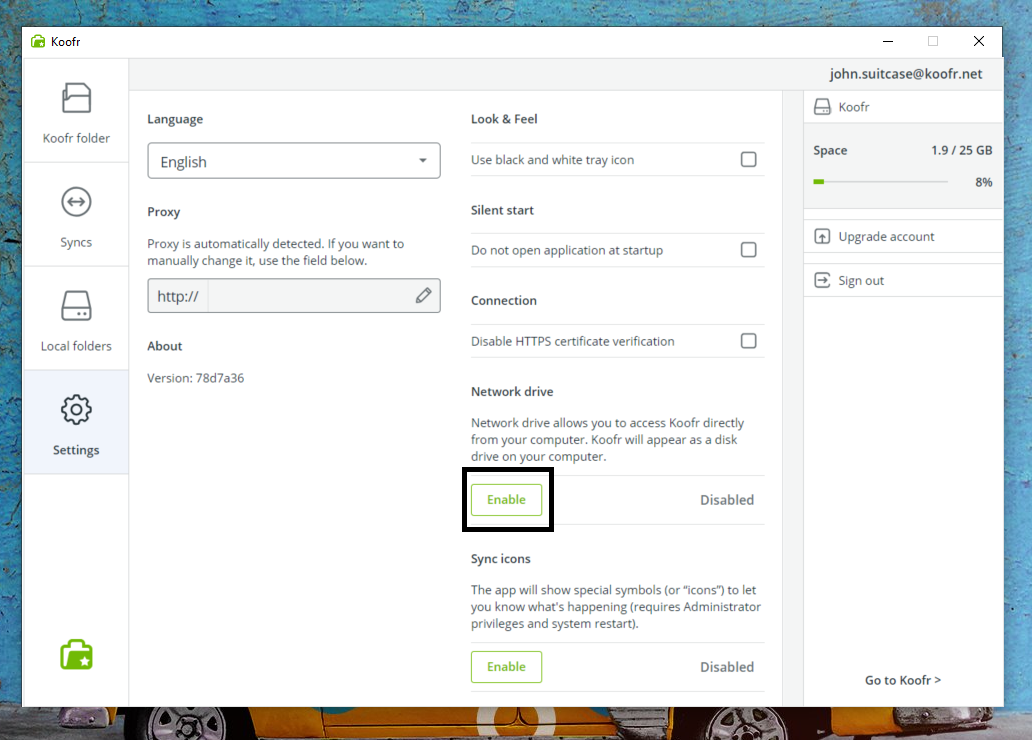
This will take care of everything, from generating separate app password to mapping Koofr as a network drive on your computer.
Note: If you are an advanced user, you can try to connect Koofr as a network drive manually. Read more about it in the next point.
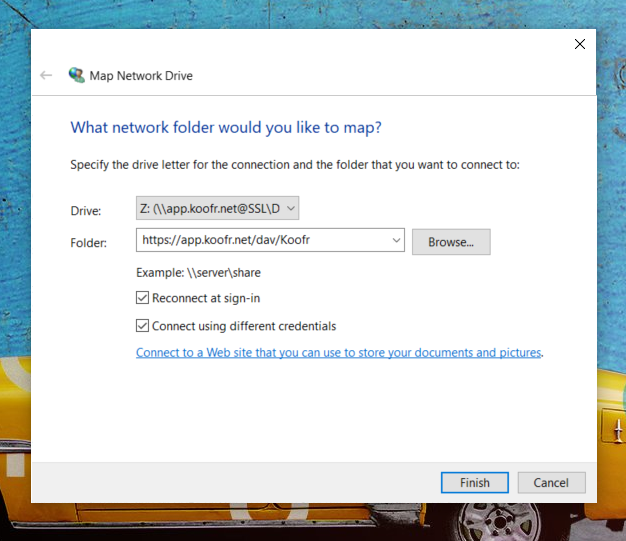
(2) Mapping manually through the operating system on your device [for advanced users]
If you are an advanced user and for whatever reason, you want to map Koofr as a network drive manually, you can find detailed instructions on how to do that for Windows, macOS and Linux in the Koofr FAQ.
You'll need to generate an application-specific password to use with WebDAV.
Note: Once you map the network drive manually, you will not be able to do it in the desktop client Settings.
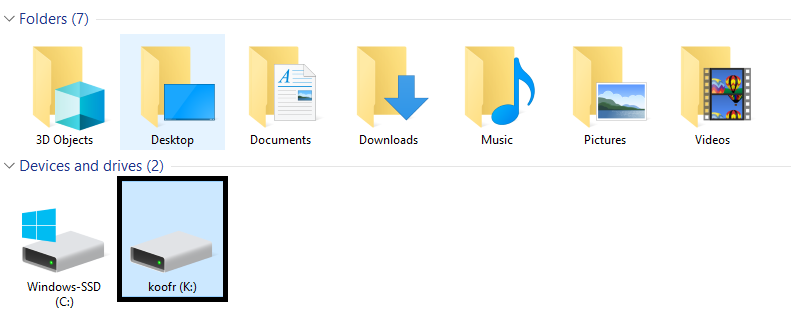
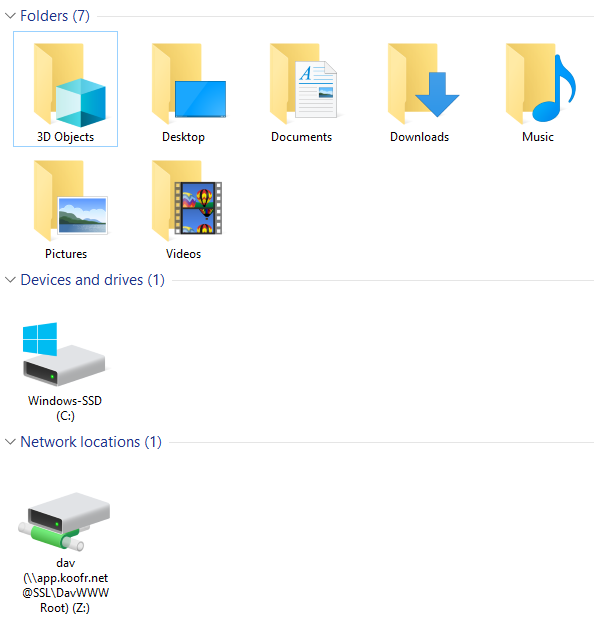
Once you establish a WebDAV protocol for the Koofr app on your computer you will see Koofr as a new Network Drive in the folder structure on your computer. If you click on it, you will see the same folder structure as in the Koofr web application.
Note: We do not suggest you do this if you are a beginner. We recommend you stick to the point (1).
(3) Mapping with rclone [for advanced users]
Rclone is a command-line tool, which can sync, move, copy, and do other file operations on your Koofr files. You can use it to create backups of your data or to simply store files in your Koofr account, optionally adding encryption. One of the things you can use rclone for is also mounting Koofr as a network drive through the Koofr API.
General note for using rclone with Koofr: Do not use --copy-links option with rclone when copying or syncing files to Koofr, since you might end up infinitely uploading your files over and over again if a cycle in the filesystem is induced by your symlinks or junction points.
This is a superior option compared to the connection through the WebDAV protocol in terms of transmission speed and the ability to transmit multiple files at the same time. WebDAV protocol can only transfer one file at a time.
If you are a Windows user, you'll need to first download WinFsp. For all other operating systems, you can skip this step. Find rclone mount command.
Note: When you mount Koofr as a network drive with rclone, it will run only while cmd is open. As soon as you quit rclone, you will not be able to see the network drive on your computer anymore. You can close rclone by pressing ctrl + c.
You can read more on how to mount Koofr as a network drive with rclone in our basics of rclone and encryption with rclone blog posts.
These are the three ways to map Koofr as a network drive. Choose the one for you and set it up today to access and edit your Koofr files with the file manager on your computer.
Want to talk to us? Join us on the Koofr subreddit!