

Beginner's Guide to the Koofr Web App
Koofr is your go-to cloud storage solution for secure and efficient file management. With a user-friendly interface and features like file sharing, integration with other cloud storage services, as well as its customisable settings, it’s designed to streamline file management. Explore our beginner's guide for all users starting with the Koofr web app, and embark on your Koofr journey seamlessly.
Written by human for humans
Koofr is a European cloud storage provider with a strong emphasis on user privacy and data security. With over 12 years of experience in the market, Koofr has become a reliable choice for individuals and businesses seeking a secure way to manage their files.
Accessible through the web app, mobile and desktop apps, Koofr ensures flexibility and convenience, allowing you to access your data anytime and anywhere. Let's take a closer look at the features and advantages of the Koofr web app through the eyes of a beginner.
Koofr Web App: Features and Navigation
The Koofr web app provides an intuitive and privacy-focused way to manage your files in the cloud. Sign in with your existing credentials or create a new Koofr account and start managing your files securely.
Koofr's web app is designed with simplicity in mind, featuring:
- The Account Menu: Where you can access settings and preferences.
- The Main Menu: Where you can navigate to key sections like Vault, Shared, and more.
- Account Settings: Where you can monitor your storage usage, see your invoices, upgrade your account and buy gift cards.
- Adding files and folders to Koofr and working with them: Find out where you can upload files and folders to your Koofr account, work with them with the help of the Editing Menu or share them.
- Help and Support: Where you can get assistance or report issues.
Koofr features that you shouldn't miss.
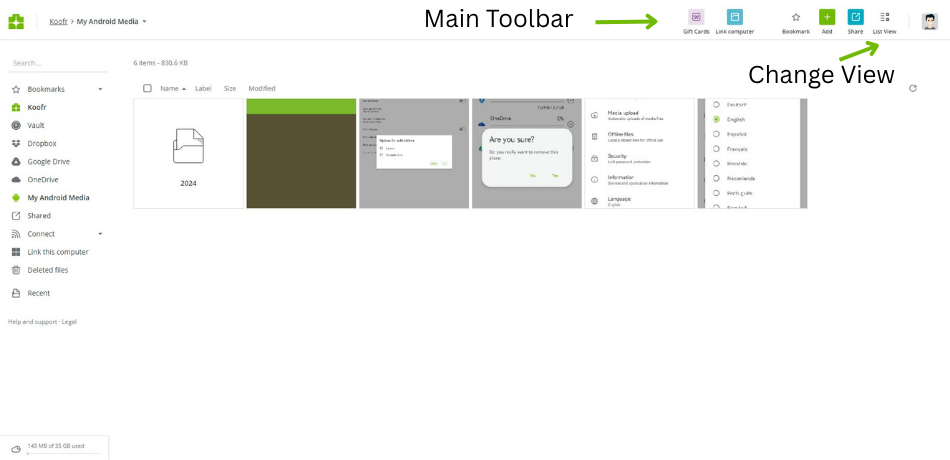
The picture below shows where to find the Main Menu, the Account Menu, and the Space stats for your account, as well as Help and Support.

The Account Menu
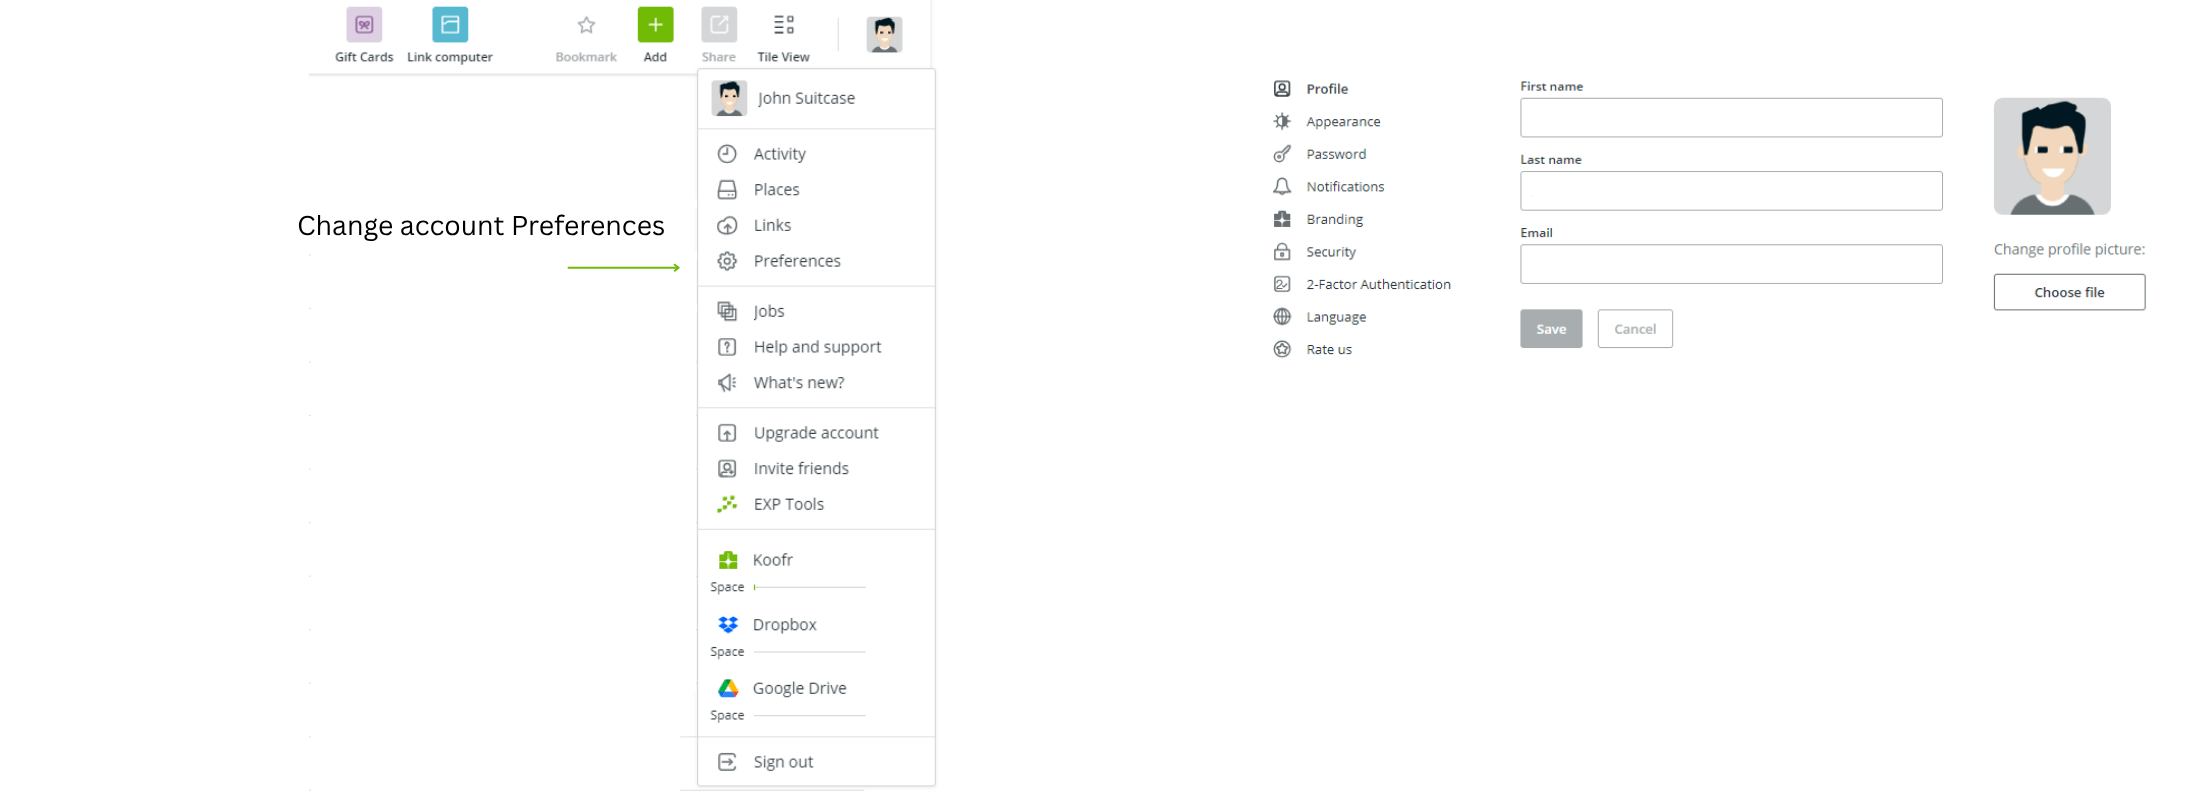
The Account Menu, which opens if you click on the profile picture in the top-right corner of the app, houses these:
- Links: See and manage your download and upload links.
- Preferences: Change the account details settings. Read more on this below.
- Help and support: Open our help and support centre. Read more on this in the last paragraph of this blog.
- What's new: Read Koofr changelog and be on track with all the updates.
- Upgrade account: See your current subscription, upgrade your Koofr account, view your invoices or buy a gift card.
- EXP Tools: Access our EXP Tools, available in the paid Koofr accounts.
Select Preferences and get the option to change your account details, password, and its security settings. These are the Preferences highlights:
- Profile: Update your first and last name, change email address and profile picture.
- Appearance: Customise the app’s look and feel - choose between the light and the dark theme.
- Password: Change your account password or create additional app passwords here.
- Two-Factor Authentication (2FA): Add an extra layer of protection, turn on two-factor authentication for your Koofr account.
- Language: Switch between English and the Slovenian language or choose your preferred language from our community-translated options.
Account Settings
Your Koofr Account Settings are available with a click on the Account Menu and Preferences. In the view that opens you'll see Account in the top-right corner. Click on it, and the view in the picture below will open.
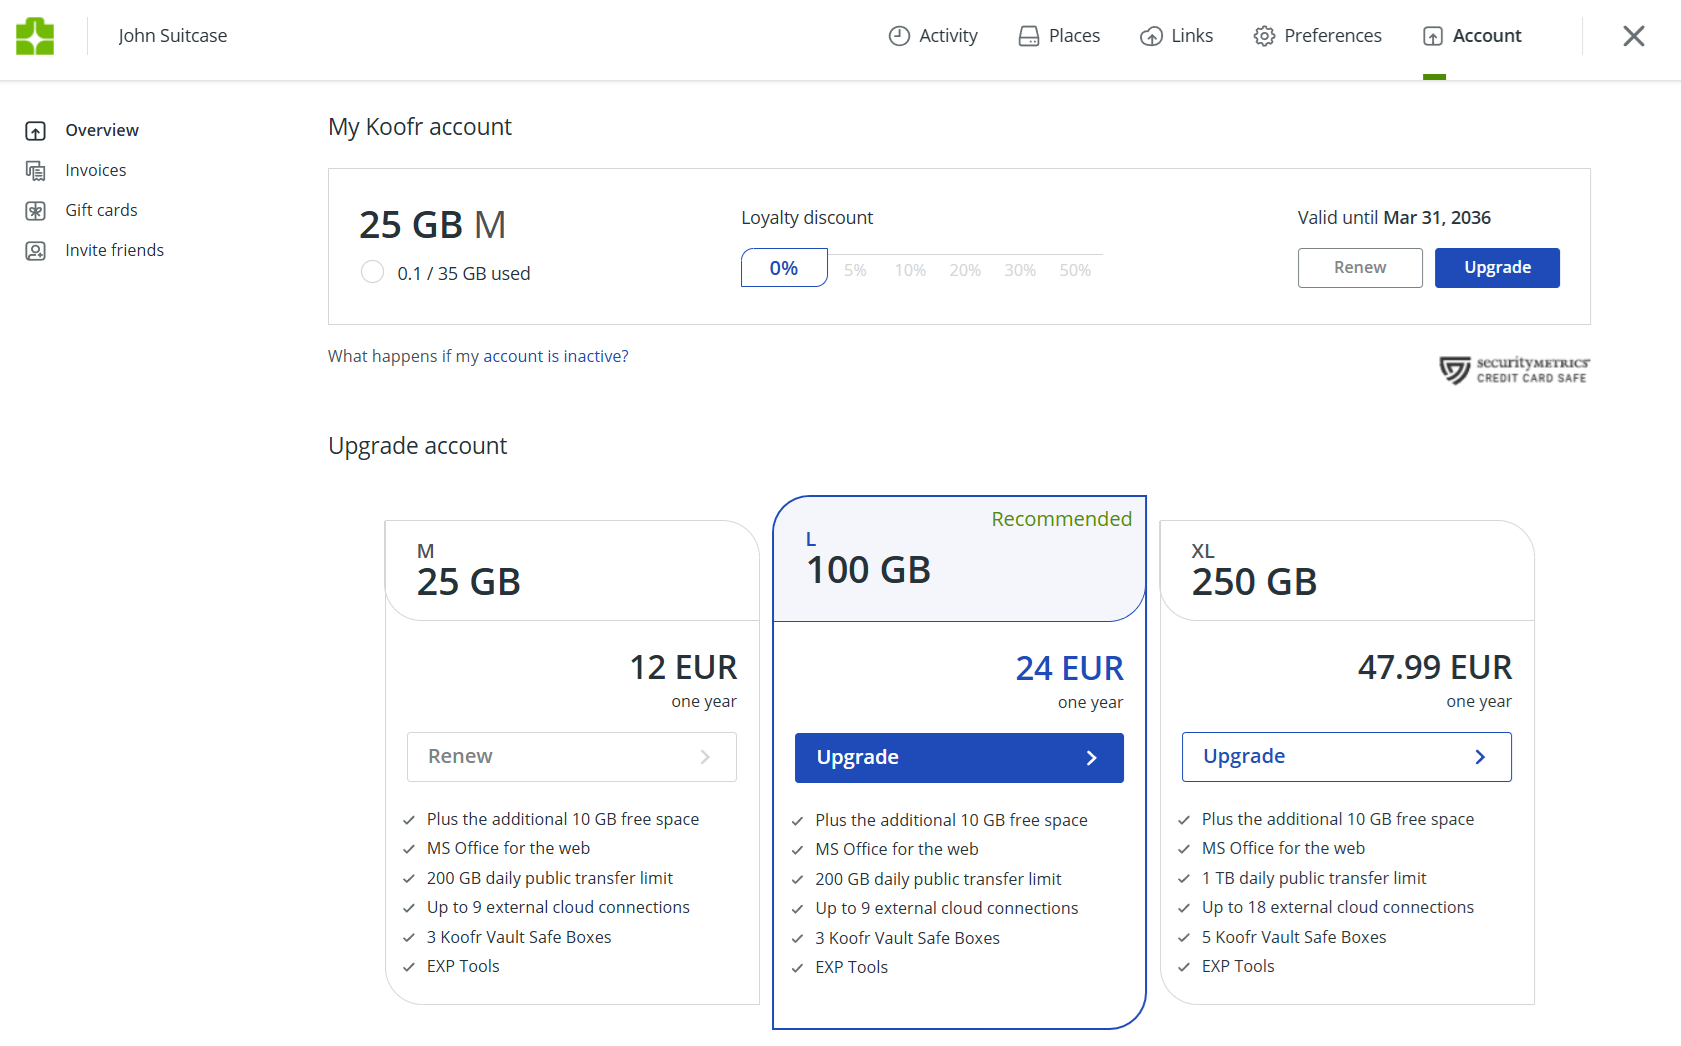
Here you can view your space usage as well as your current subscription, easily upgrade your Koofr plan and see the loyalty discount you are eligible for. You can also see your invoices and purchase Koofr gift cards here, or by clicking on the Gift Cards button at the top of the main Koofr web app window.
Under Free addons, you'll see the 10 GB of free storage that remains yours regardless of your current plan.
The Main Menu
The Main Menu provides quick access to some important features:
- The Vault: Store sensitive files extra securely.
- Shared: Manage files shared with you or by you.
- Connect: Connect to your other cloud services and view all your files in one place, or link services like Facebook and Instagram to centralise your data.
- Link This Computer: Download the Koofr desktop app for seamless file management.
- Deleted Files: View and restore the deleted files within the retention period for your account.
How to automatically backup your photos and videos from your social media accounts to Koofr: Transfer a Copy of Your Instagram Social Life or Transfer a Copy of Your Facebook Photos and Videos.
Adding files and folders to Koofr and working with them
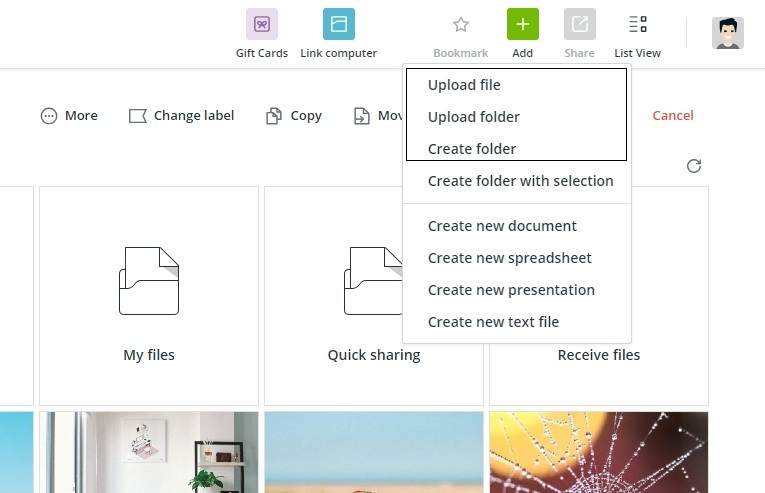
Now that we are done with formalities, it is time we upload some files. You can do that by clicking on the green Add button at the top of the main Koofr web app screen. A drop-down menu opens, where you can select to Upload file, Upload folder or Create folder in your Koofr account. You can also simply upload files by dragging and dropping them to Koofr or create documents, spreadsheets, presentations and text files directly inside your Koofr account.
Once your files are successfully uploaded, you can select a file by hovering over it and clicking in the checkbox that appears. The file is selected once the checkmark appears next to it.
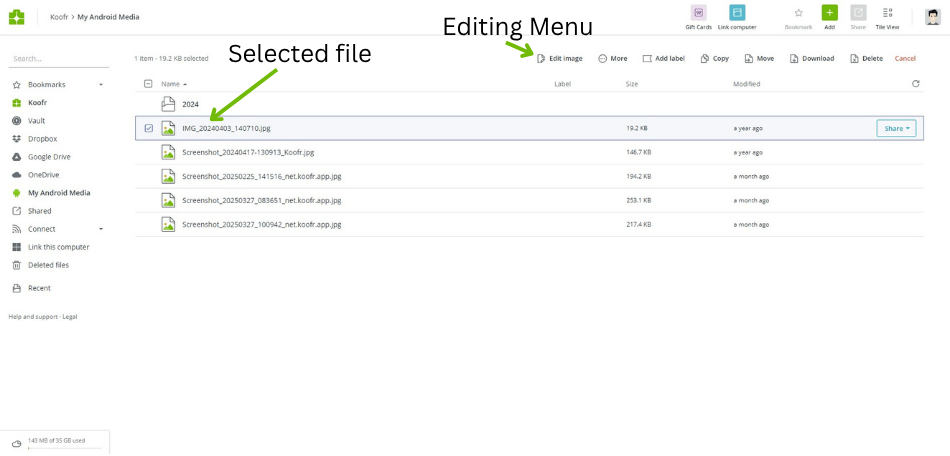
When a file is selected, the Editing Menu will appear, where you will see the options to Copy, Move, Download, Delete, Rename and Label your file and see the file Info as well as its previous versions. To deselect your file, remove the checkmark next to it. The drop-down of the Editing Menu also appears with the right-click on the selected file.
Koofr web app interface offers two viewing options - the List View and Tiles View, one offering to see files in an organised and detailed way, the other offering a grid display for easier visual navigation. You can simply switch between them in the Main toolbar, by clicking on the button marked in the picture below.
Sharing files in Koofr is seamless and available both in list and tiles views. Select a file and click on the Share button in List View or the sharing icon in Tiles view. Select the Add people or Send link options.
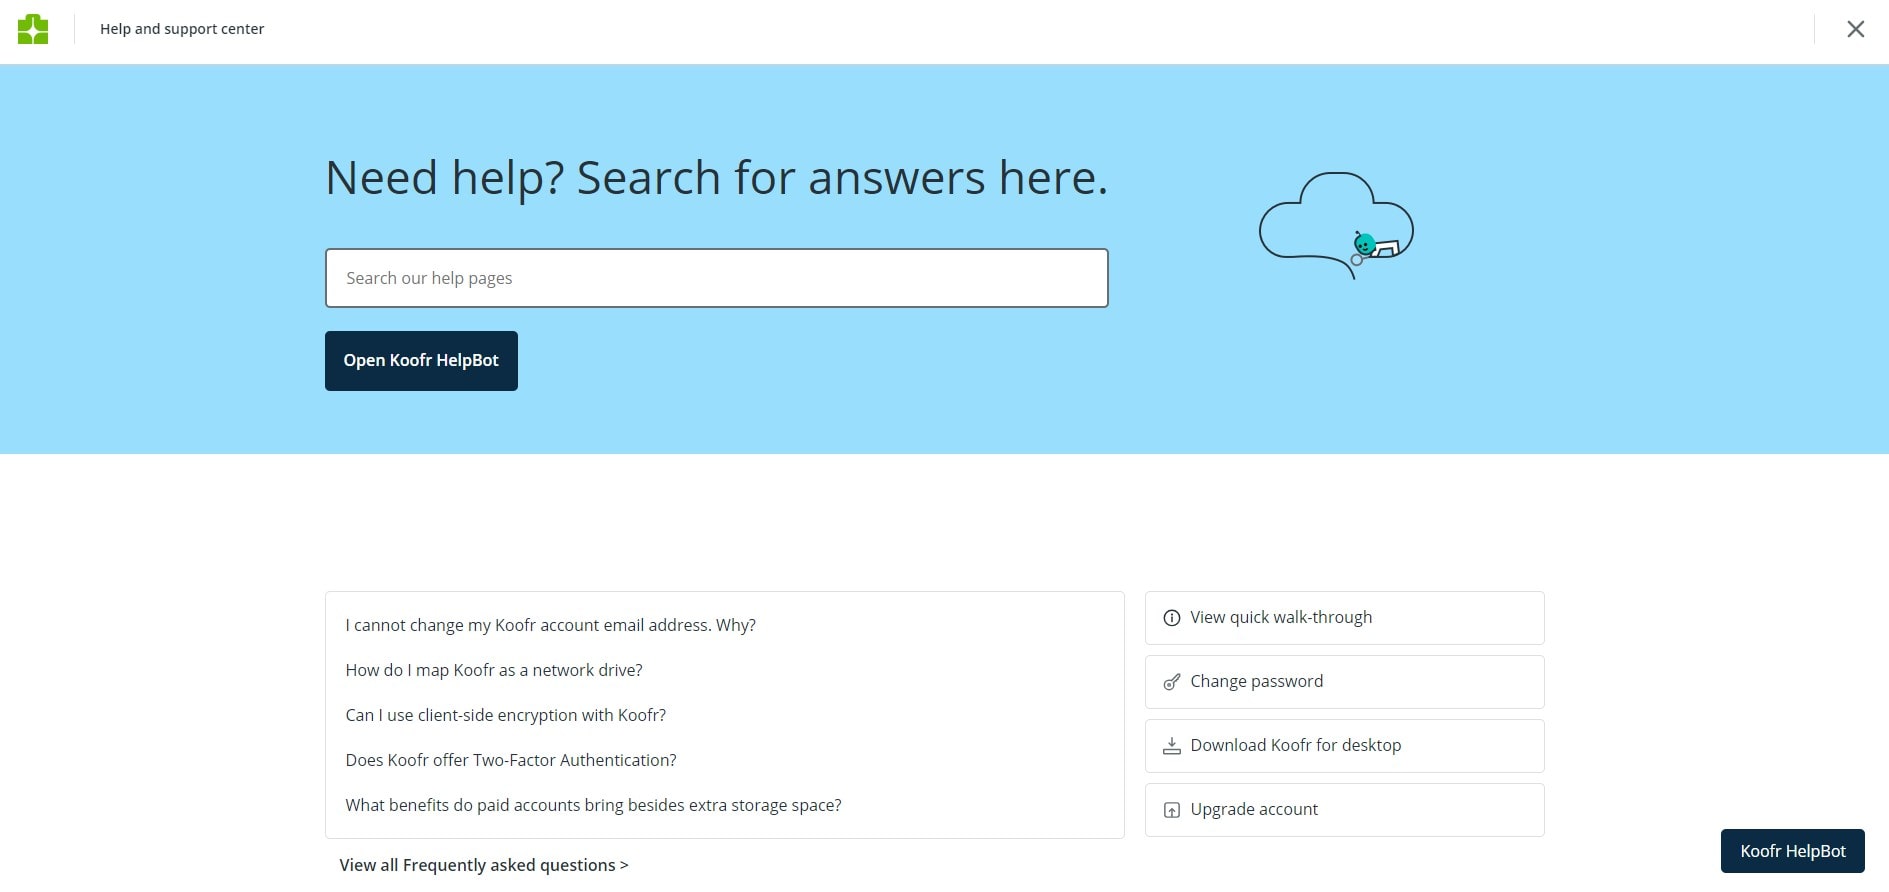
Help and Support
We hope we made your life and your start with Koofr web app a bit easier.
If you need additional Help, open our Help and support center below the Main Menu in the Koofr web app or in the Account Menu.
Discover more of Koofr's advanced features.
Editor's Note: This post was first published in 2020. We've updated and enhanced the content to improve clarity and detail. Whether you're revisiting or reading it for the first time, we hope this improved version offers an even better experience.
Want to talk to us? Join our growing Reddit community!